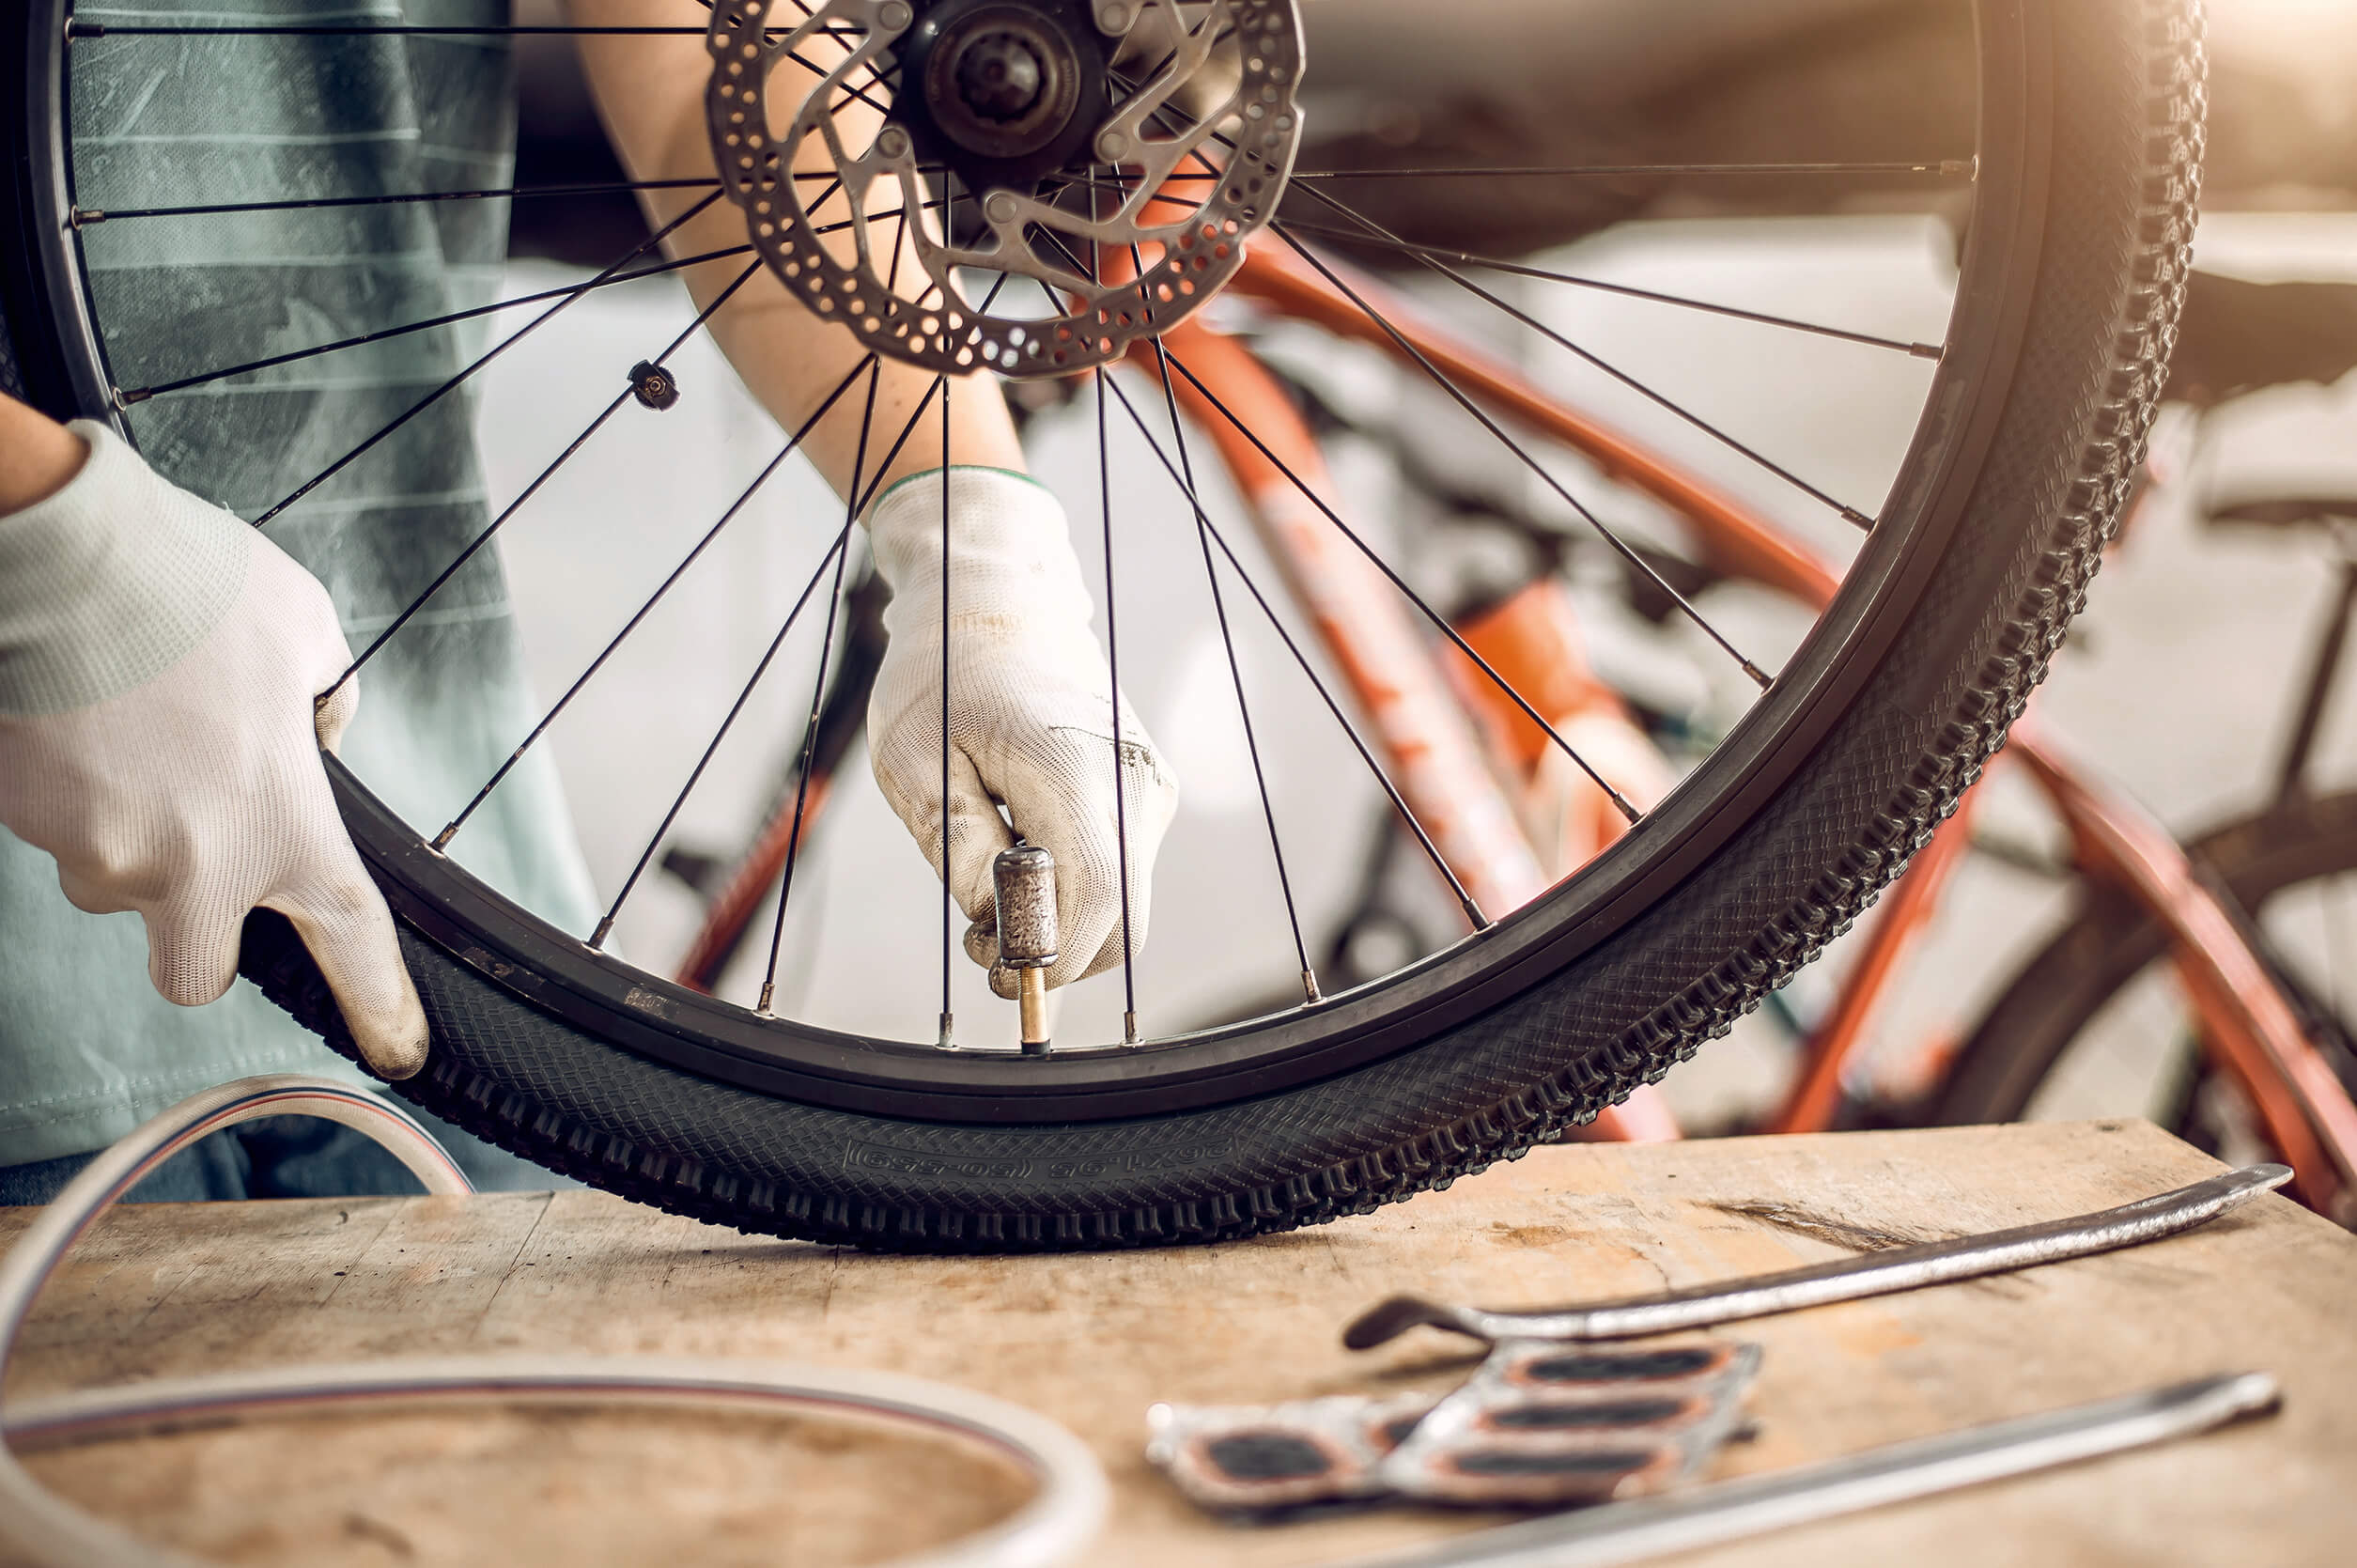
A flat tire usually occurs when you least need it. With the following steps, you can ensure that your bike is ready to ride again quickly and cleanly.
Step 1: Prepare tools and materials.
Prepare everything before you start – this will save you time and nerves.
Tools & Material.
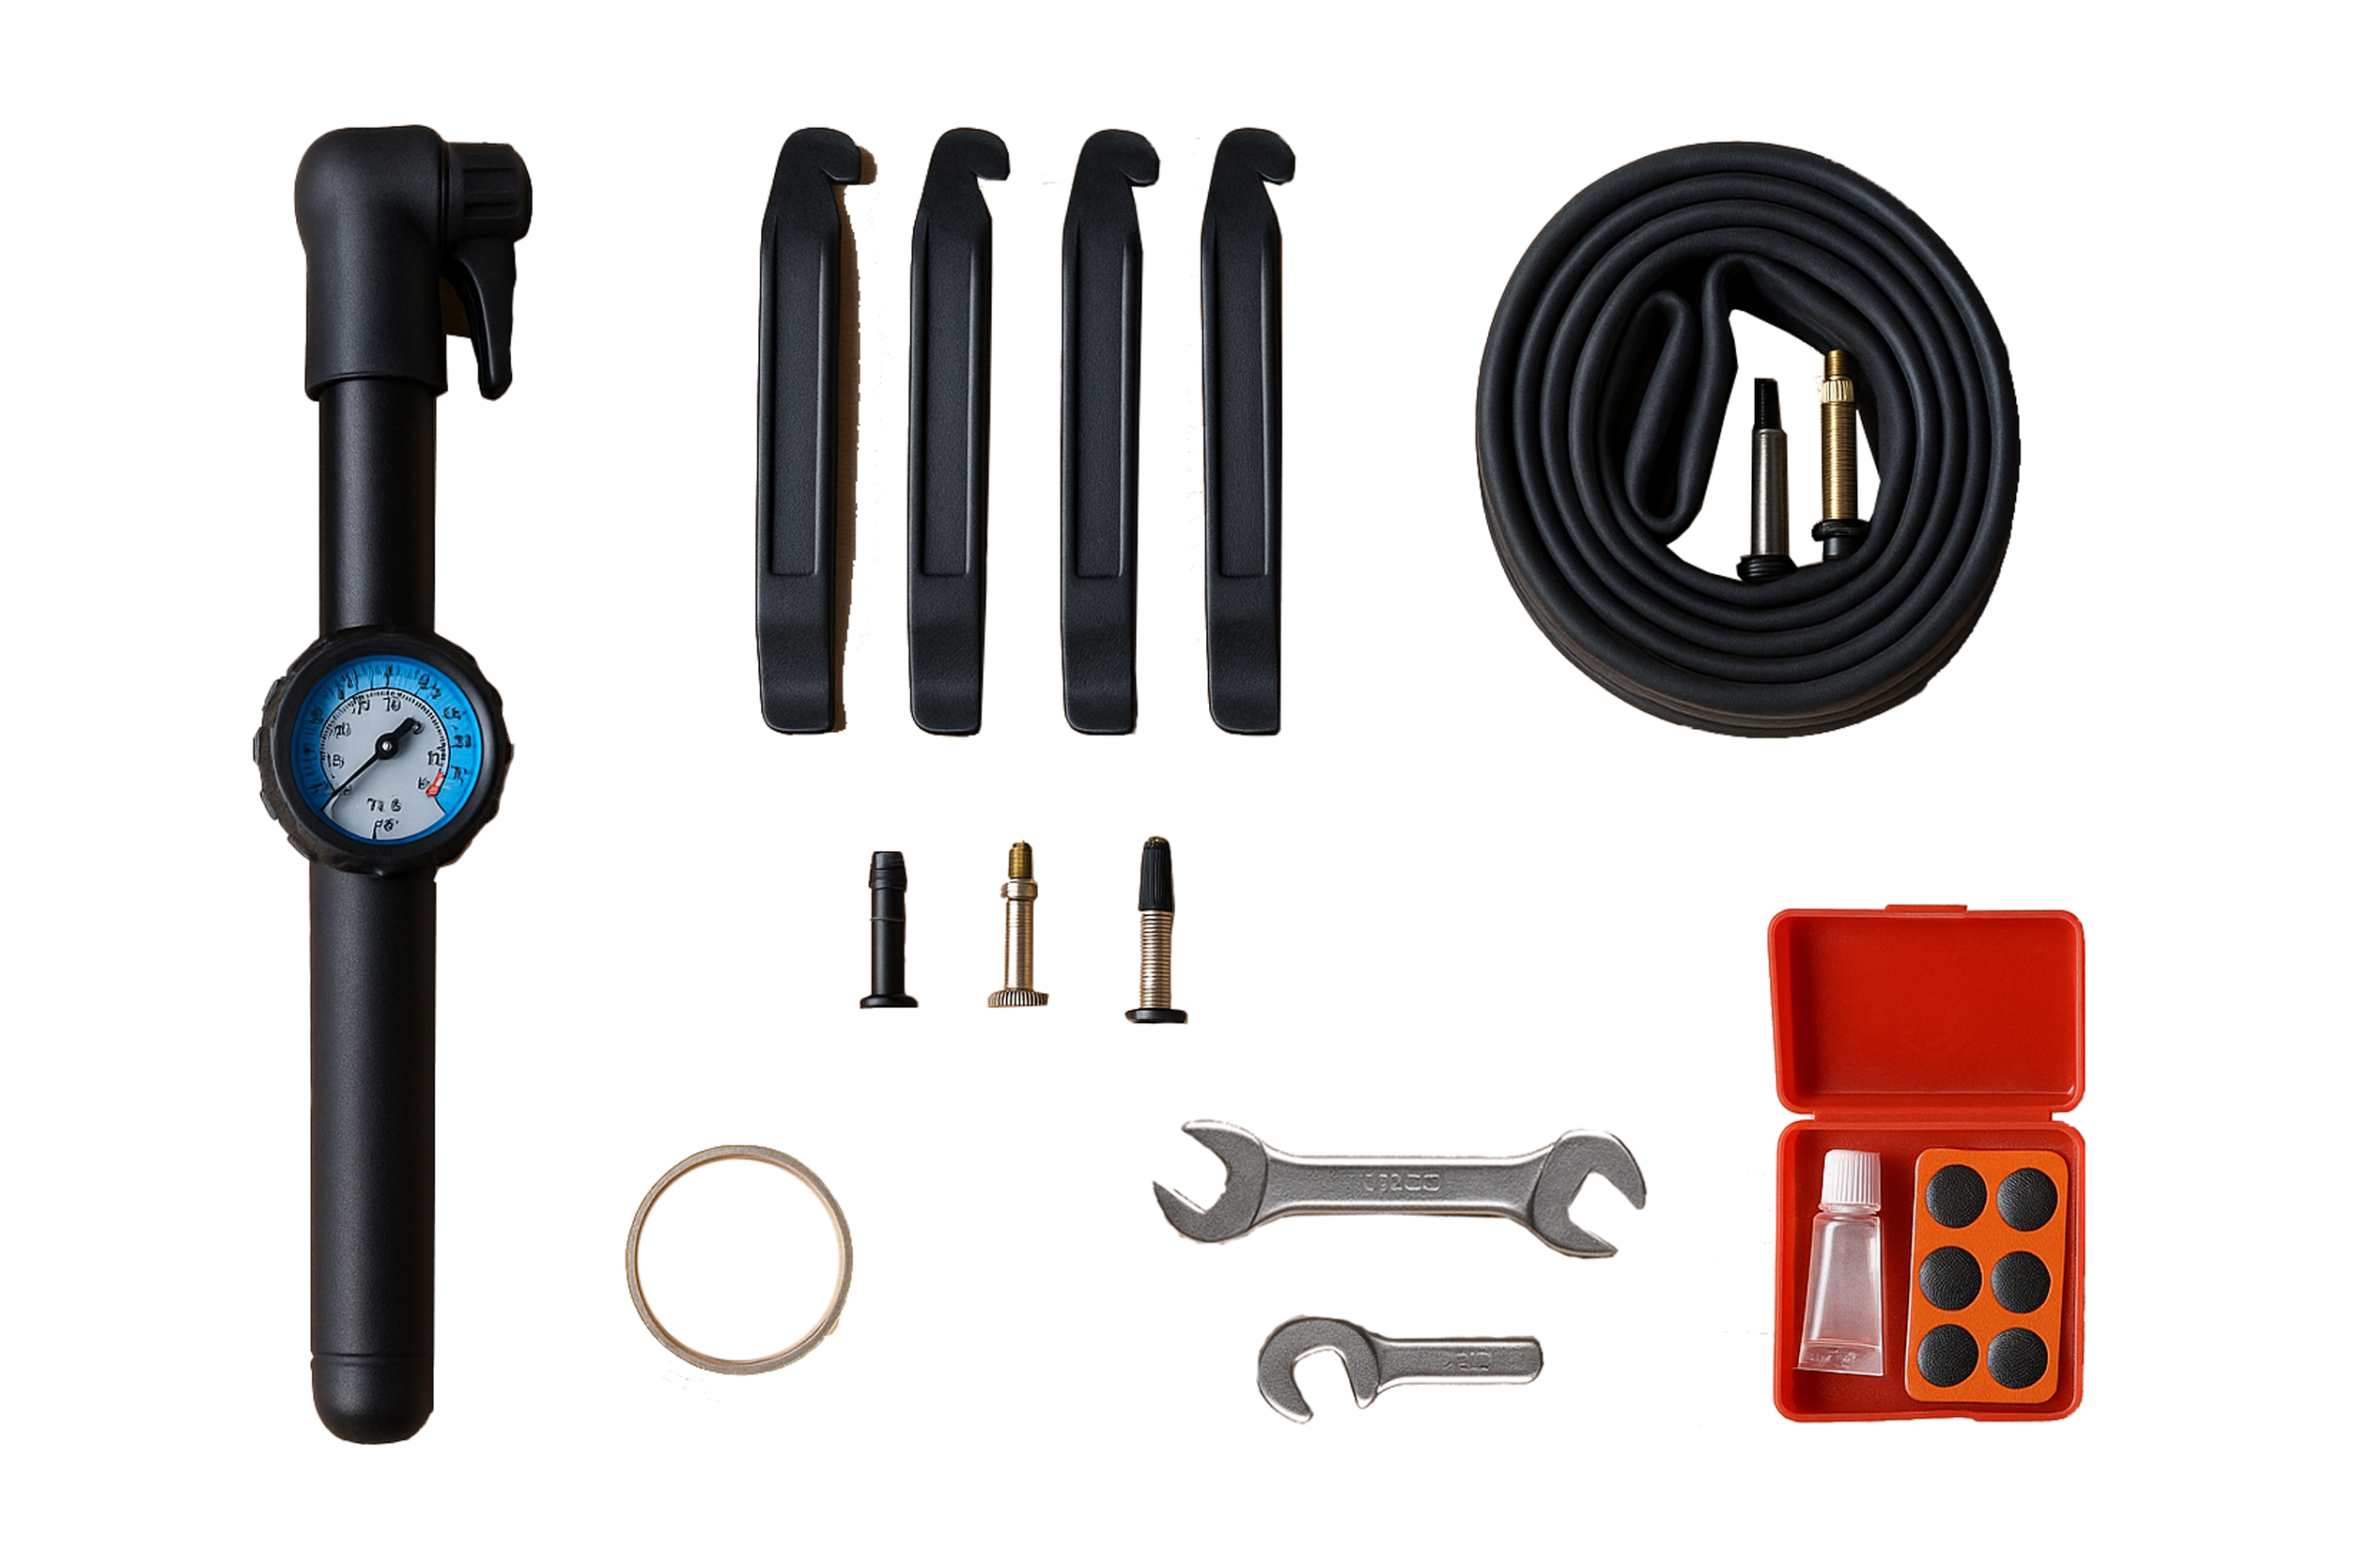
3-4 tire levers: With these you lift the tire from the rim – this prevents scratches on the rim
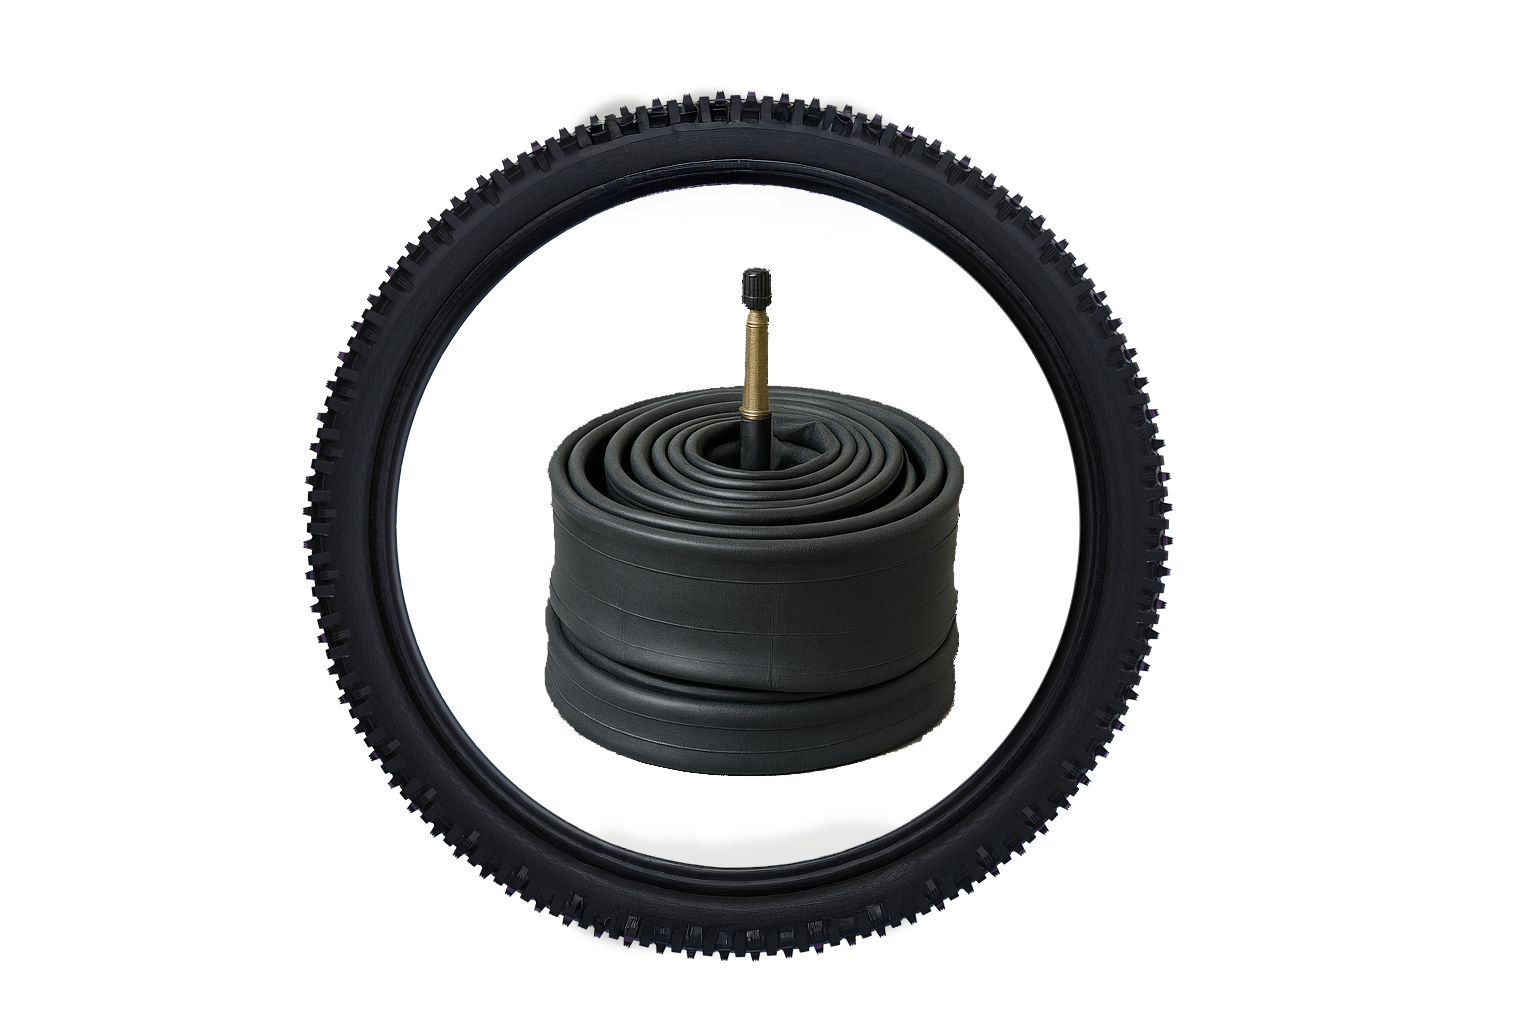
New hose or casing: – Hose with hole or leaking valve – Mantel with cracks, bumps or worn-out profile
Air pump with manometer: For the correct pressure. Pay attention to the appropriate pump head (AV, SV, DV)
Optional: Tweezers, talcum powder (for easier assembly) and a soft cloth
Does the hose or the casing need to be replaced?
Tube.
Visible hole
Valve wobbles
Rubber is brittle
Loss of air
Coat.
Cracks in the side wall
Bump when rolling
The tire no longer has any tread left
The tires can no longer be mounted evenly
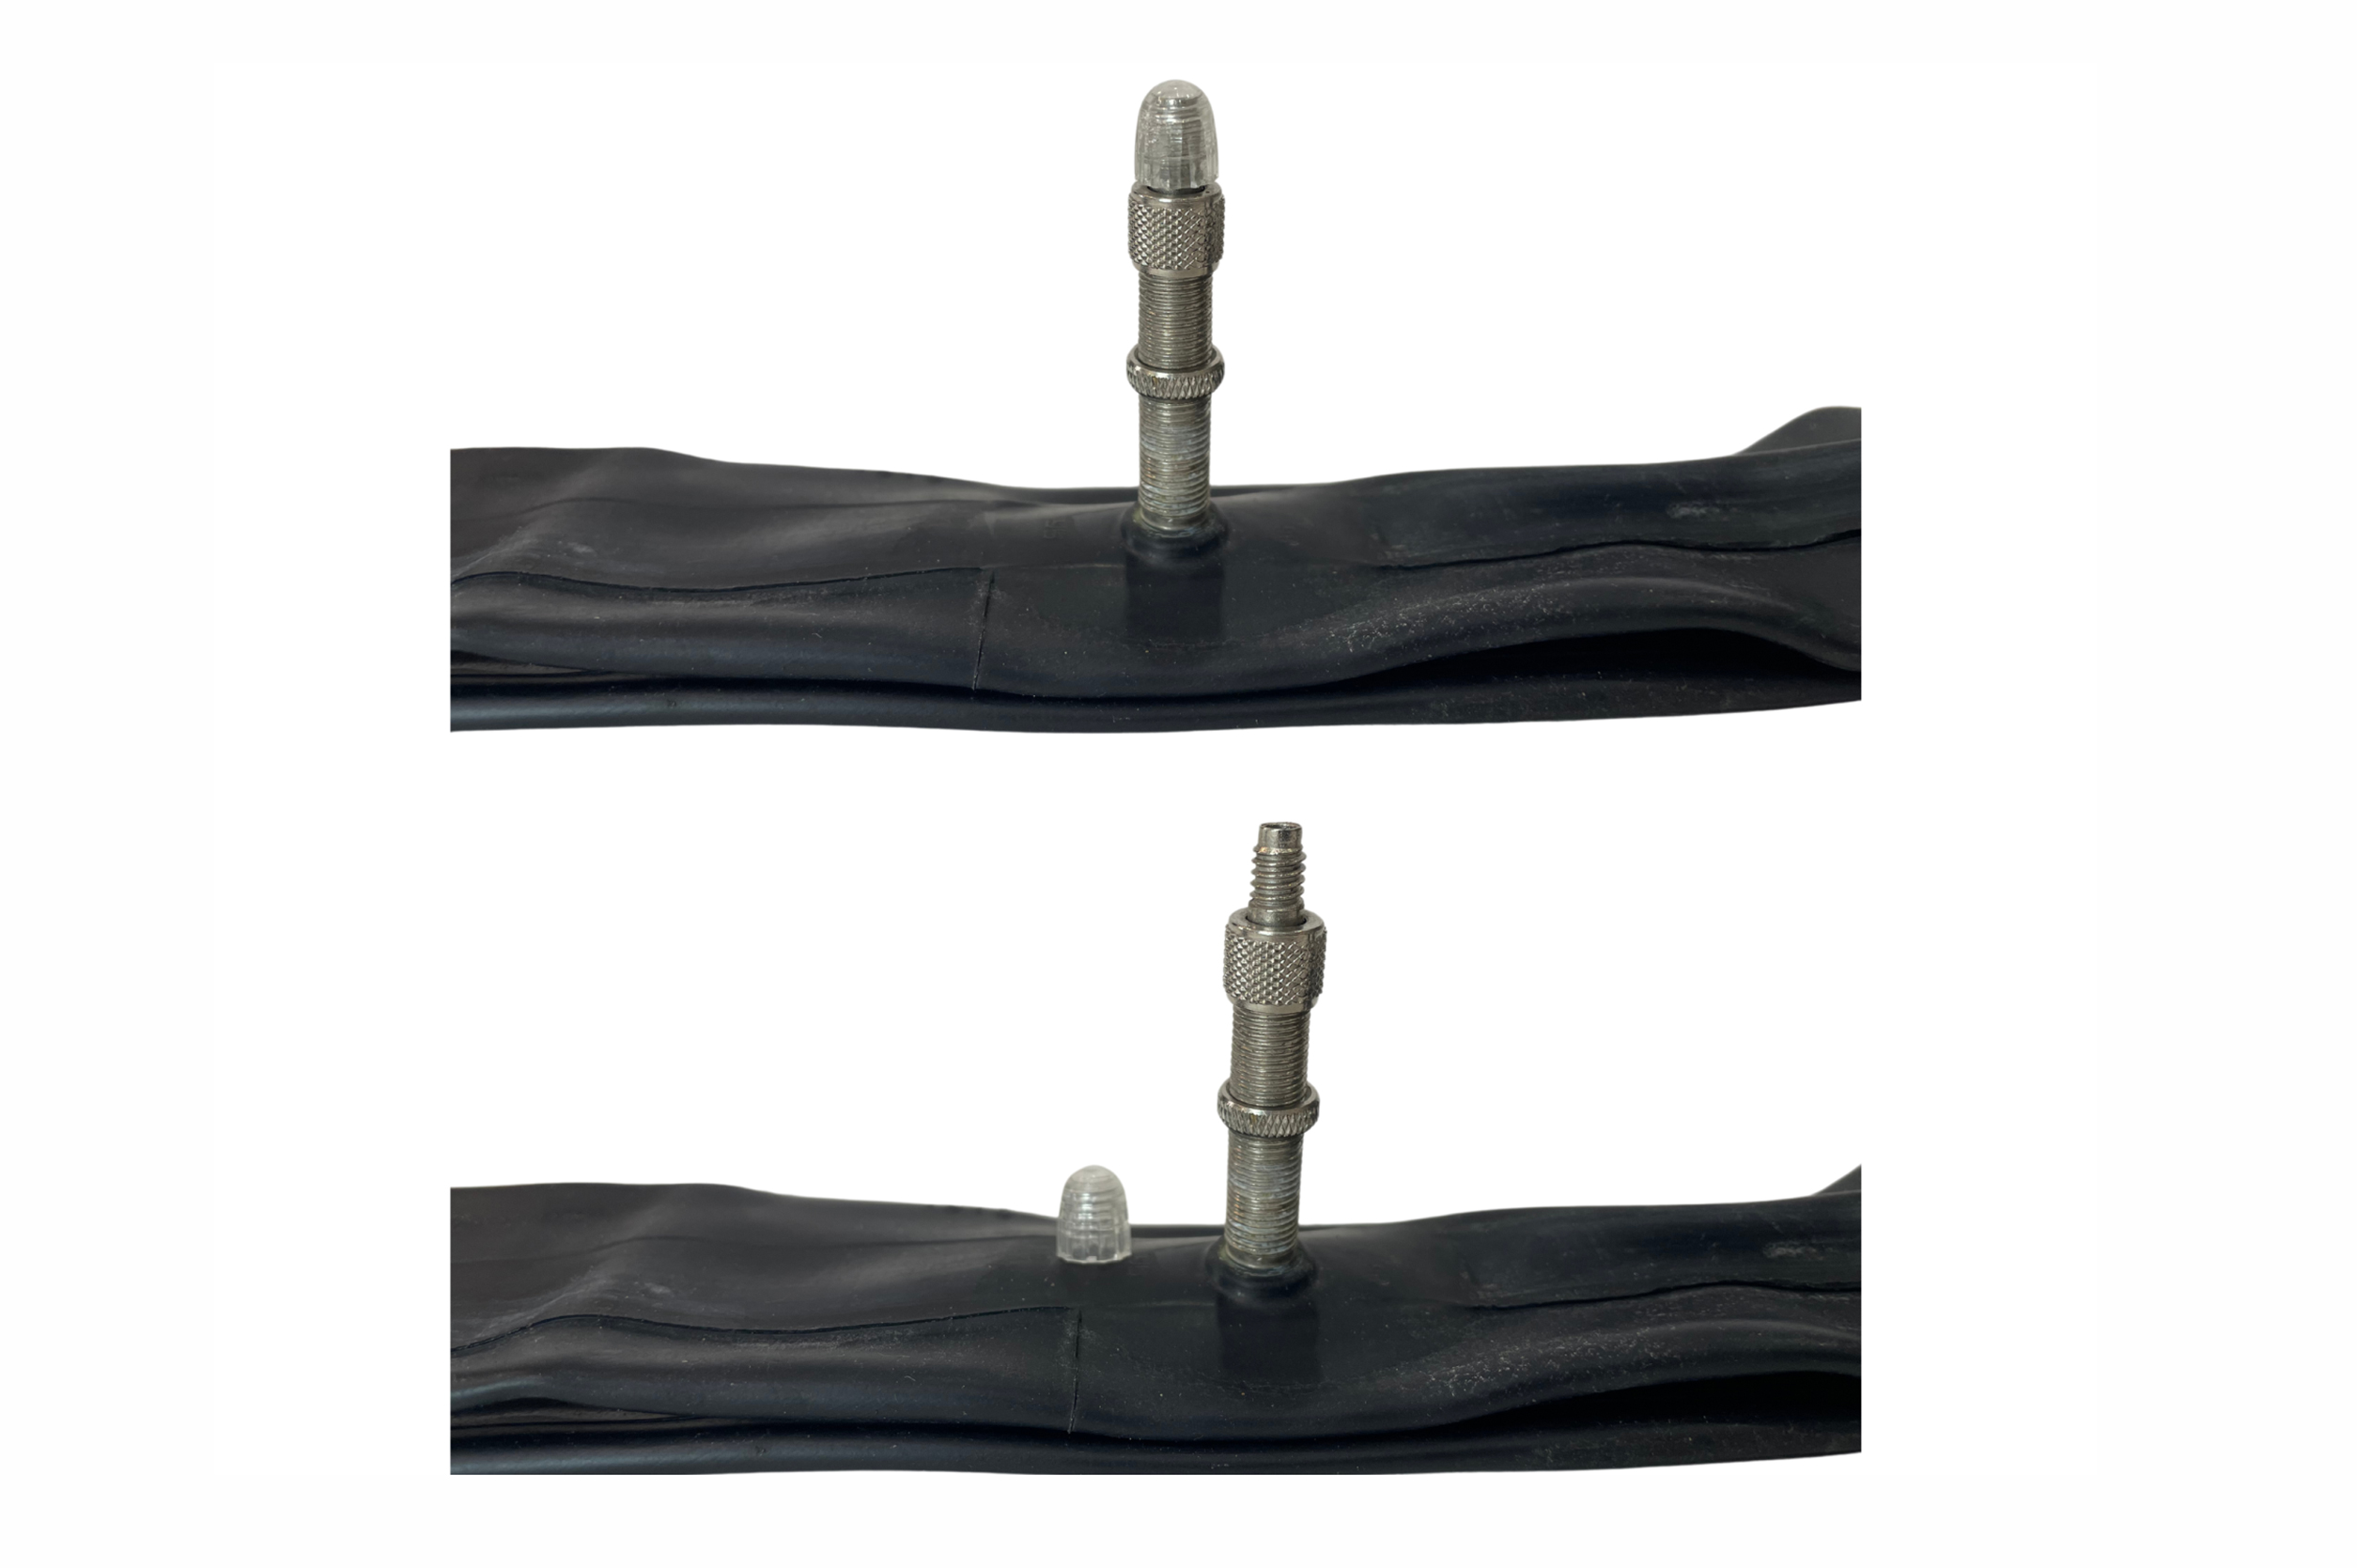
Valve and size check.
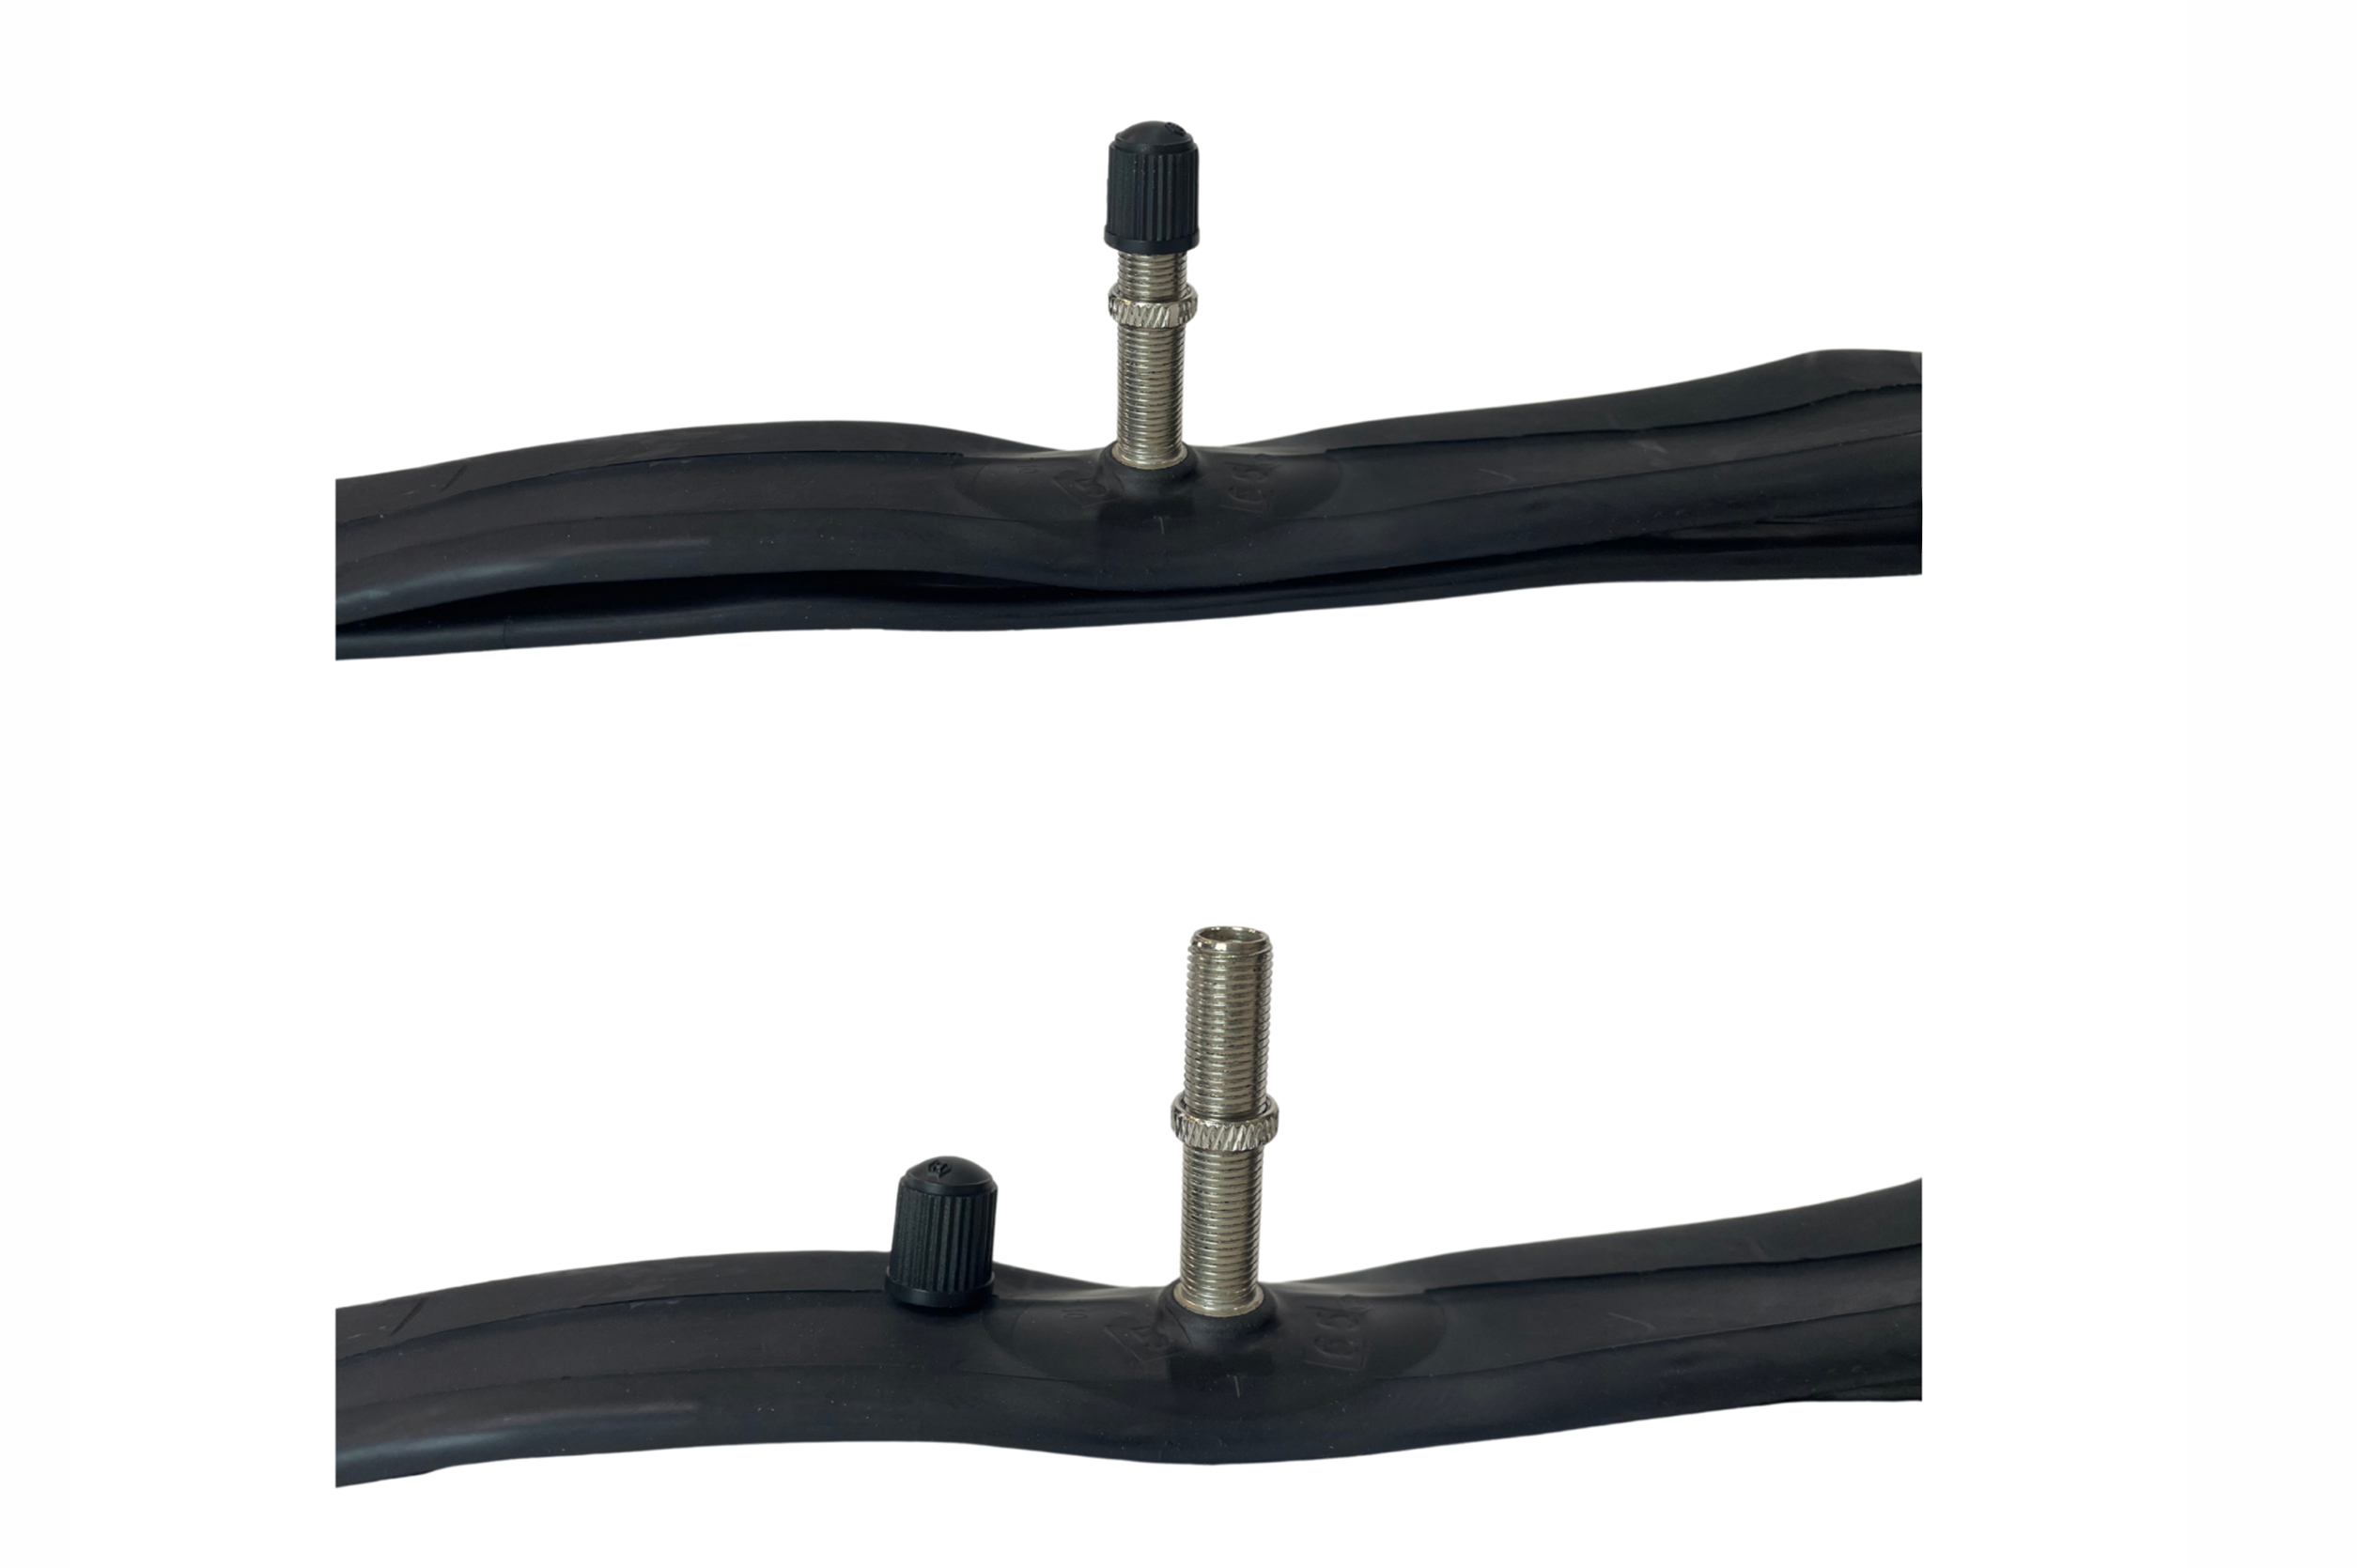
Auto valve (AV), Schrader valve.
The AV is the most common bicycle valve, similar to the tire valve in a car. It is robust and easy to operate. To inflate: Remove the valve cap, install the pump head and pump until the desired pressure is reached. Release air: Insert the pin into the middle. Assembly: Insert the valve through the rim hole and secure it with a nut if necessary. Ideal for mountain and touring bikes, as it can also be used at gas stations.
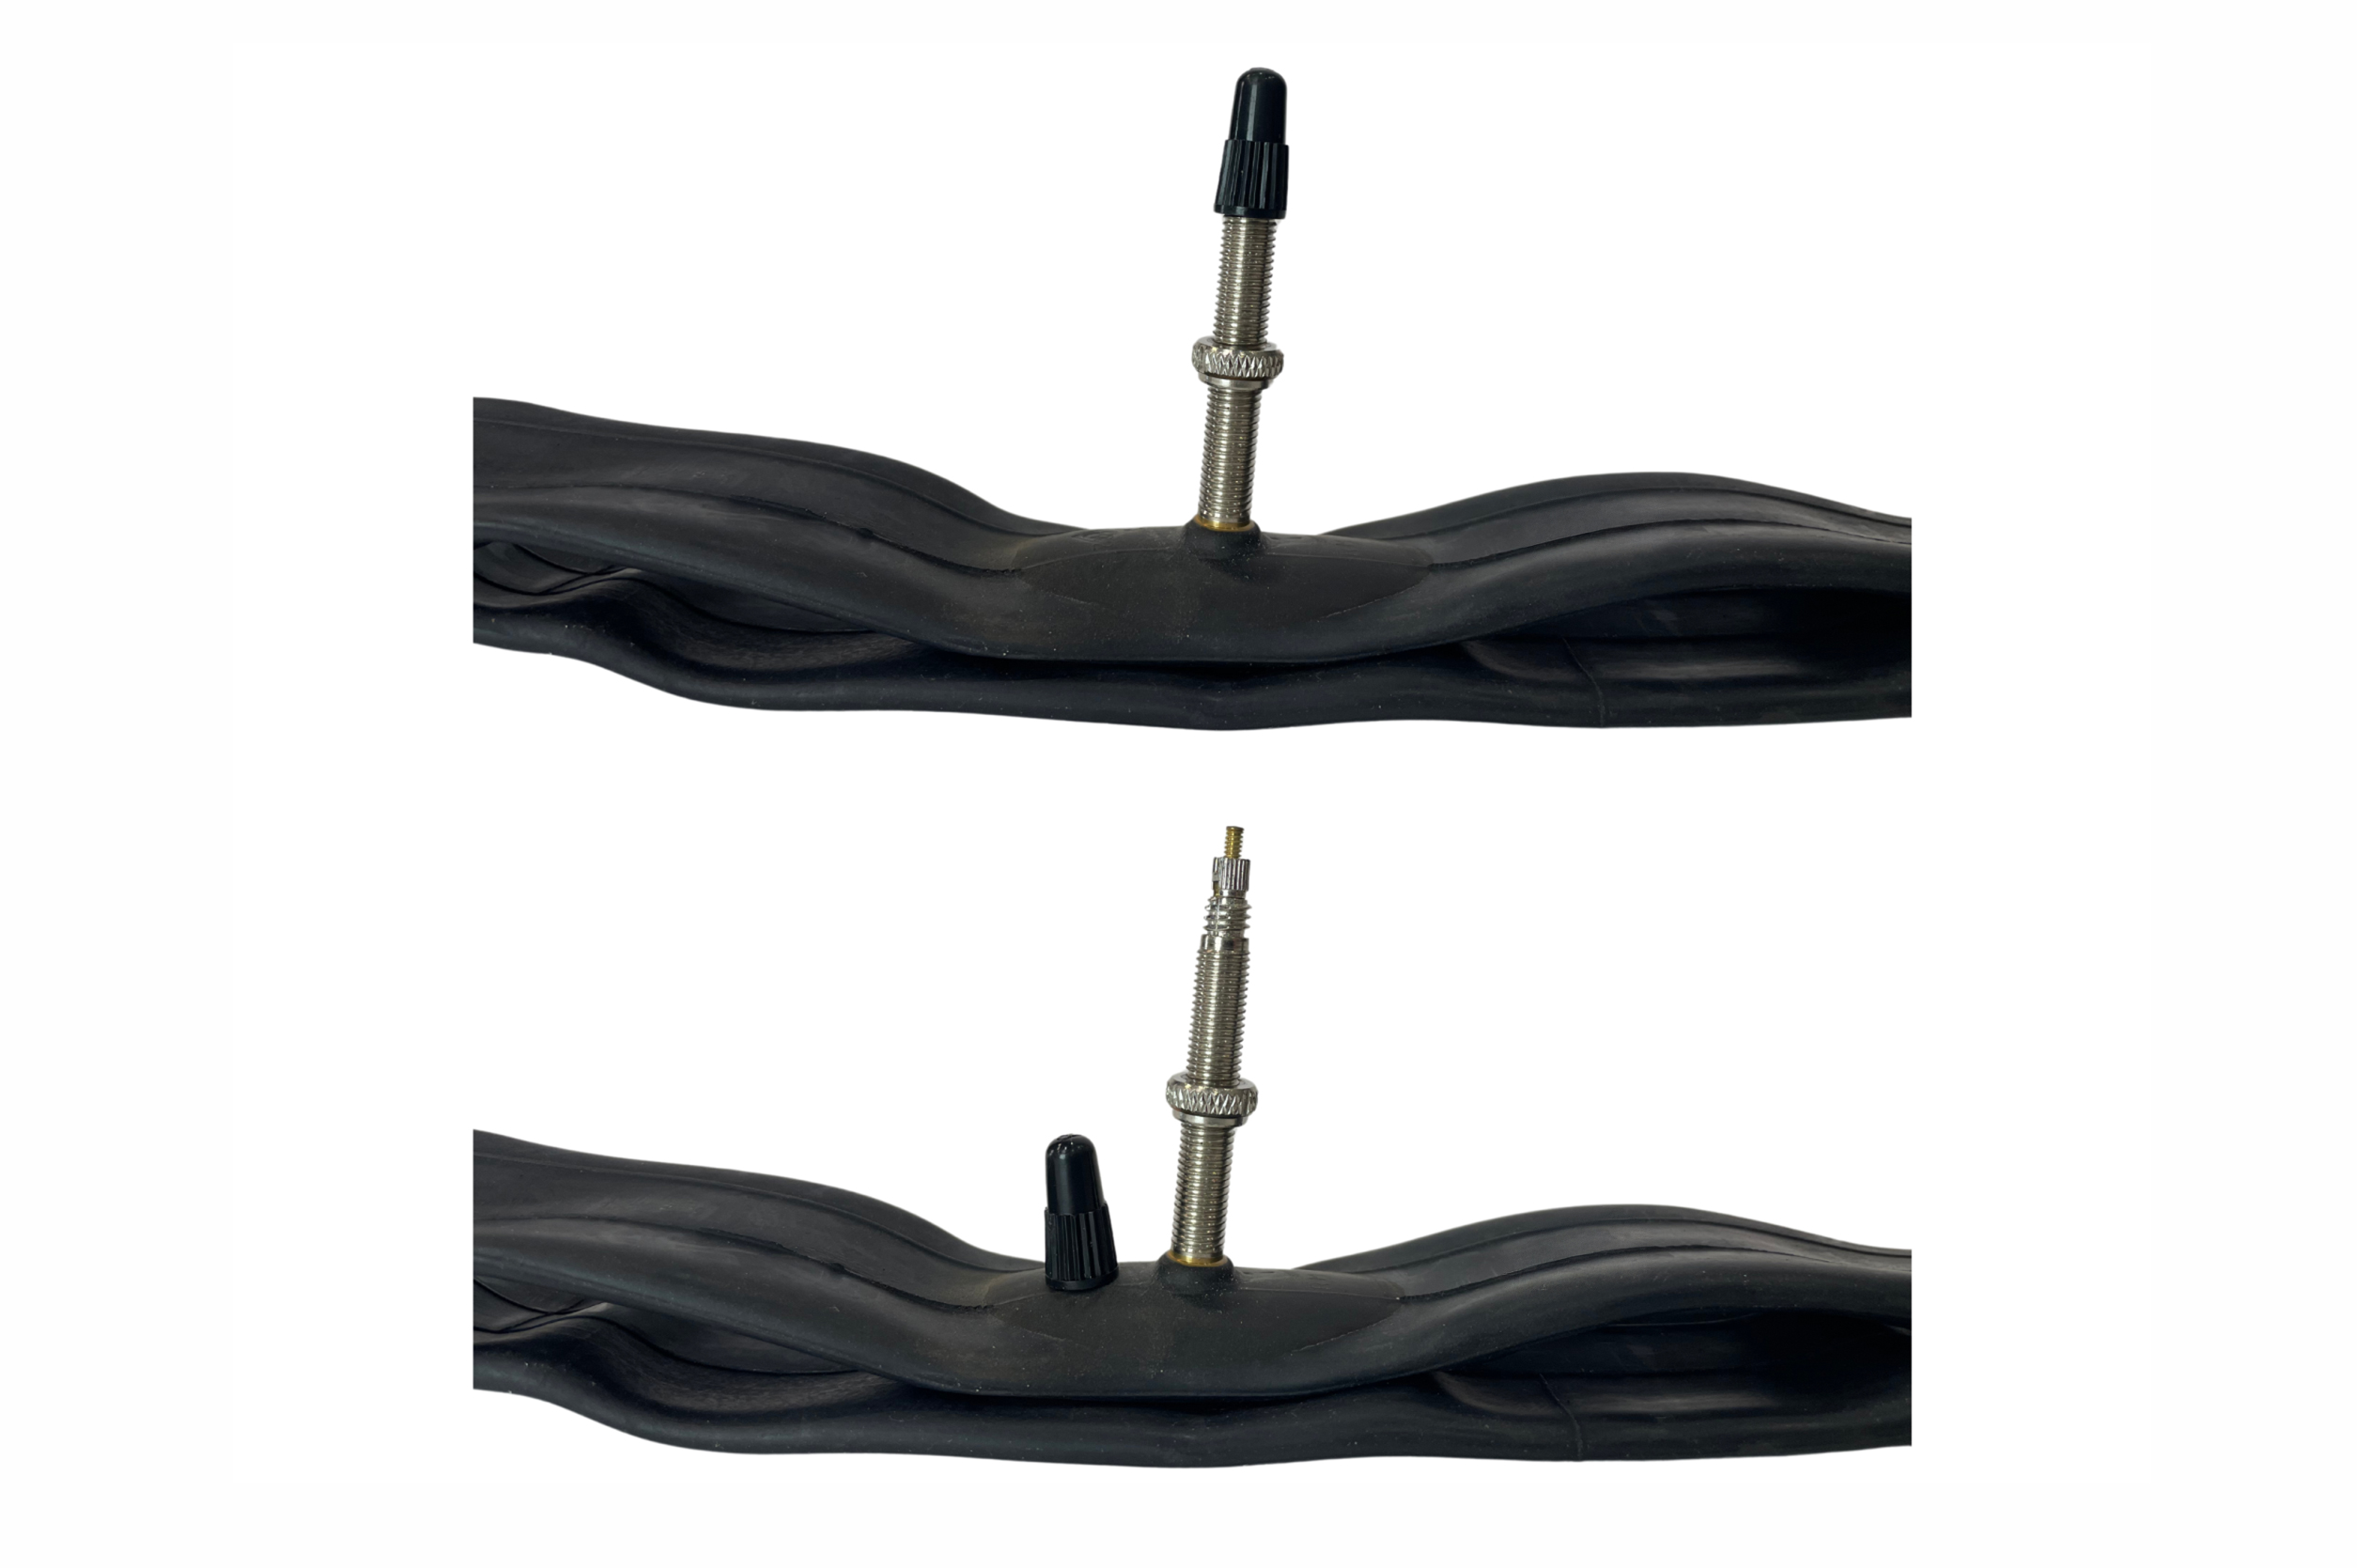
French valve (SV), Presta valve or Sclaverand valve.
The SV is slimmer and lighter than the autocycle valve and is used primarily on racing bicycles. It fits on narrow rims and can withstand high pressure. For inflation: Remove the valve cap, unscrew the nut on the valve stem, install the pump head, pump, re-tighten the nut, and install the cap. Assembly: Insert the valve through the rim hole and secure it with the nut. Ideal for road bikes and gravel bikes, thanks to precise pressure control.
Flash valve (DV), Dunlop valve Older city valve (special head required).
The DV is widely used in Europe and easy to maintain. To inflate: remove the valve cap, attach the pump and pump. To deflate: unscrew the nut on the valve insert. Assembly: unscrew the nut, insert the valve through the rim hole, insert the valve core. Robust and ideal for everyday use.
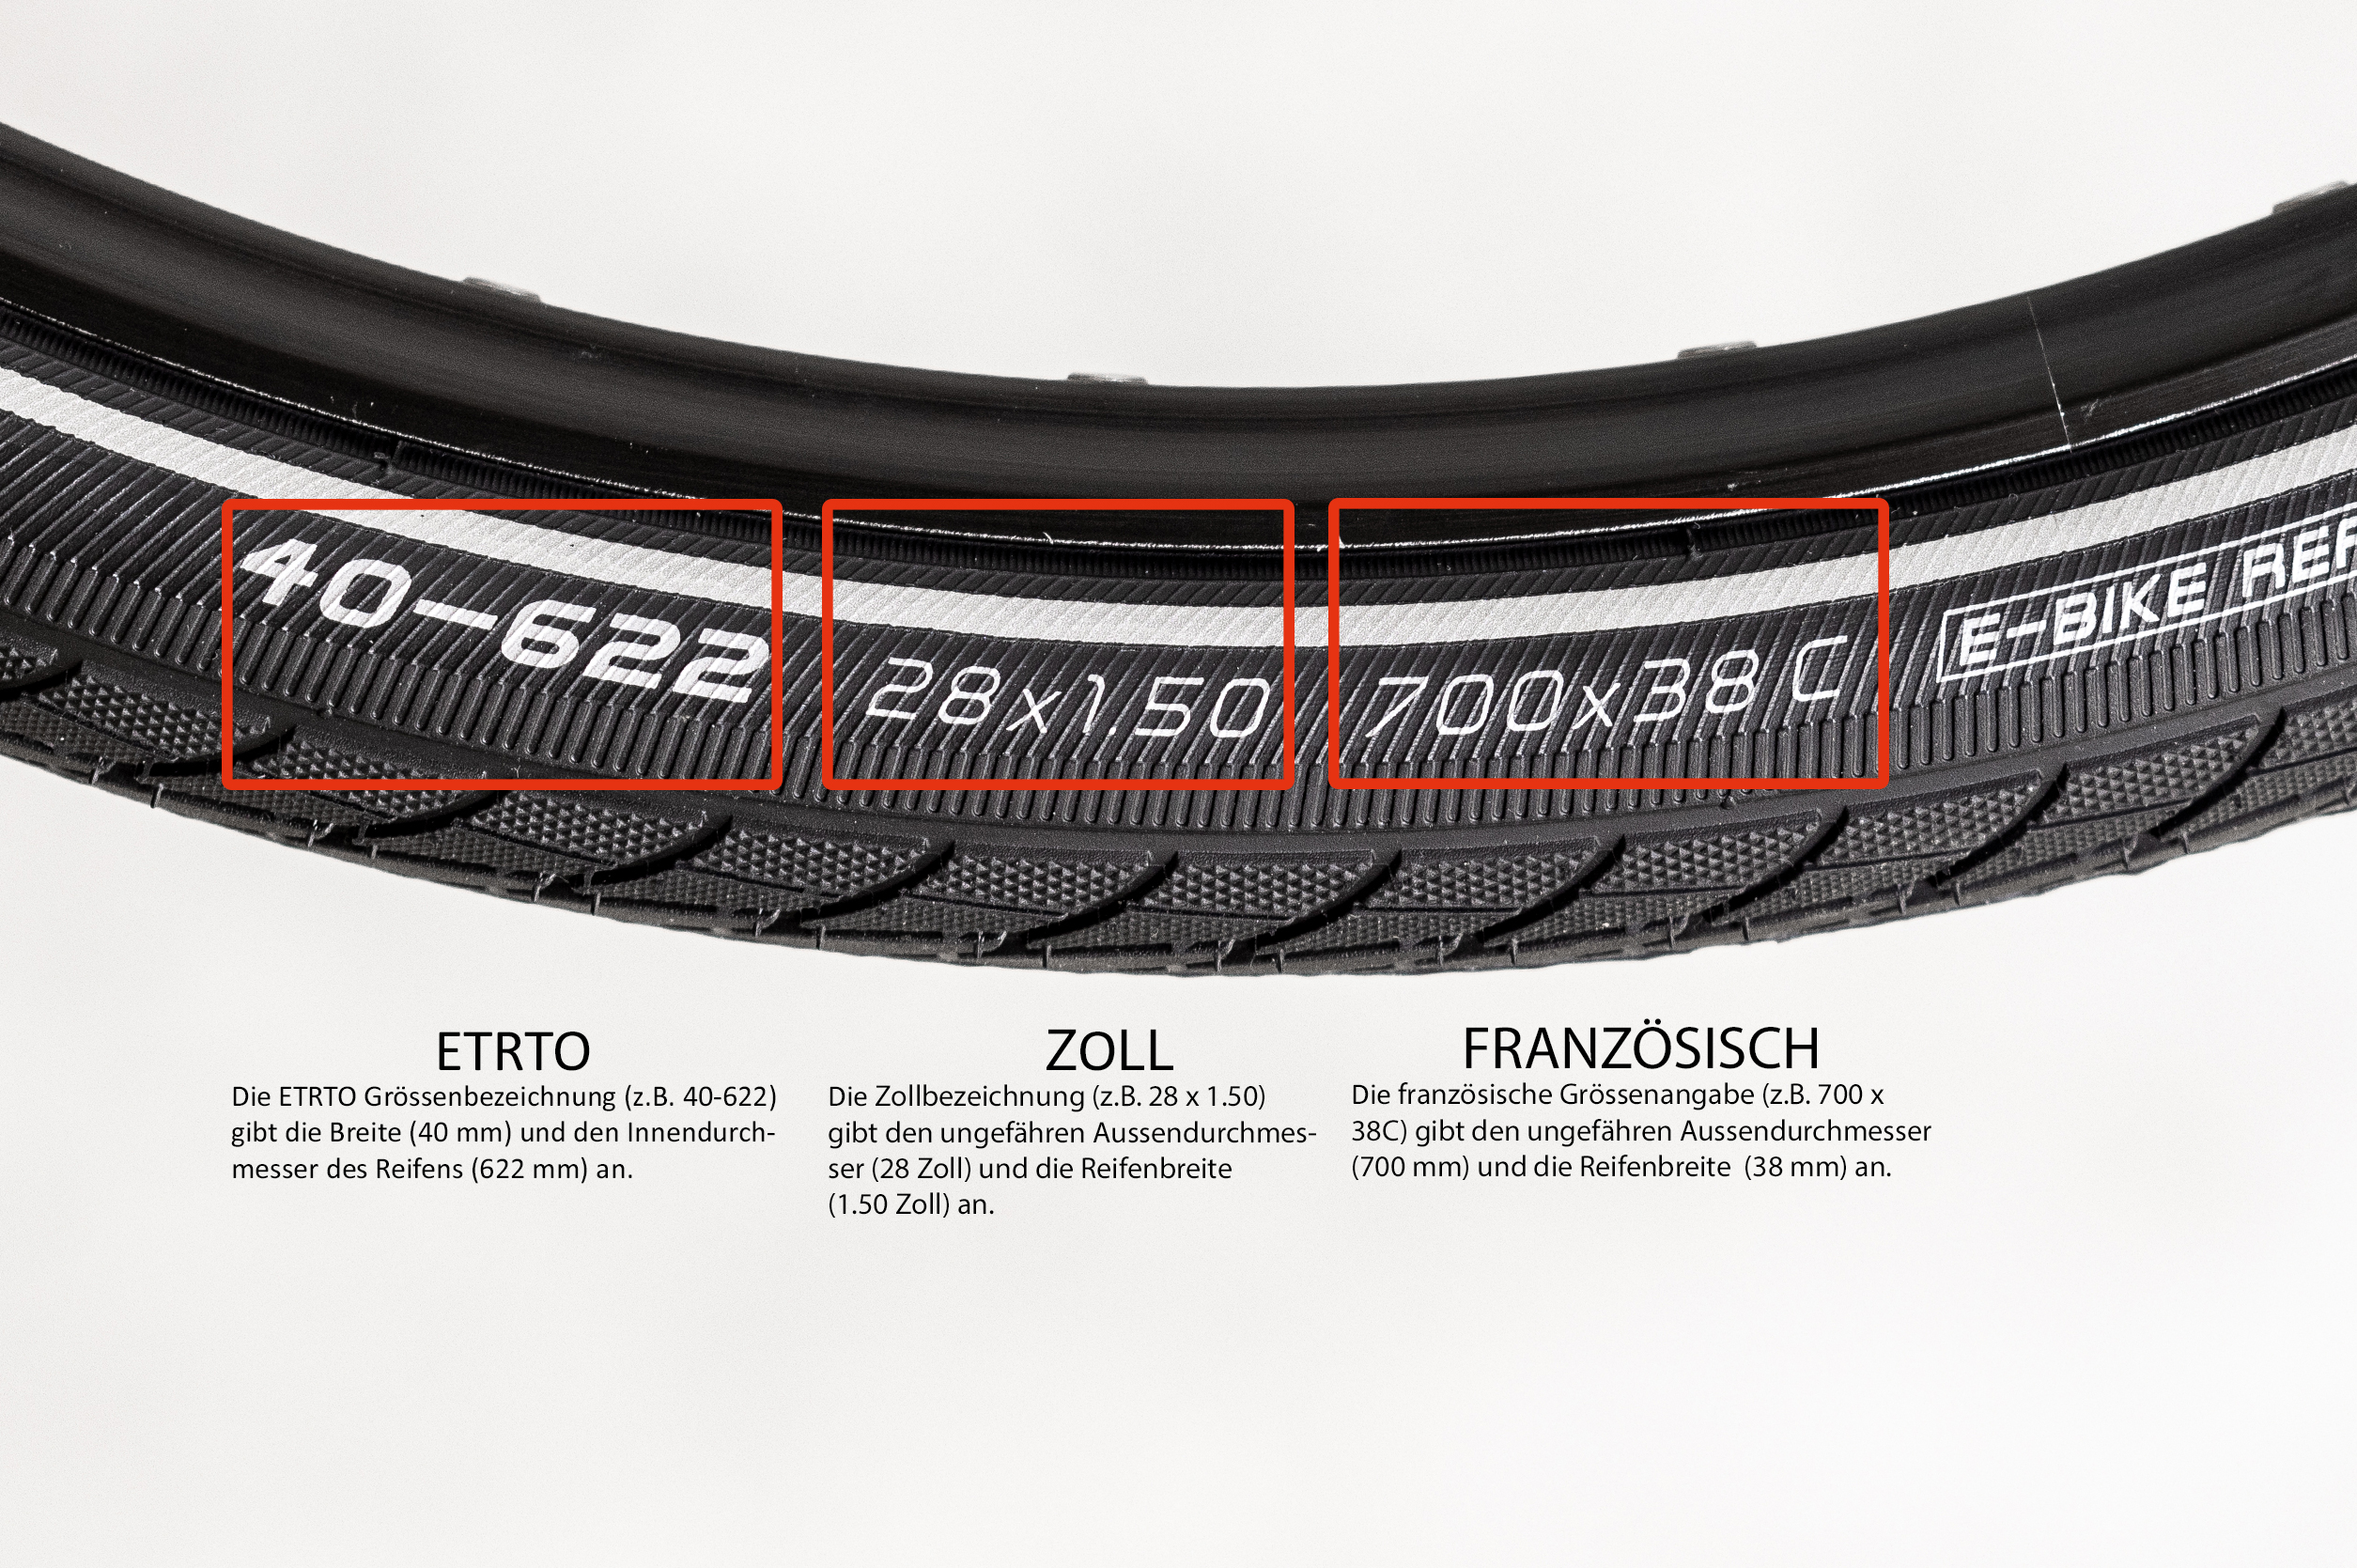
How do you read the ETRTO indication?
A typical example: 40-622
40 = Tire width in millimeters 622 = Rim diameter in millimeters
This means: This tire is 40 mm wide and fits on a rim with a diameter of 622 mm (approximately 28 inches).
Step 2: Check the tire cord.
Check the tire cord before changing the tire. Cracks or misalignments can expose the spoke holes and damage the tire – replace it if necessary.
Step 3: Change the front wheel.
1. Remove the wheel Open the brake, release the quick-release nut, turn the axle counter-clockwise, and remove the front wheel.
2.Air out & remove tires Open the valve, let the air escape completely. Attach the tire lifter opposite the valve and lift the tire from the rim.
3. Remove the hose Carefully pull out the hose and check the rim and the inner side of the casing for foreign objects.
4. Insert the new hose Lightly prime the hose, paying attention to the direction of flow. Insert the valve straight into the rim opening and press the sleeve back on by hand.
5. Inflation and control Inflate tires evenly, check seat (tire line must be uniformly even throughout), align valve perpendicular
6. Install the wheel Tighten the axle, close the brake
Fix the problems.
Problem
Why?
Fixing
The tire is shaking
Mantel sits unevenly
Lower pressure to ~1 bar, tighten the jacket all around, check the control line
Brake is wearing on the tire
The wheel is not positioned correctly / The saddle is minimally crooked
Reinstall and fix the wheel; with a disc: loosen the seat, pull the lever, tighten the seat
Knocking when inflating
The hose is stuck
Lower the pressure, release the sleeve at the point, fit the hose tightly, slowly inflate
Step 4: Change the rear wheel.
The procedure for the rear wheel is almost identical – however, it involves the chain and the shifting mechanism.
Preparation Switch to the smallest gear, set the shift lever to „OFF“, and open the brake
Replacing the hose Unscrew the air hose, remove the cover and replace the tube as with the front wheel.
Installation: Place the chain on the smallest sprocket, pull the shifter slightly backward, tighten the axle, and check the seat of the wheel and the brake
Fix the problems.
Problem
Why?
Fixing
The chain is located next to the pinion
Chain slips during insertion
Remove the wheel, place the chain on the smallest sprocket, and reinstall it.
The tire is shaking
Mantel sits unevenly
Lower pressure to ~1 bar, tighten the jacket all around, check the control line
Brake is wearing on the tire
The wheel is not positioned correctly / The saddle is minimally crooked
Reinstall and fix the wheel; with a disc: loosen the seat, pull the lever, tighten the seat
Knocking when inflating
Tube pinched
Lower pressure, open the sleeve at the point, place the hose clean, slowly inflate
Fahrräder gibt es in vielen unterschiedlichen Grössen. Dementsprechend besitzen auch Schläuche und Reifen ein individuelles Mass. Wie du dir richtige Grösse für dein Fahrrad mit ETRTO bestimmst, erklären wir dir im folgenden Beitrag.
Was bedeutet die ETRTO-Norm bei Fahrradreifen?
Die ETRTO-Norm (European Tyre and Rim Technical Organisation) sorgt dafür, dass Reifen und Felgen weltweit einheitlich gekennzeichnet sind, Sie macht Schluss mit verwirrenden Zoll- und Zollgrössenangaben wie „28 Zoll“ oder „700C“, die je nach Hersteller variieren können.
Warum ist das wichtig?
Dank der ETRTO-Norm kannst du sicher sein, dass Reifen und Felge perfekt zusammenpassen. Das reduziert das Risiko von Montageproblemen und erhöht die Sicherheit beim Fahren.
Vorteile der ETRTO-Norm.
Einheitliche Grössenangaben weltweit
Einfacher Reifenwechsel ohne Rätselraten
Mehr Sicherheit und Kompatibilität
How do you read the ETRTO indication?
A typical example: 40-622
40 = Tire width in millimeters 622 = Innendurchmesser der Felge in Millimetern
This means: This tire is 40 mm wide and fits on a rim with a diameter of 622 mm (approximately 28 inches).
Fast jede bekannte Grössenbezeichnung solltest du in dieser Liste finden. Wir haben versucht alle Grössenbezeichnungen anzugeben, die im Markt verwendet werden oder früher verwendet wurden.
Warum sind Zollangaben bei Fahrradreifen oft verwirrend?
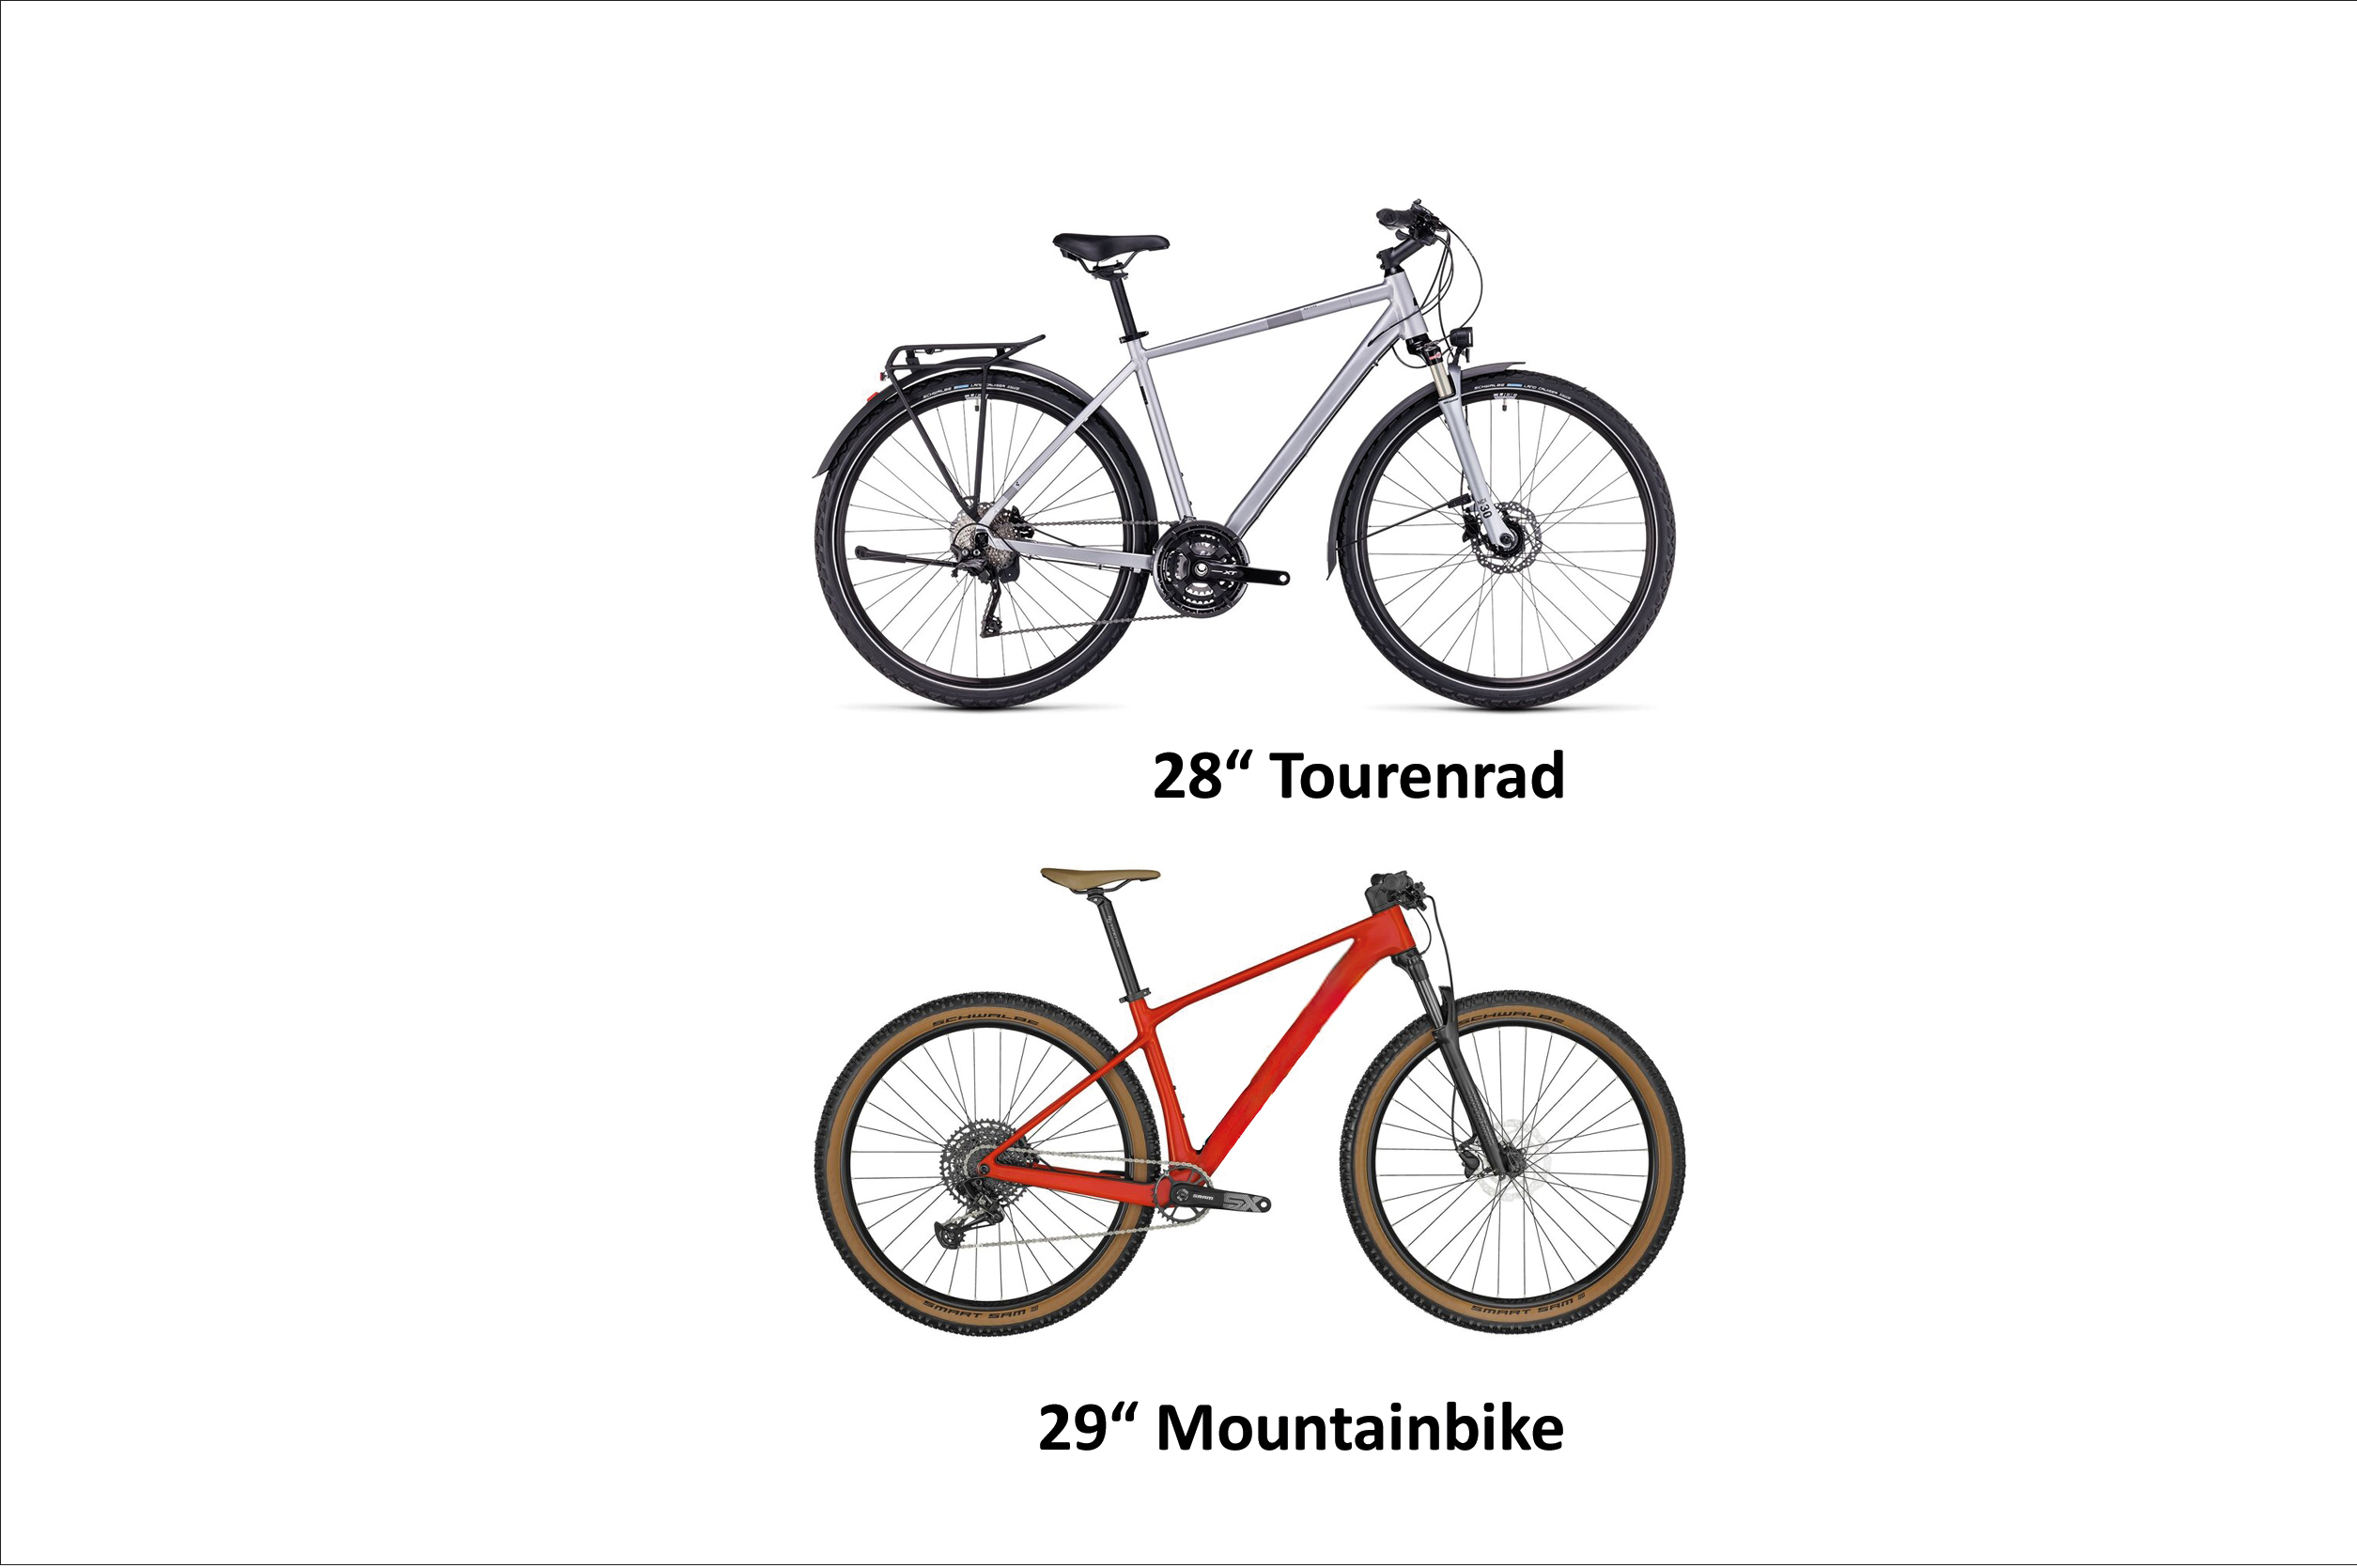
Reifen mit den Bezeichnungen 28 Zoll and 29 Zoll haben beide denselben Felgen-Innendurchmesser von 622mm. Das bedeutet: Sie passen theoretisch auf die gleichen Felgen.
28 Zoll ist in Europa die klassische Grösse für Tourenräder und sehr weit verbreitet.
29 Zoll wurde später in den USA für Mountainbikes eingeführt. Der Name kommt daher, dass die Reifen dort dicker sind und der Aussendruchmesser ungefähr 29 Zoll beträgt.
Warum sind diese Angaben ungenau?
Die Zollgrösse bezieht sich nicht auf den Felgendurchmesser, sondern auf den Aussendurchmesser des kompletten Rads – und der hängt von der Reifenbreite ab.
Ein schmaler Rennradreifen (z.B. 23 mm) hat tatsächlich nur etwa 26 Zoll Aussendurchnmesser
Bei einer Breite von ca. 40 mm kommt man ungefähr auf 28 Zoll
Sehr breite Reifen (60 mm oder mehr) erreichen fast 30 Zoll
Fazit: ETRTO – Der Schlüssel für die richtige Reifenwahl.
Die Zollangabe ist nur ein grober Richtwert. Für eine exakte Passform ist die ETRTO-Angabe (z.B. 37-622) entscheidend, denn sie gibt den Felgendurchmesser und die Reifenbreite in Millimetern an.
A flat tire usually occurs when you least need it. With the following steps, you can ensure that your bike is ready to ride again quickly and cleanly.
Step 1: Prepare tools and materials.
Prepare everything before you start – this will save you time and nerves.
Tools & Material.
3-4 tire levers: With these you lift the tire from the rim – this prevents scratches on the rim
New hose or casing: – Hose with hole or leaking valve – Mantel with cracks, bumps or worn-out profile
Air pump with manometer: For the correct pressure. Pay attention to the appropriate pump head (AV, SV, DV)
Optional: Tweezers, talcum powder (for easier assembly) and a soft cloth
Does the hose or the casing need to be replaced?
Tube.
Visible hole
Valve wobbles
Rubber is brittle
Loss of air
Coat.
Cracks in the side wall
Bump when rolling
The tire no longer has any tread left
The tires can no longer be mounted evenly
Valve and size check.
Auto valve (AV), Schrader valve.
The AV is the most common bicycle valve, similar to the tire valve in a car. It is robust and easy to operate. To inflate: Remove the valve cap, install the pump head and pump until the desired pressure is reached. Release air: Insert the pin into the middle. Assembly: Insert the valve through the rim hole and secure it with a nut if necessary. Ideal for mountain and touring bikes, as it can also be used at gas stations.
French valve (SV), Presta valve or Sclaverand valve.
The SV is slimmer and lighter than the autocycle valve and is used primarily on racing bicycles. It fits on narrow rims and can withstand high pressure. For inflation: Remove the valve cap, unscrew the nut on the valve stem, install the pump head, pump, re-tighten the nut, and install the cap. Assembly: Insert the valve through the rim hole and secure it with the nut. Ideal for road bikes and gravel bikes, thanks to precise pressure control.
Flash valve (DV), Dunlop valve Older city valve (special head required).
The DV is widely used in Europe and easy to maintain. To inflate: remove the valve cap, attach the pump and pump. To deflate: unscrew the nut on the valve insert. Assembly: unscrew the nut, insert the valve through the rim hole, insert the valve core. Robust and ideal for everyday use.
How do you read the ETRTO indication?
A typical example: 40-622
40 = Tire width in millimeters 622 = Rim diameter in millimeters
This means: This tire is 40 mm wide and fits on a rim with a diameter of 622 mm (approximately 28 inches).
Step 2: Check the tire cord.
Check the tire cord before changing the tire. Cracks or misalignments can expose the spoke holes and damage the tire – replace it if necessary.
Step 3: Change the front wheel.
1. Remove the wheel Open the brake, release the quick-release nut, turn the axle counter-clockwise, and remove the front wheel.
2.Air out & remove tires Open the valve, let the air escape completely. Attach the tire lifter opposite the valve and lift the tire from the rim.
3. Remove the hose Carefully pull out the hose and check the rim and the inner side of the casing for foreign objects.
4. Insert the new hose Lightly prime the hose, paying attention to the direction of flow. Insert the valve straight into the rim opening and press the sleeve back on by hand.
5. Inflation and control Inflate tires evenly, check seat (tire line must be uniformly even throughout), align valve perpendicular
6. Install the wheel Tighten the axle, close the brake
Fix the problems.
Problem
Why?
Fixing
The tire is shaking
Mantel sits unevenly
Lower pressure to ~1 bar, tighten the jacket all around, check the control line
Brake is wearing on the tire
The wheel is not positioned correctly / The saddle is minimally crooked
Reinstall and fix the wheel; with a disc: loosen the seat, pull the lever, tighten the seat
Knocking when inflating
The hose is stuck
Lower the pressure, release the sleeve at the point, fit the hose tightly, slowly inflate
Step 4: Change the rear wheel.
The procedure for the rear wheel is almost identical – however, it involves the chain and the shifting mechanism.
Preparation Switch to the smallest gear, set the shift lever to „OFF“, and open the brake
Replacing the hose Unscrew the air hose, remove the cover and replace the tube as with the front wheel.
Installation: Place the chain on the smallest sprocket, pull the shifter slightly backward, tighten the axle, and check the seat of the wheel and the brake
Fix the problems.
Problem
Why?
Fixing
The chain is located next to the pinion
Chain slips during insertion
Remove the wheel, place the chain on the smallest sprocket, and reinstall it.
The tire is shaking
Mantel sits unevenly
Lower pressure to ~1 bar, tighten the jacket all around, check the control line
Brake is wearing on the tire
The wheel is not positioned correctly / The saddle is minimally crooked
Reinstall and fix the wheel; with a disc: loosen the seat, pull the lever, tighten the seat
Knocking when inflating
Tube pinched
Lower pressure, open the sleeve at the point, place the hose clean, slowly inflate
To provide you with the best possible experience, we use technologies such as cookies to store and/or access device information. If you consent to these technologies, we may process data such as your browsing behaviour or unique IDs on this website. If you do not consent or withdraw your consent, this may affect certain features and functions.
Functional
Always active
Technical storage or access is essential for the legitimate purpose of using a specific service requested by the subscriber or user, or for the sole purpose of carrying out the transmission of a communication over an electronic communications network.
Preferences
The technical storage or access is necessary for the legitimate purpose of storing preferences that are not requested by the subscriber or user.
Statistics
Technical storage or access used exclusively for anonymous statistical purposes.The technical storage or access that is used exclusively for anonymous statistical purposes. Without a subpoena, voluntary compliance on the part of your Internet Service Provider, or additional records from a third party, information stored or retrieved for this purpose alone cannot usually be used to identify you.
Marketing
Technical storage or access is necessary to create user profiles for sending advertising, or to track the user across a website or multiple websites for similar marketing purposes.