The new online shop of Arthur Rüegg Fahrzeug-Zubehör AG is here!
From now on, all customers of Arthur Rüegg Fahrzeug-Zubehör AG have access to a modern, user-friendly and secure e-commerce platform. This significantly simplifies the ordering process for bicycle tires and tubes.
Existing customers only need to enter their password once. www.rueaggag.ch reset. All customer and archive data from the old shop will be transferred to the new account.
With the new trading platform, we set new standards in terms of user friendliness, transparency, and security. The improved search function makes it easier to quickly and precisely find the desired products, while the optimized account management allows for easy tracking of previous orders. The new login procedure with a personal email address and password also offers greater protection and individuality.
Our Managing Director, Jürg Rüegg, sees this as an important step forward: „With the launch of our new online store, we are taking another step into the digital future. Our customers benefit from a powerful platform that makes shopping easier, more efficient, and safer.“
Optimized collaboration and mobile usage.
The shop offers practical features especially for companies with multiple users: several employees can access the company account simultaneously using the same login and use a shopping cart together.
With the successful launch, another milestone has been reached for our digital shop solution.
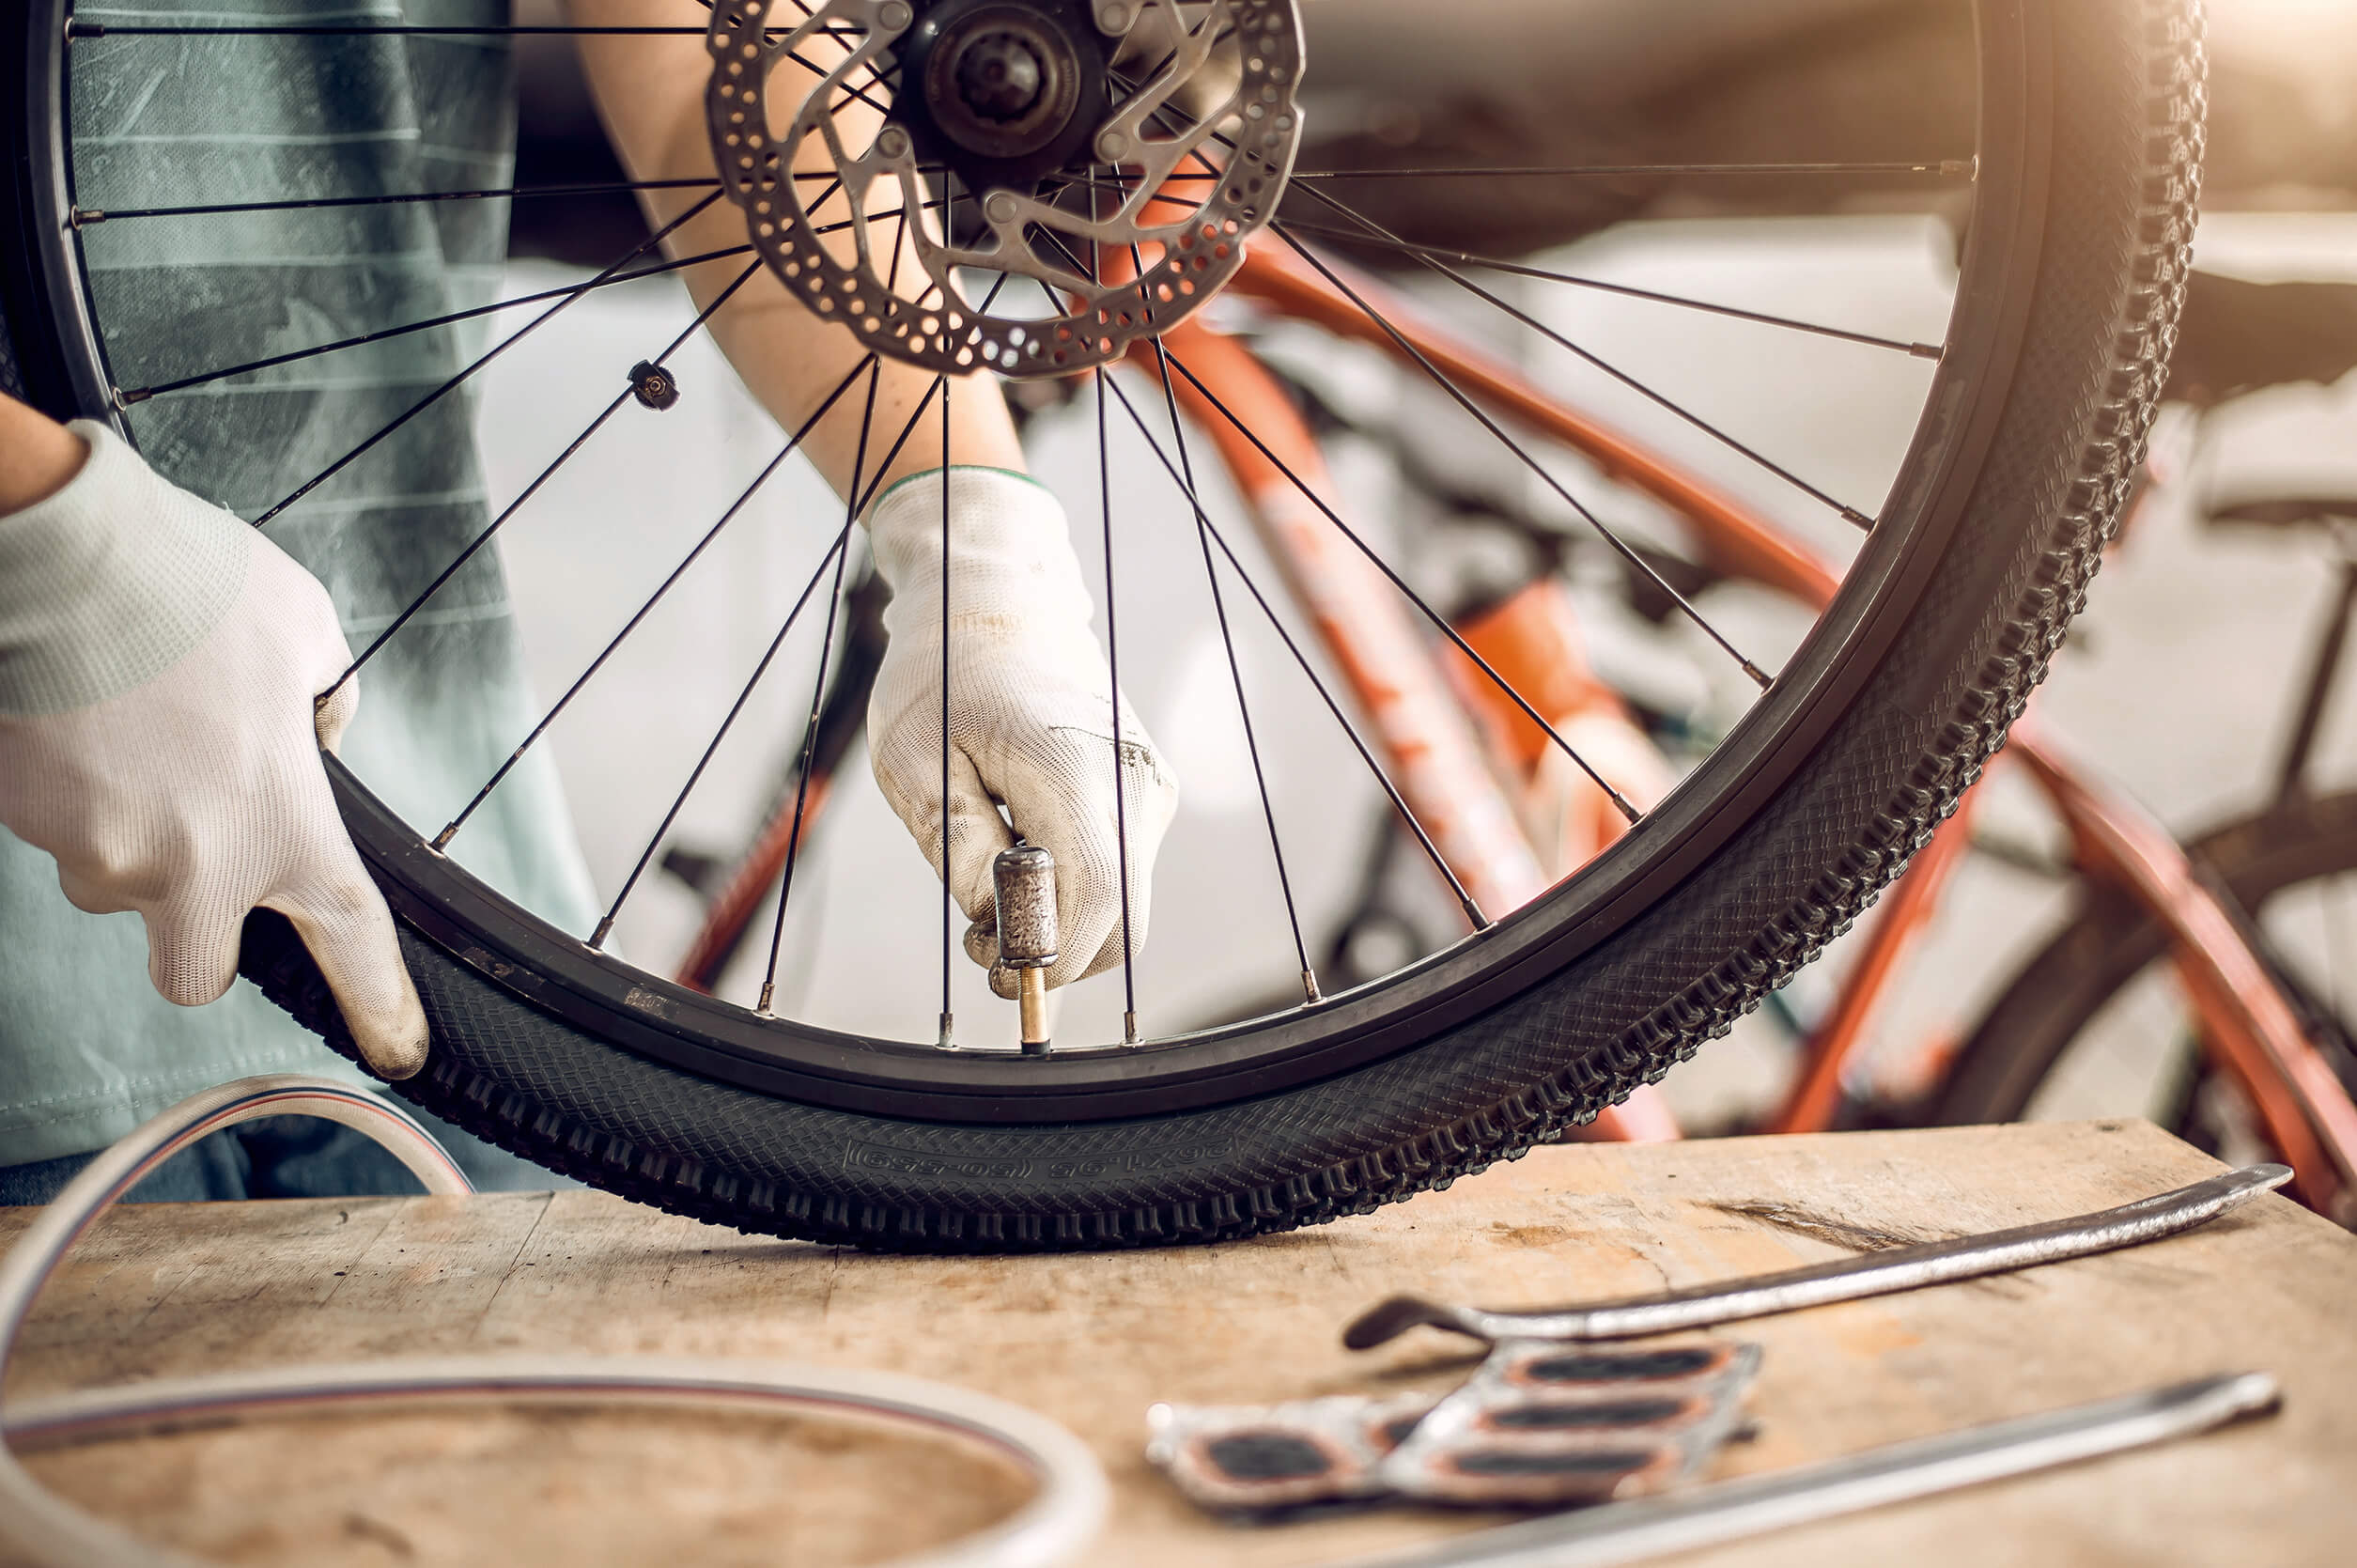
A flat tire usually occurs when you least need it. With the following steps, you can ensure that your bike is ready to ride again quickly and cleanly.
Step 1: Prepare tools and materials.
Prepare everything before you start – this will save you time and nerves.
Tools & Material.
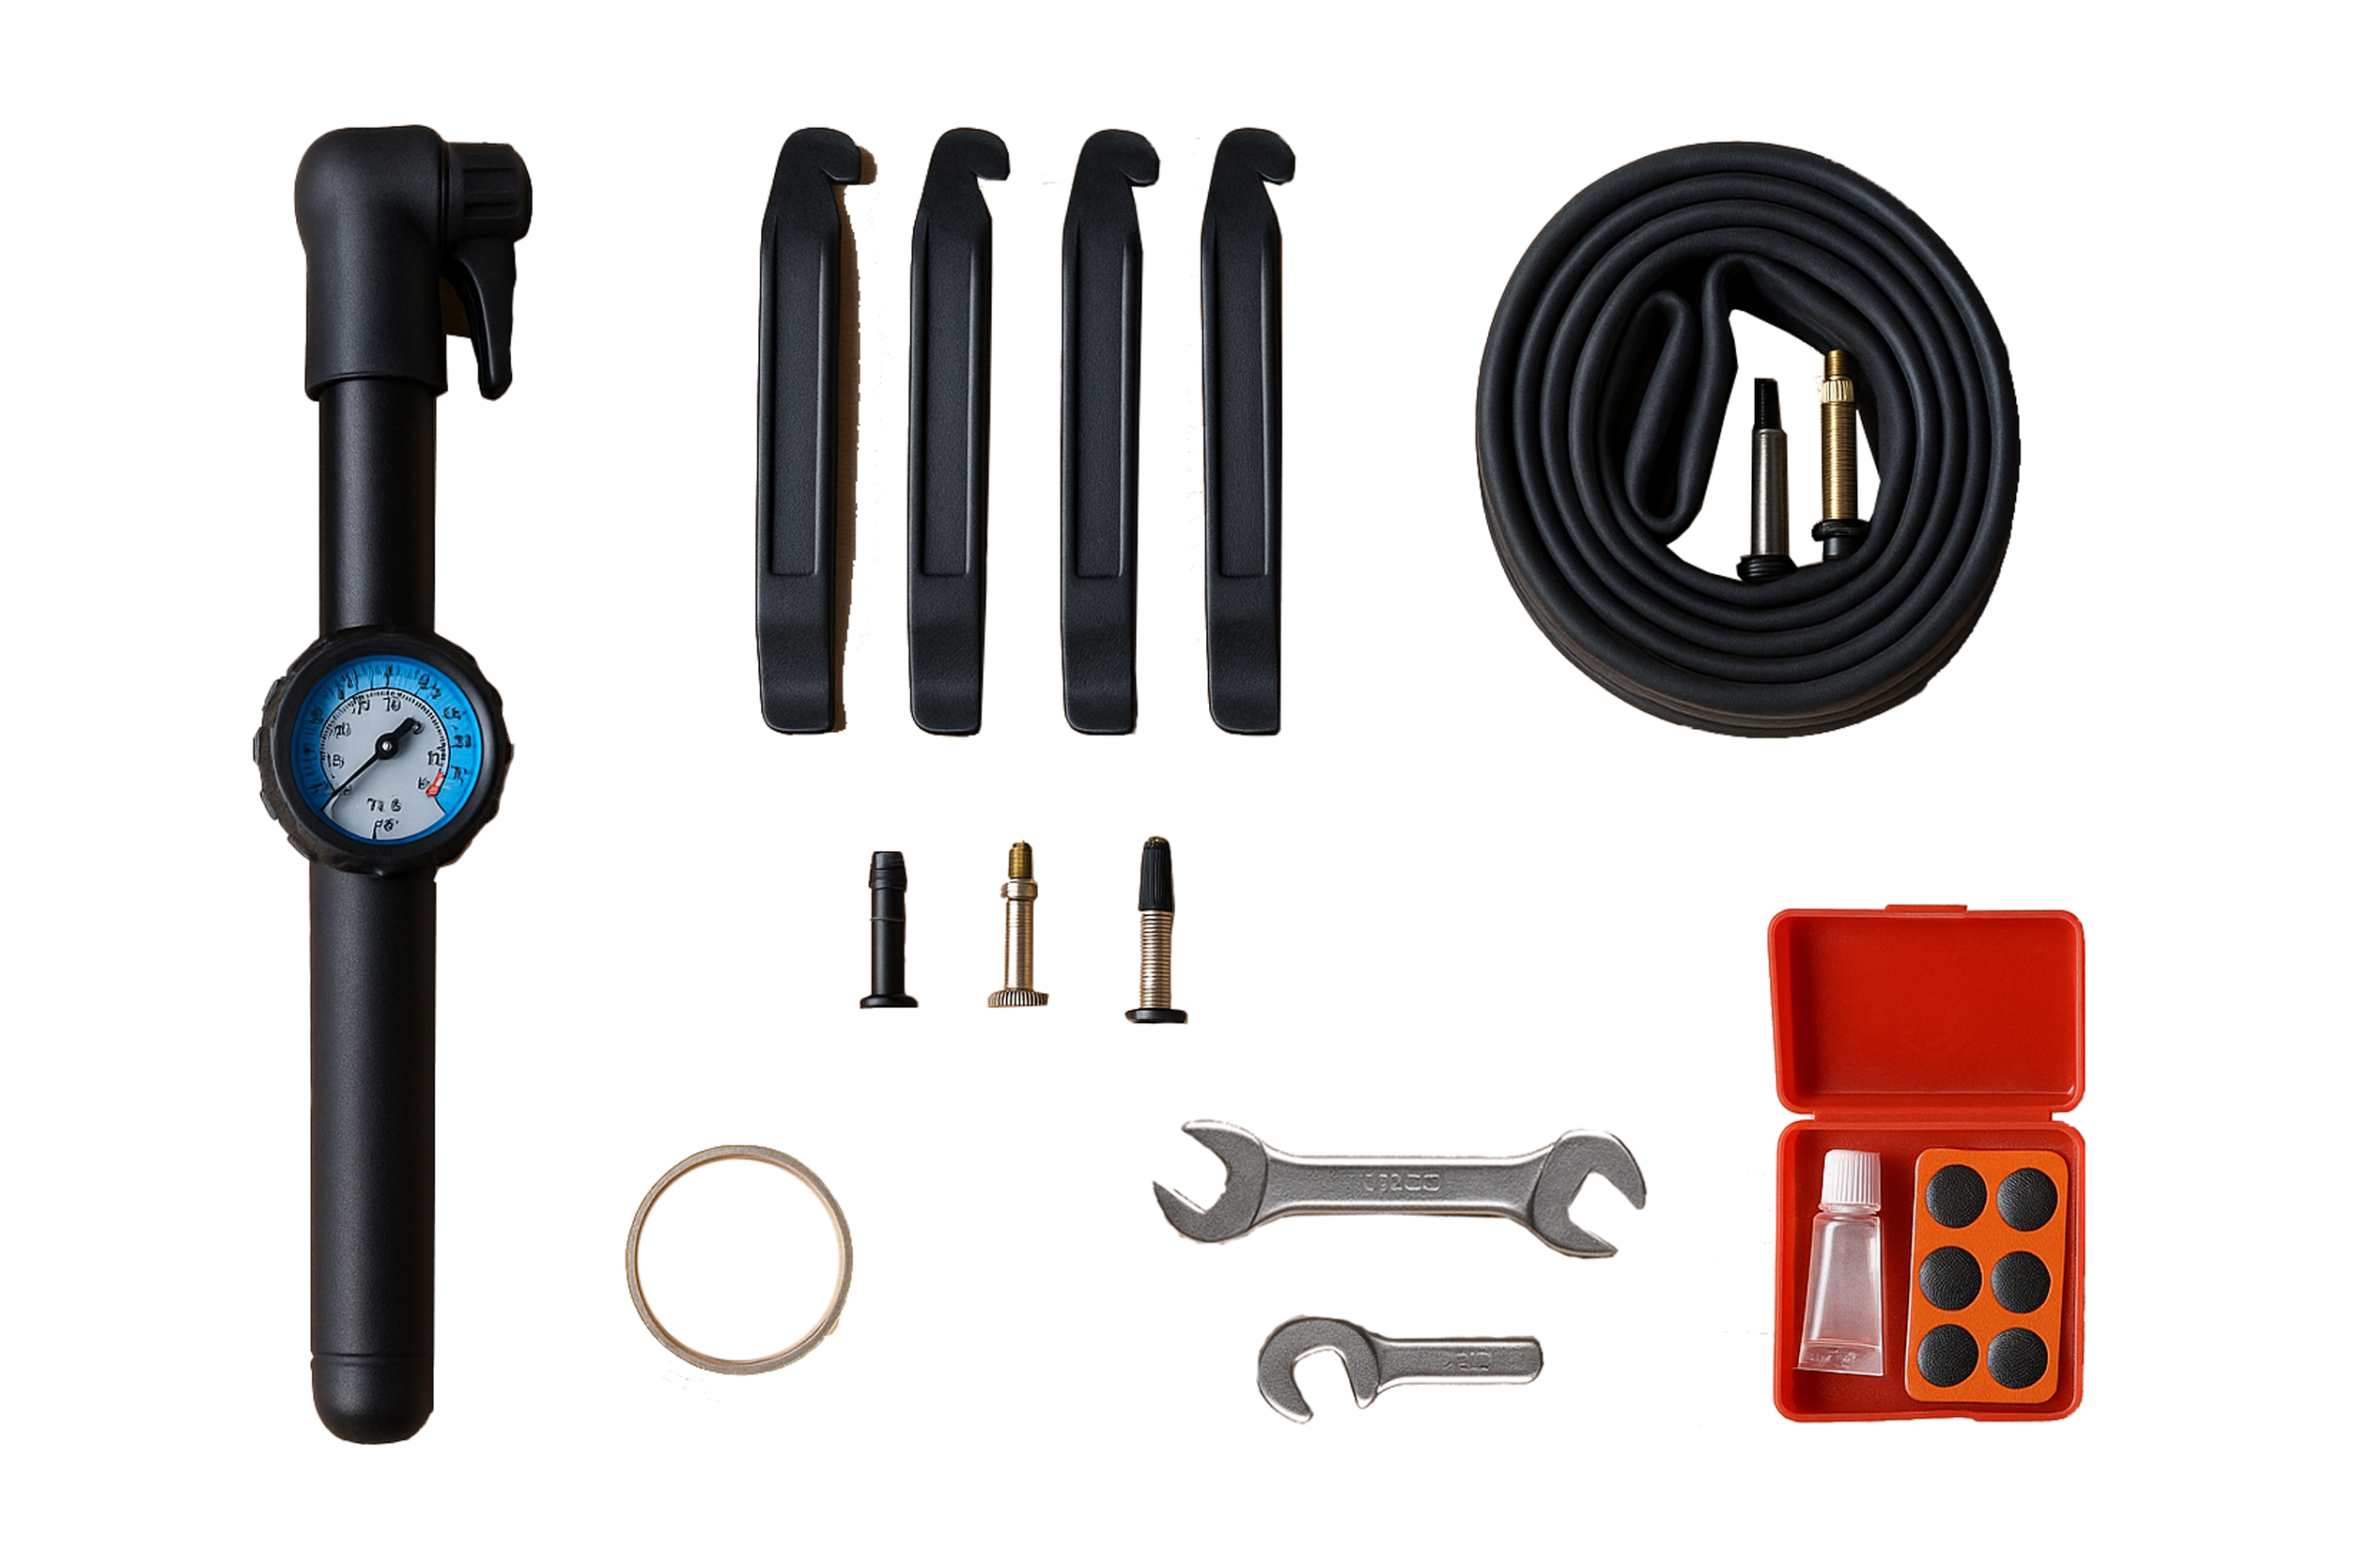
3-4 tire levers: With these you lift the tire from the rim – this prevents scratches on the rim
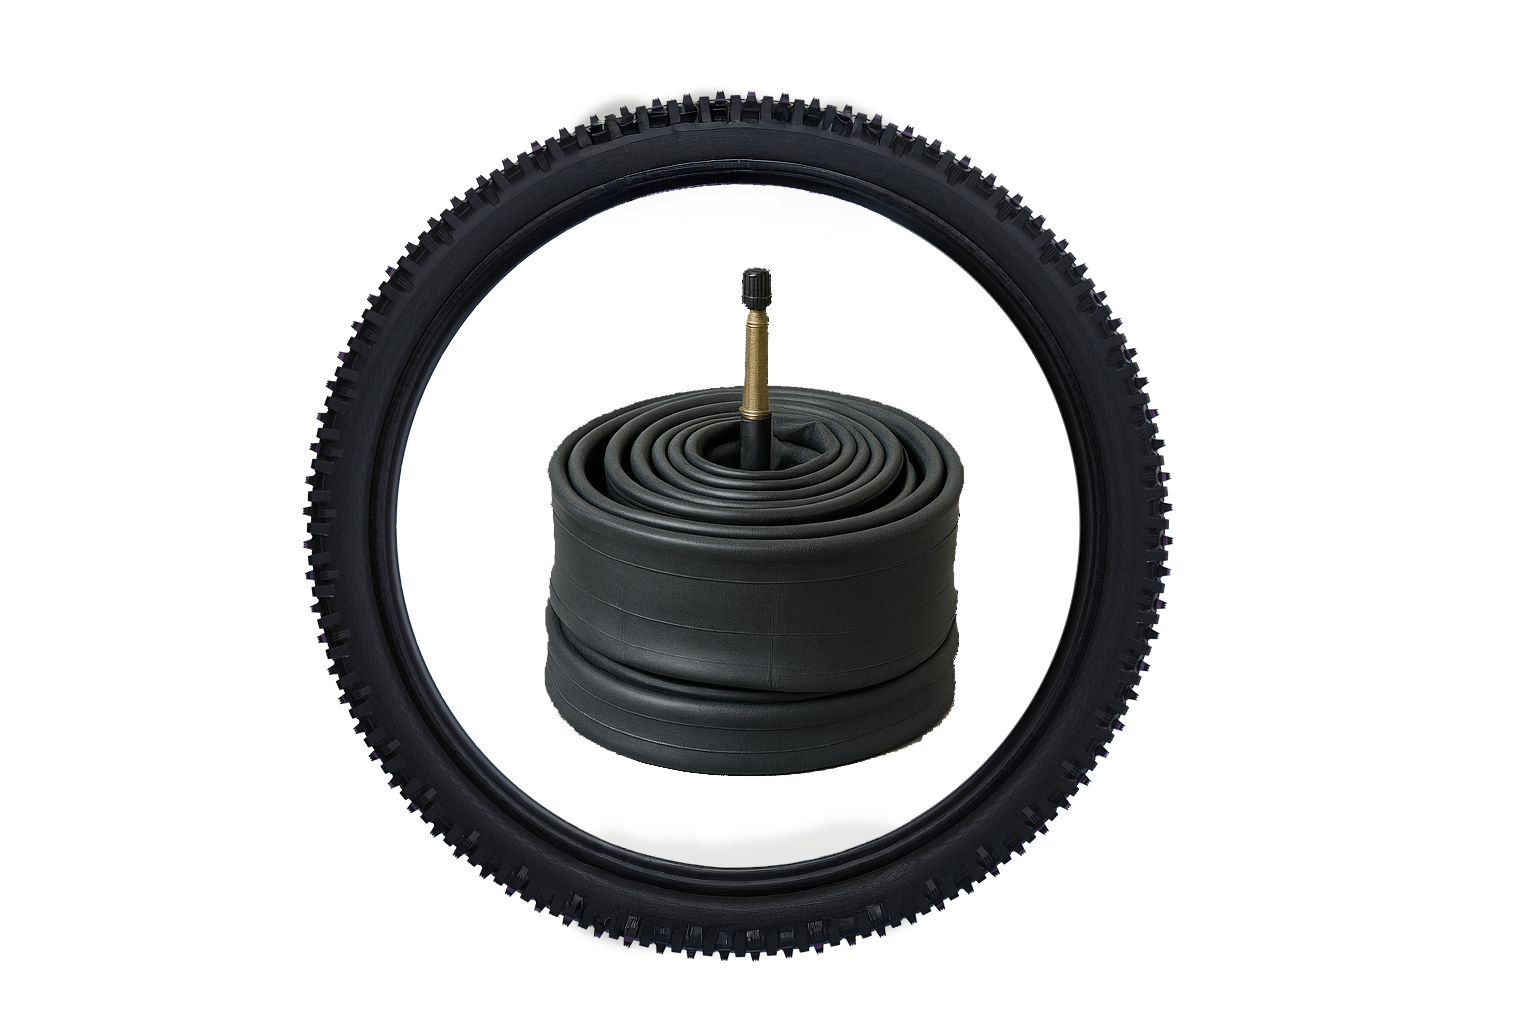
New hose or casing: – Hose with hole or leaking valve – Mantel with cracks, bumps or worn-out profile
Air pump with manometer: For the correct pressure. Pay attention to the appropriate pump head (AV, SV, DV)
Optional: Tweezers, talcum powder (for easier assembly) and a soft cloth
Does the hose or the casing need to be replaced?
Tube.
Visible hole
Valve wobbles
Rubber is brittle
Loss of air
Coat.
Cracks in the side wall
Bump when rolling
The tire no longer has any tread left
The tires can no longer be mounted evenly
Valve and size check.
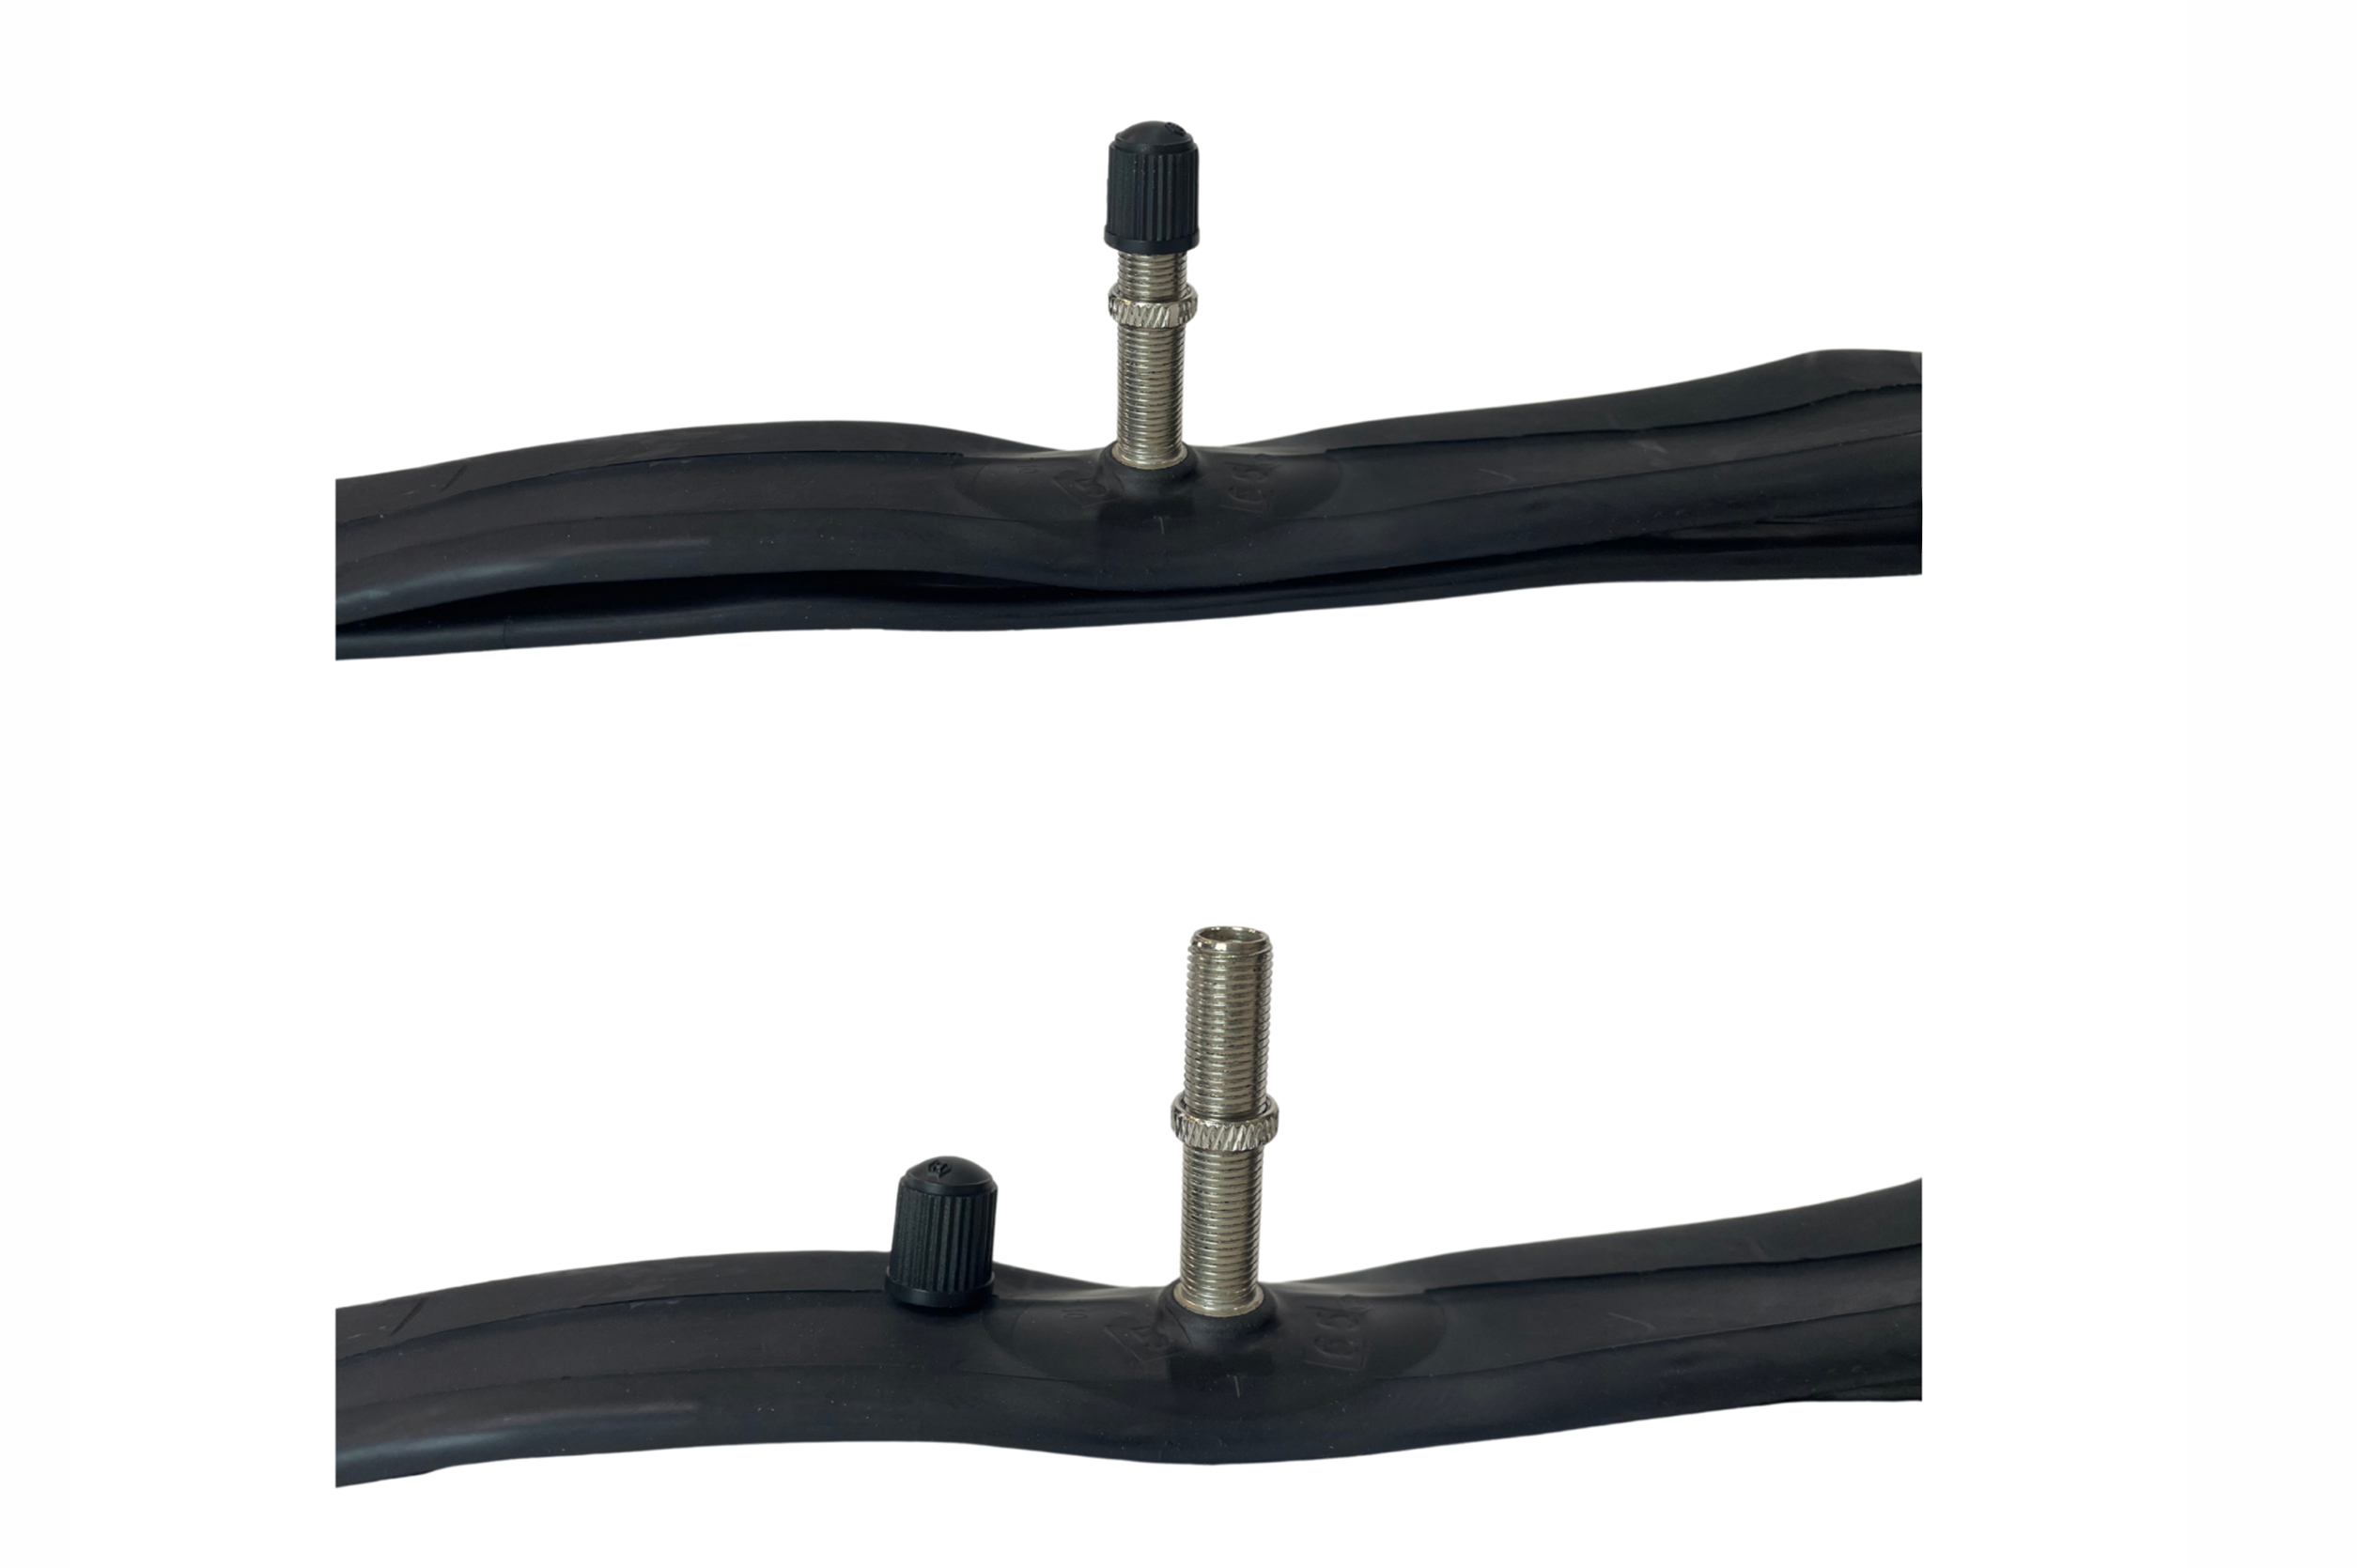
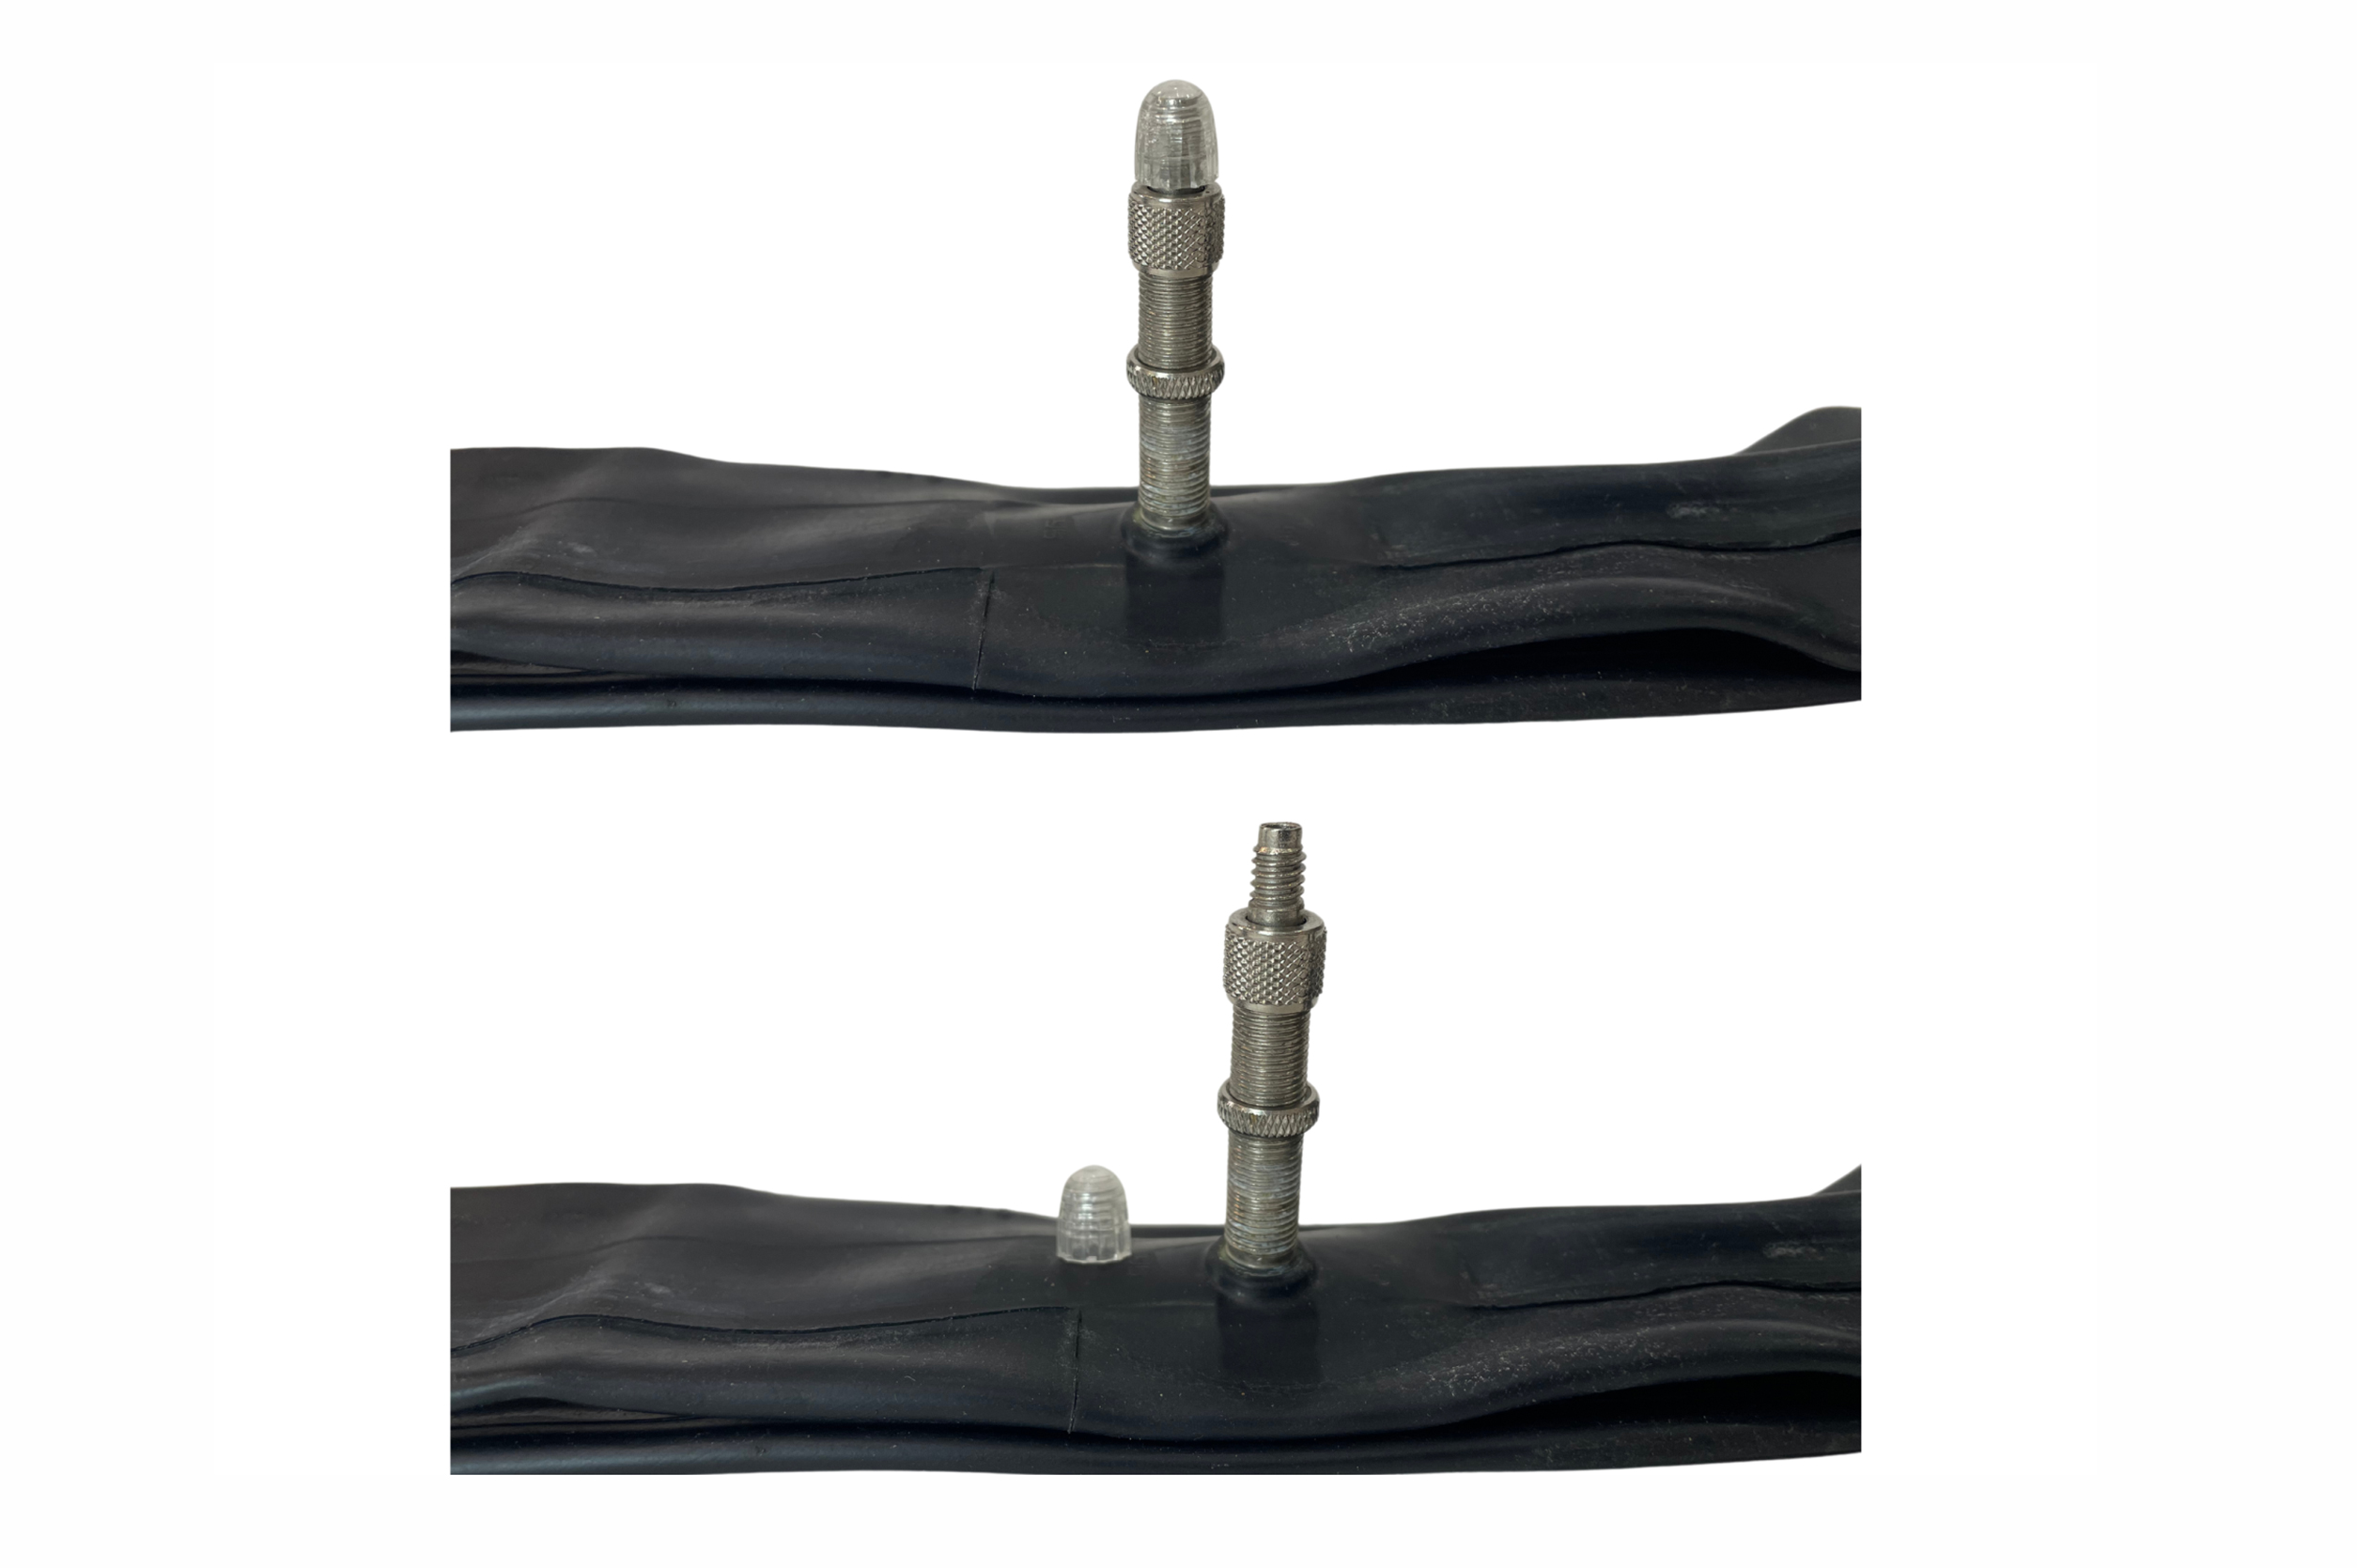
Auto valve (AV), Schrader valve.
The AV is the most common bicycle valve, similar to the tire valve in a car. It is robust and easy to operate. To inflate: Remove the valve cap, install the pump head and pump until the desired pressure is reached. Release air: Insert the pin into the middle. Assembly: Insert the valve through the rim hole and secure it with a nut if necessary. Ideal for mountain and touring bikes, as it can also be used at gas stations.
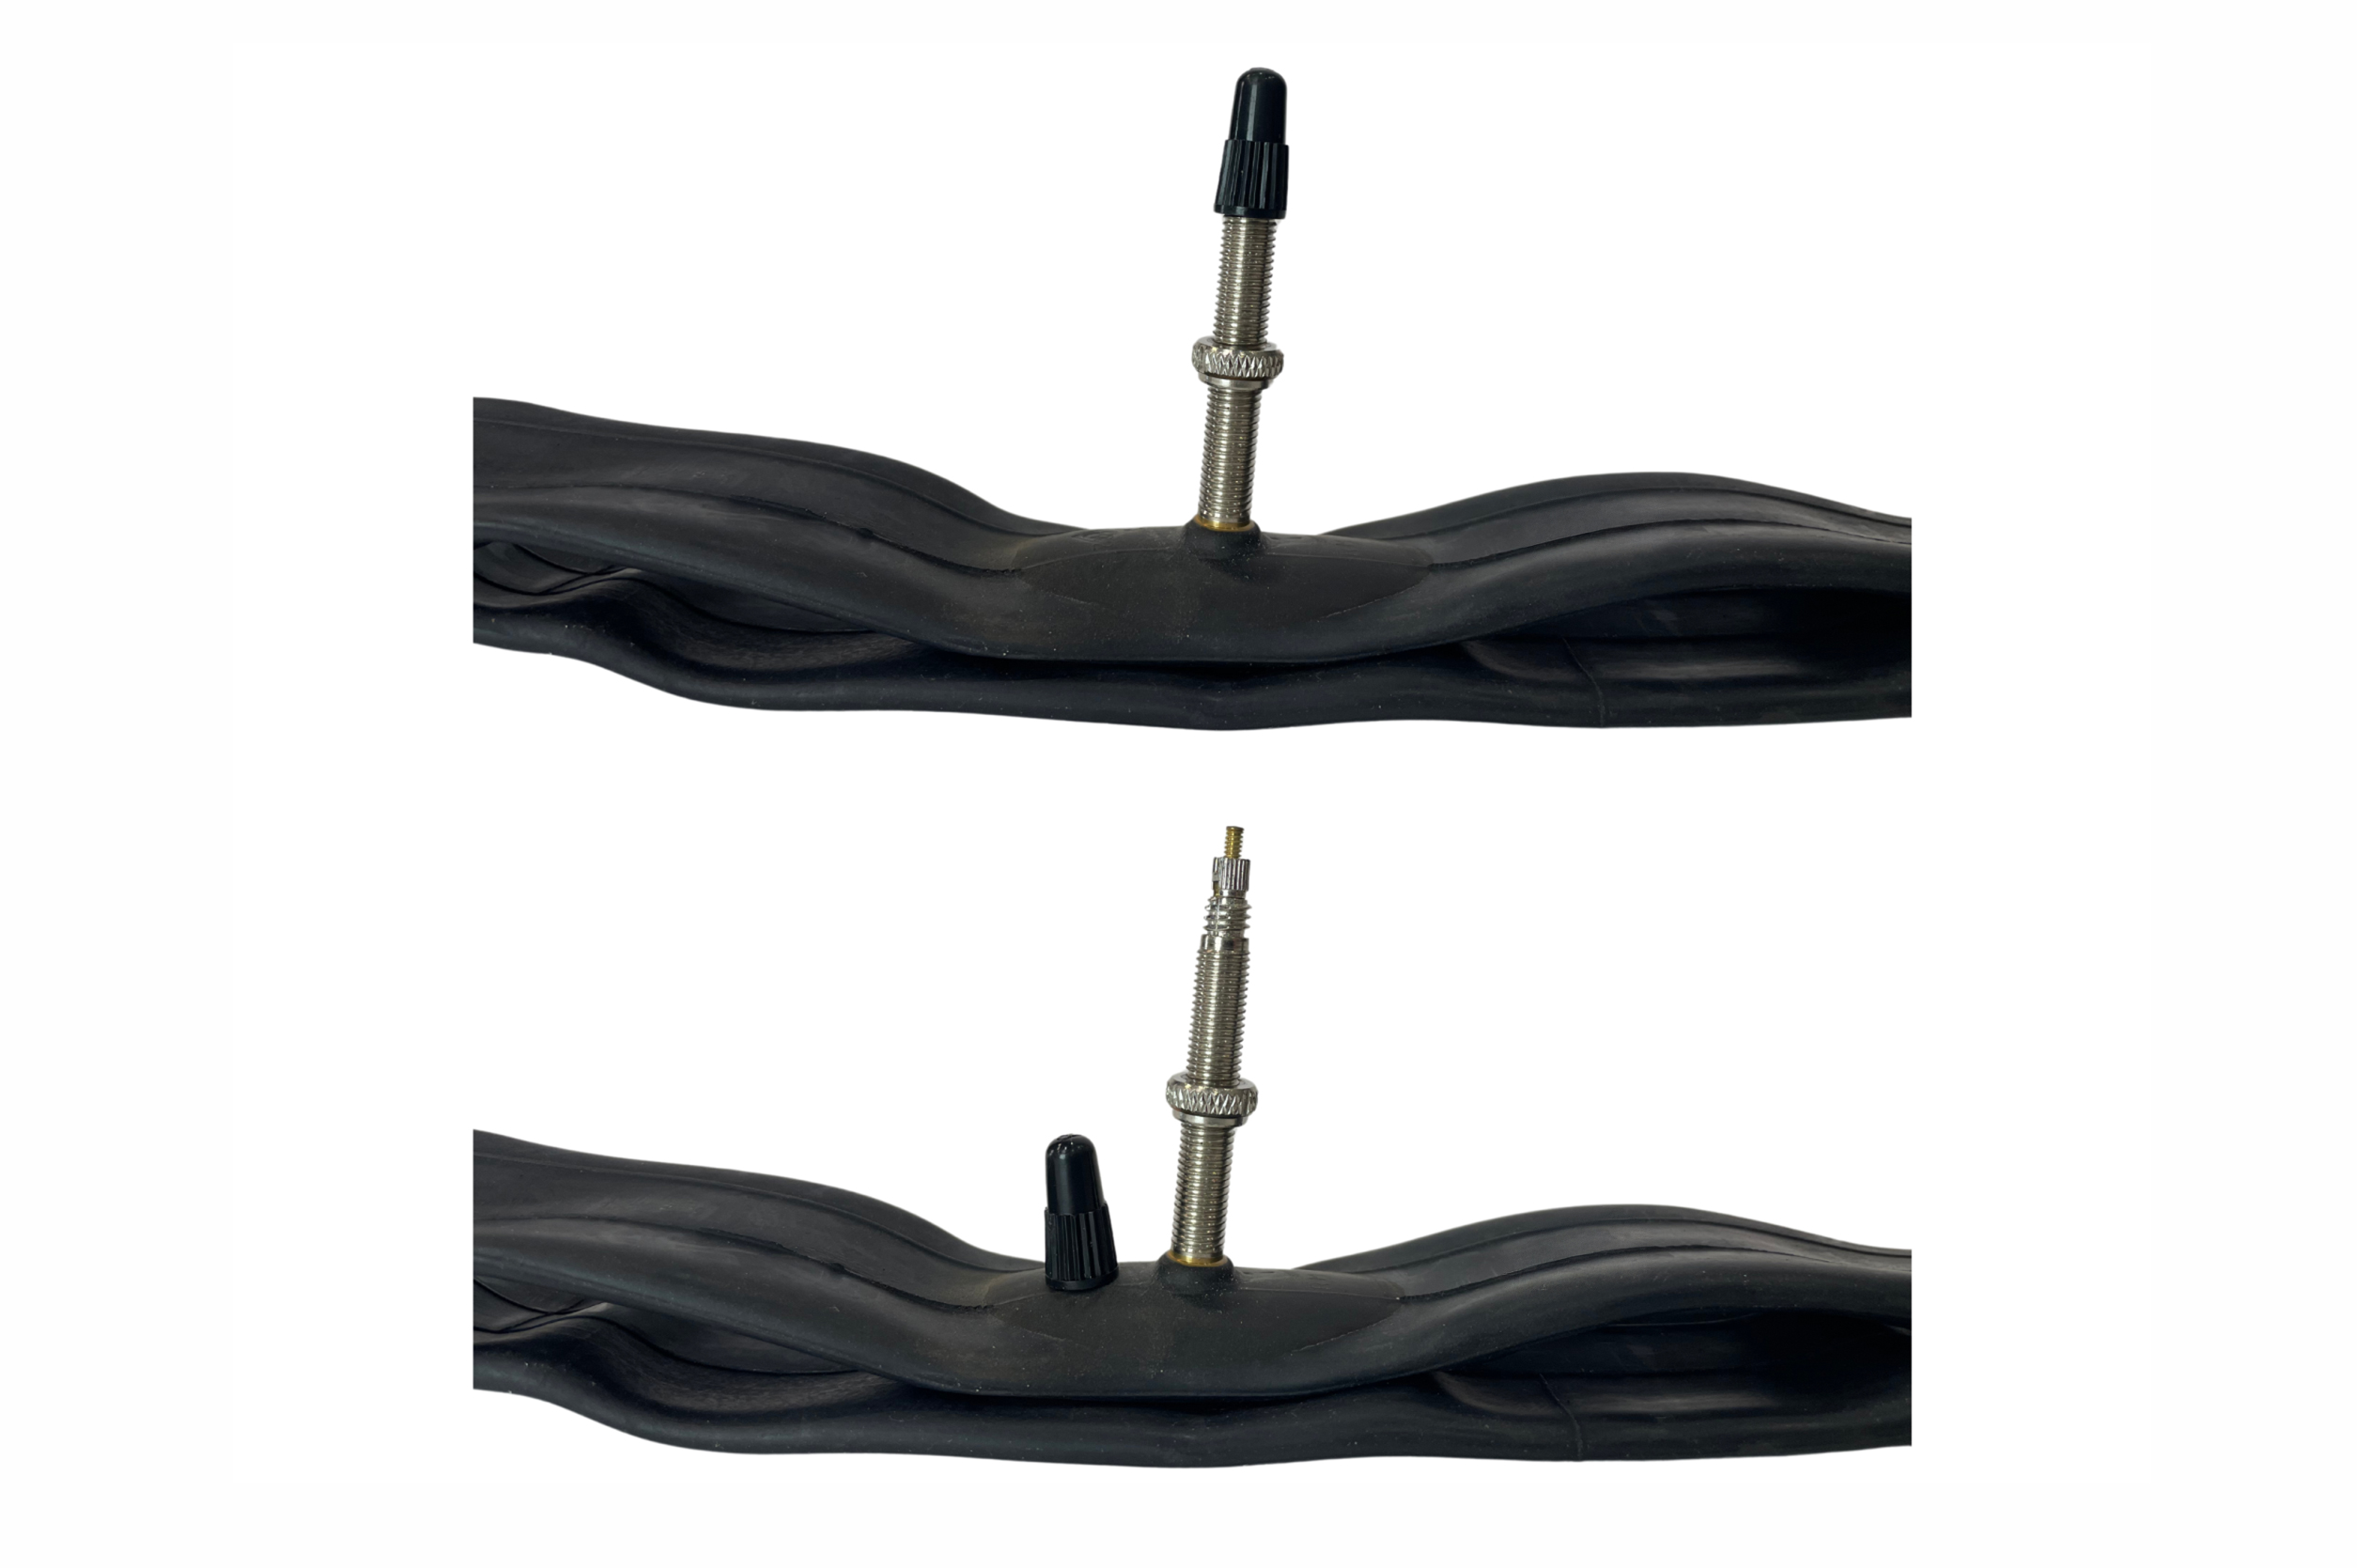
French valve (SV), Presta valve or Sclaverand valve.
The SV is slimmer and lighter than the autocycle valve and is used primarily on racing bicycles. It fits on narrow rims and can withstand high pressure. For inflation: Remove the valve cap, unscrew the nut on the valve stem, install the pump head, pump, re-tighten the nut, and install the cap. Assembly: Insert the valve through the rim hole and secure it with the nut. Ideal for road bikes and gravel bikes, thanks to precise pressure control.
Flash valve (DV), Dunlop valve Older city valve (special head required).
The DV is widely used in Europe and easy to maintain. To inflate: remove the valve cap, attach the pump and pump. To deflate: unscrew the nut on the valve insert. Assembly: unscrew the nut, insert the valve through the rim hole, insert the valve core. Robust and ideal for everyday use.
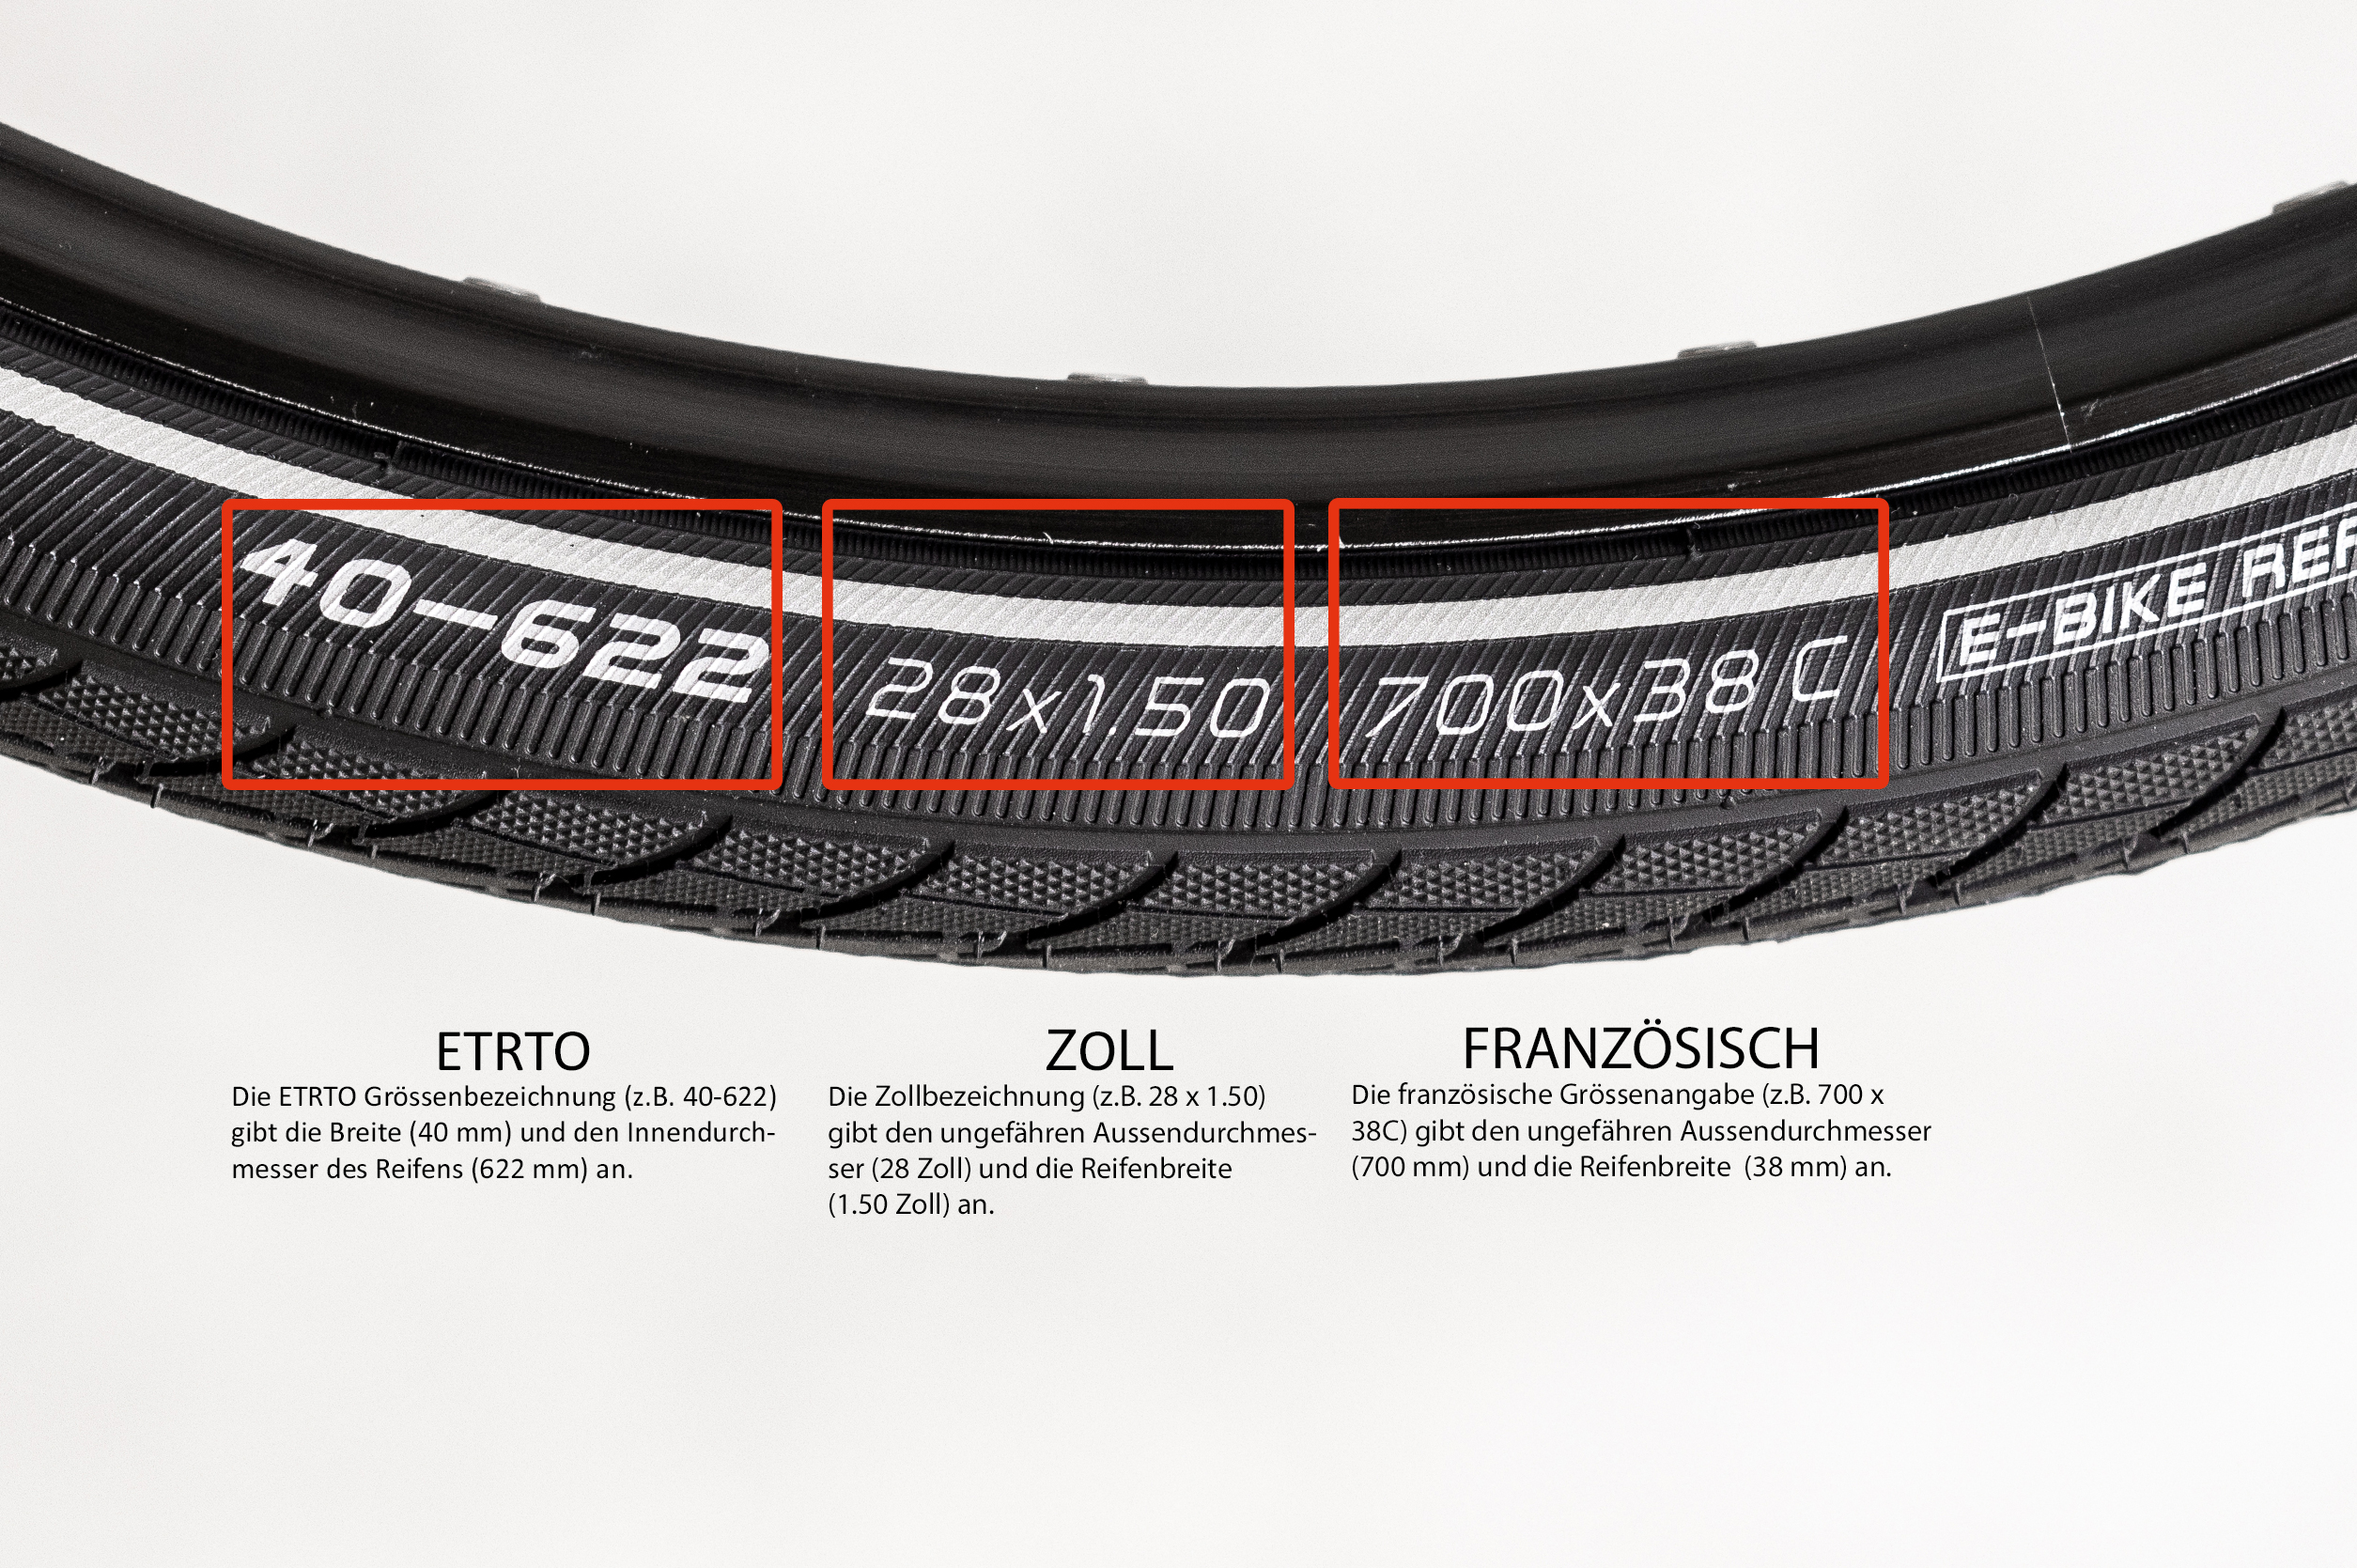
How do you read the ETRTO indication?
A typical example: 40-622
40 = Tire width in millimeters 622 = Rim diameter in millimeters
This means: This tire is 40 mm wide and fits on a rim with a diameter of 622 mm (approximately 28 inches).
Step 2: Check the tire cord.
Check the tire cord before changing the tire. Cracks or misalignments can expose the spoke holes and damage the tire – replace it if necessary.
Step 3: Change the front wheel.
1. Remove the wheel Open the brake, release the quick-release nut, turn the axle counter-clockwise, and remove the front wheel.
2.Air out & remove tires Open the valve, let the air escape completely. Attach the tire lifter opposite the valve and lift the tire from the rim.
3. Remove the hose Carefully pull out the hose and check the rim and the inner side of the casing for foreign objects.
4. Insert the new hose Lightly prime the hose, paying attention to the direction of flow. Insert the valve straight into the rim opening and press the sleeve back on by hand.
5. Inflation and control Inflate tires evenly, check seat (tire line must be uniformly even throughout), align valve perpendicular
6. Install the wheel Tighten the axle, close the brake
Fix the problems.
Problem
Why?
Fixing
The tire is shaking
Mantel sits unevenly
Lower pressure to ~1 bar, tighten the jacket all around, check the control line
Brake is wearing on the tire
The wheel is not positioned correctly / The saddle is minimally crooked
Reinstall and fix the wheel; with a disc: loosen the seat, pull the lever, tighten the seat
Knocking when inflating
The hose is stuck
Lower the pressure, release the sleeve at the point, fit the hose tightly, slowly inflate
Step 4: Change the rear wheel.
The procedure for the rear wheel is almost identical – however, it involves the chain and the shifting mechanism.
Preparation Switch to the smallest gear, set the shift lever to „OFF“, and open the brake
Replacing the hose Unscrew the air hose, remove the cover and replace the tube as with the front wheel.
Installation: Place the chain on the smallest sprocket, pull the shifter slightly backward, tighten the axle, and check the seat of the wheel and the brake
Fix the problems.
Problem
Why?
Fixing
The chain is located next to the pinion
Chain slips during insertion
Remove the wheel, place the chain on the smallest sprocket, and reinstall it.
The tire is shaking
Mantel sits unevenly
Lower pressure to ~1 bar, tighten the jacket all around, check the control line
Brake is wearing on the tire
The wheel is not positioned correctly / The saddle is minimally crooked
Reinstall and fix the wheel; with a disc: loosen the seat, pull the lever, tighten the seat
Knocking when inflating
Tube pinched
Lower pressure, open the sleeve at the point, place the hose clean, slowly inflate
Choosing the right tires for your motorcycle is crucial for safety, handling, and driving pleasure. A tool that is often underestimated in this process is the ETRTO table. ETRTO stands for European Tyre and Rim Technical Organisation and defines standard sizes for tires and rims to ensure their compatibility and safety.
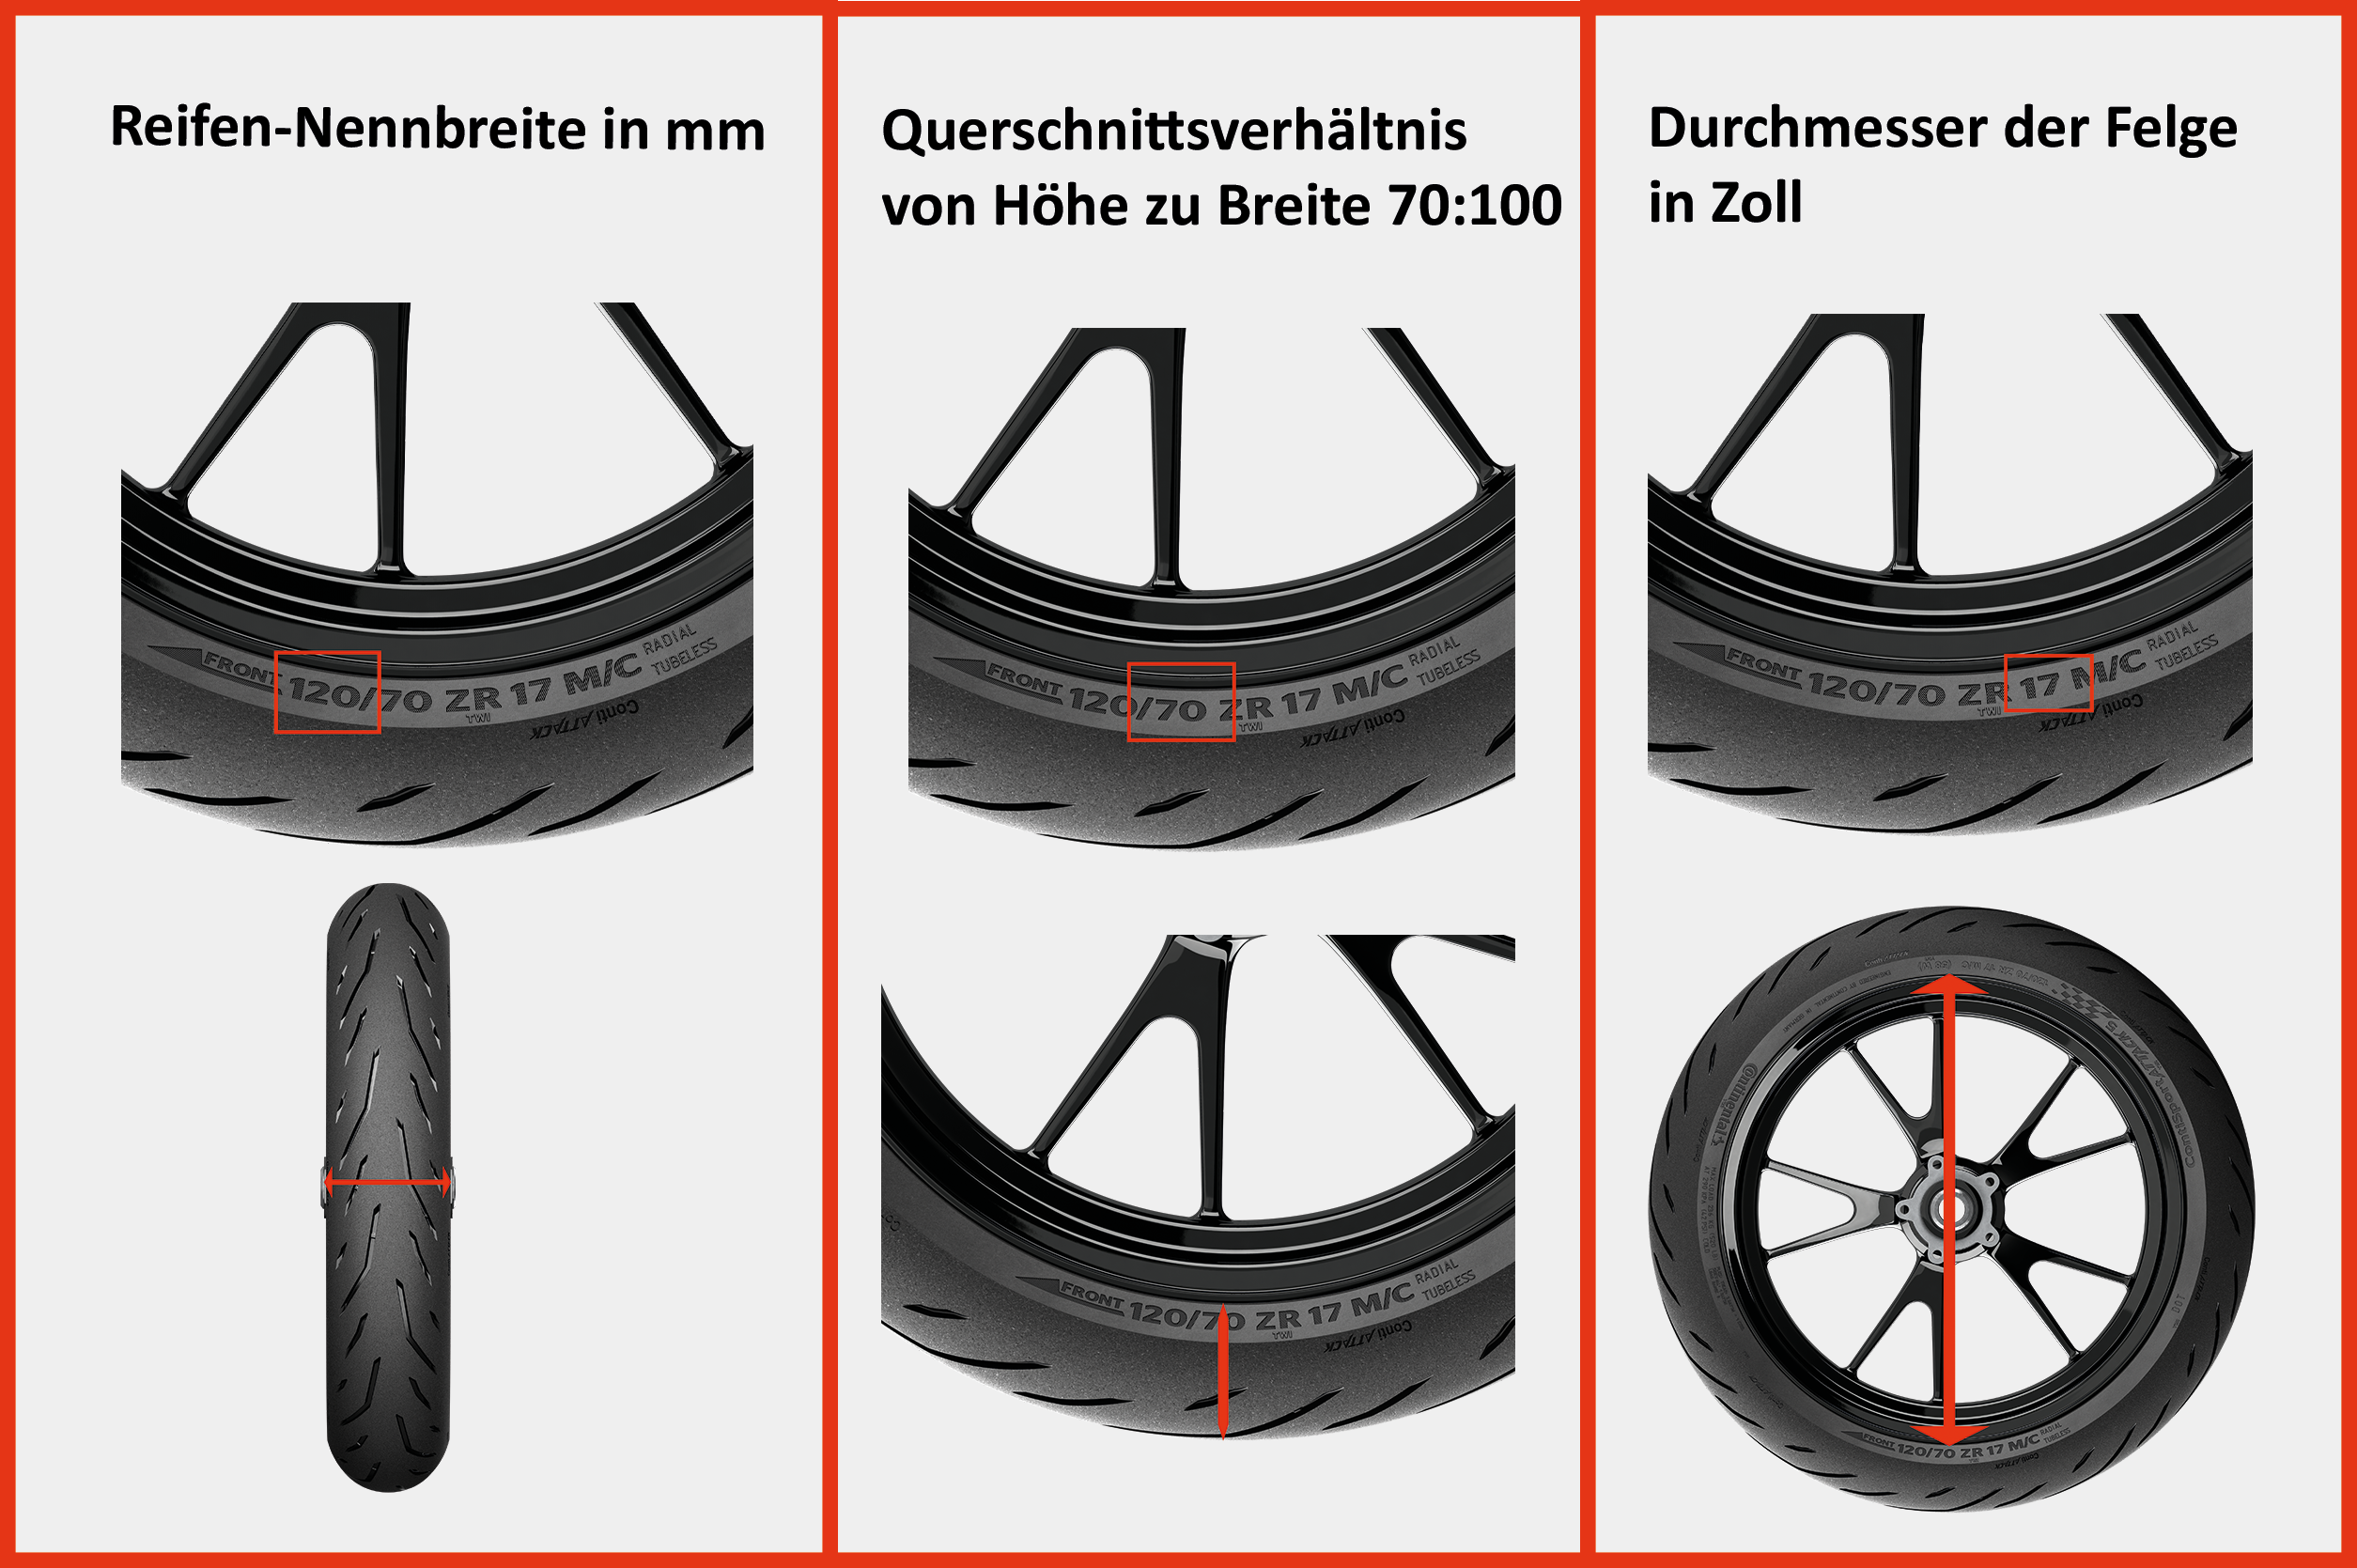
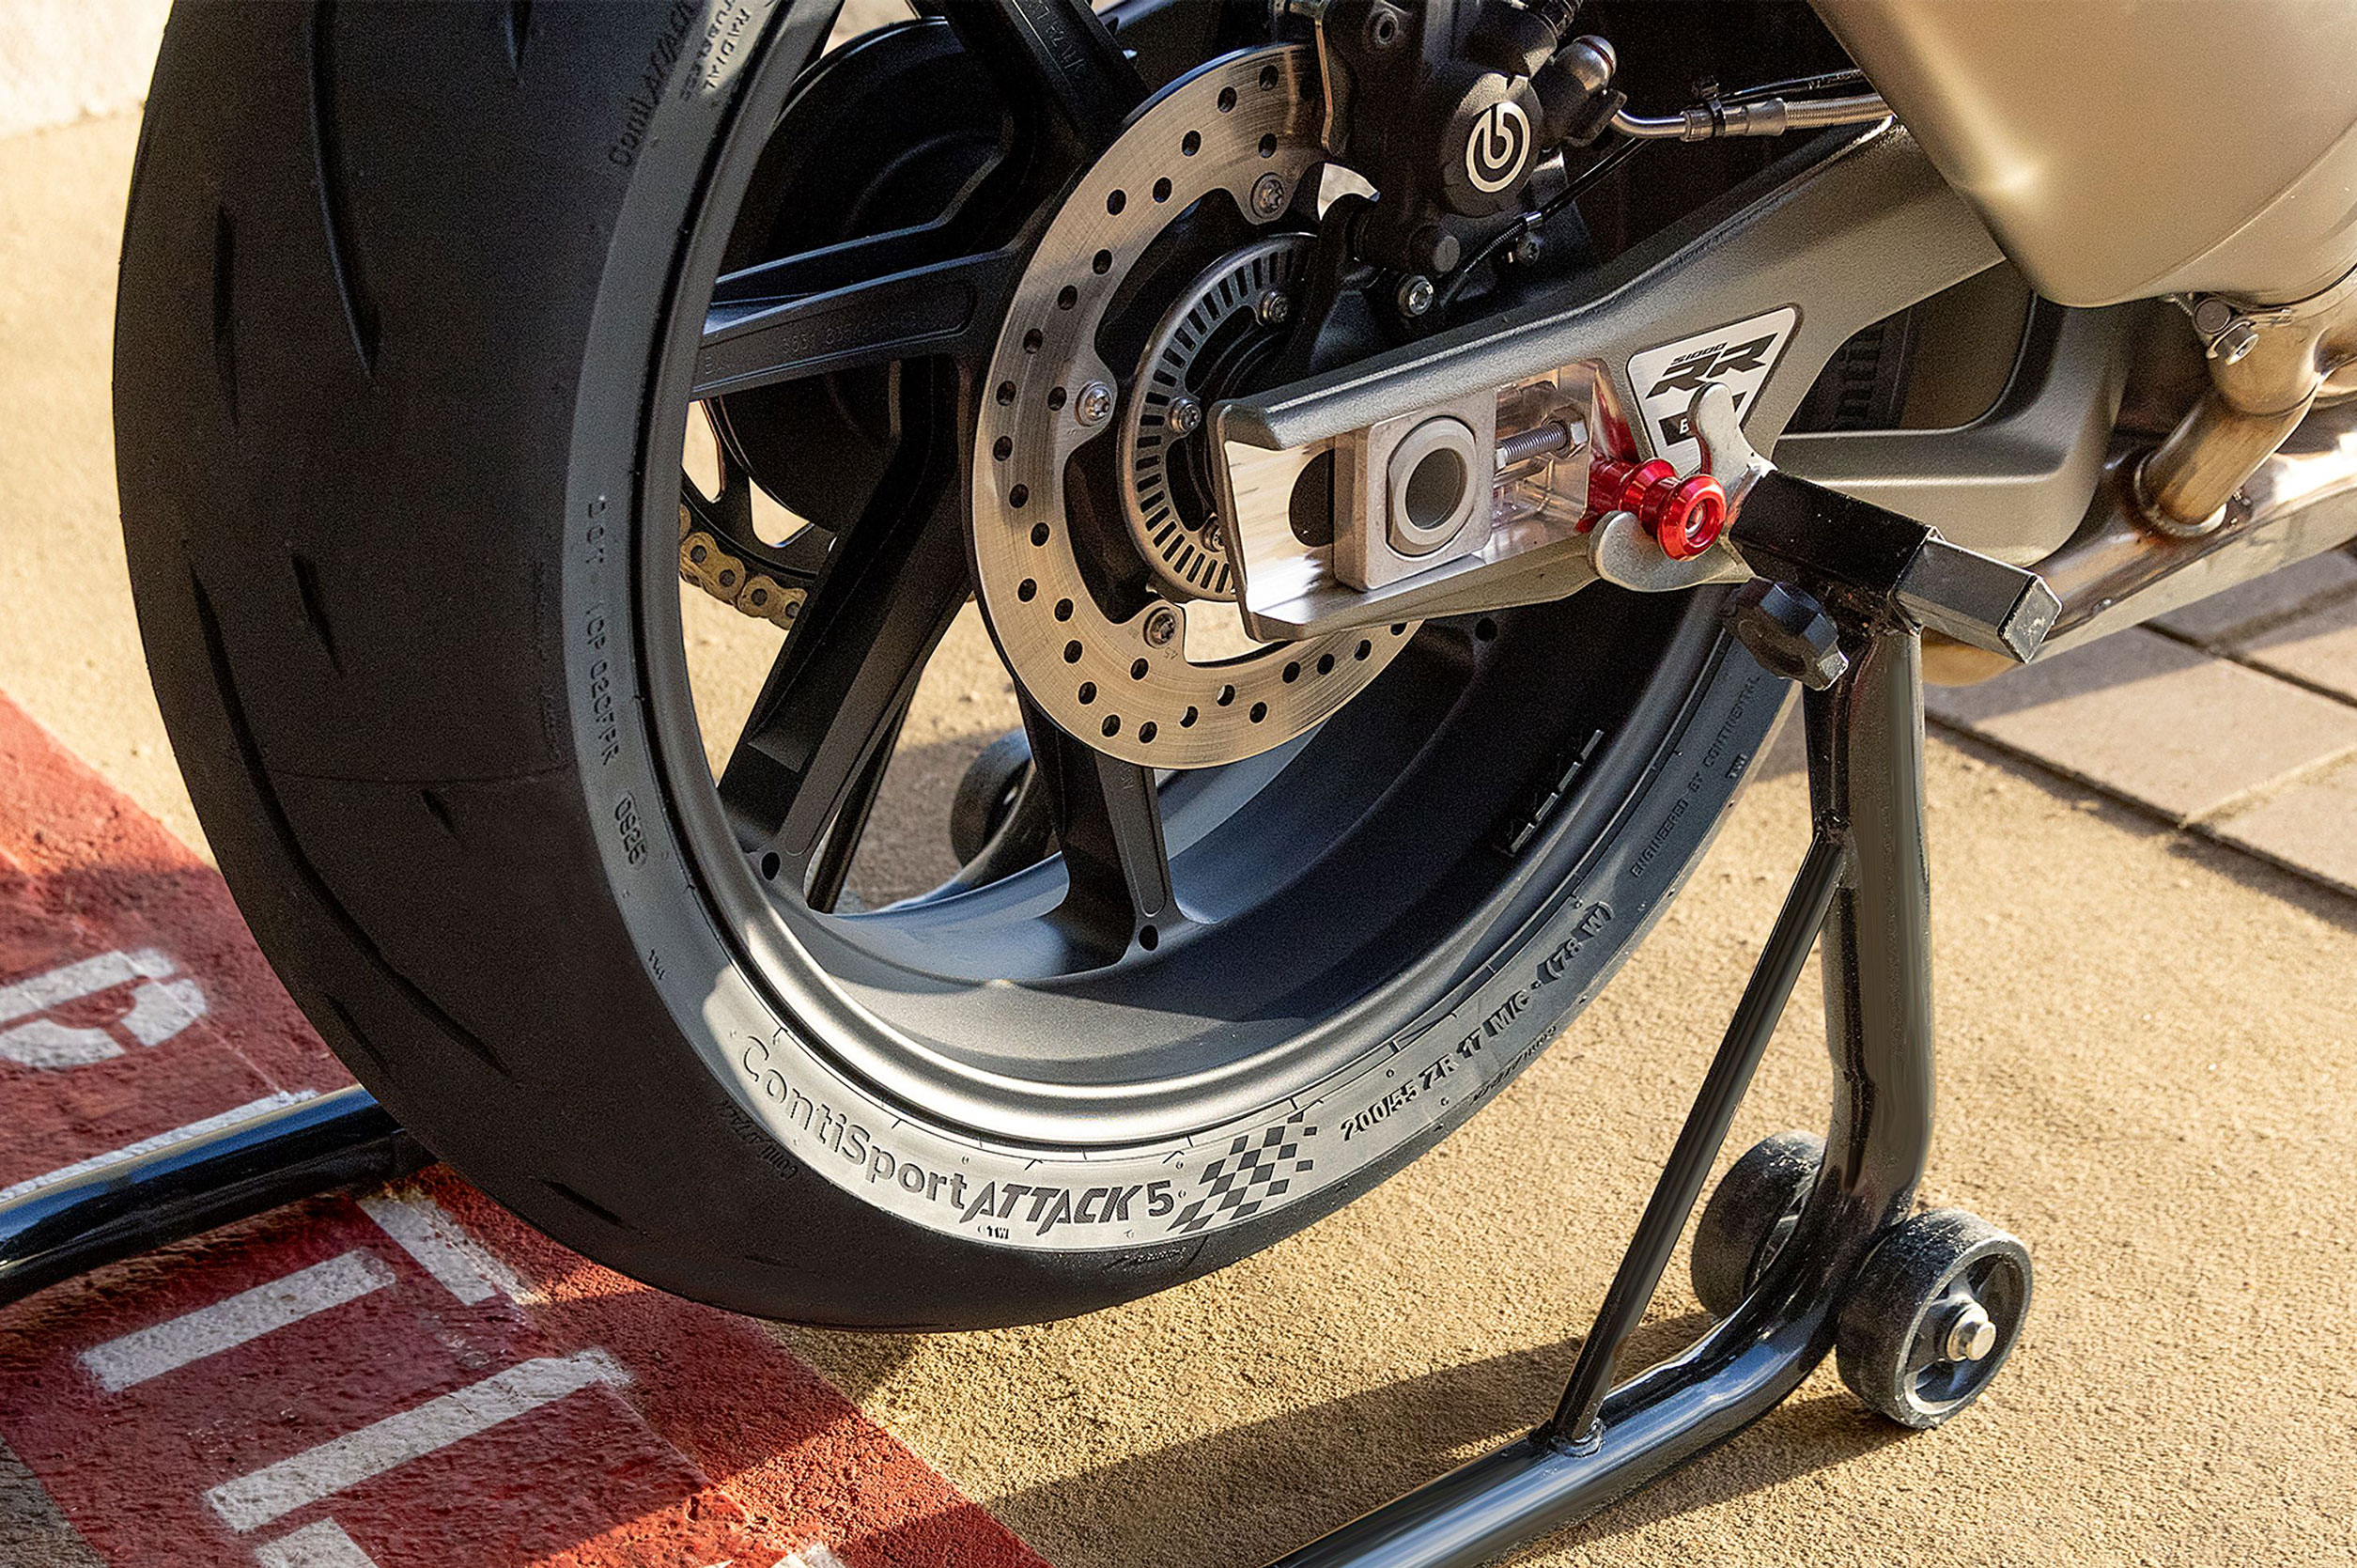
A tire labeled 120/70-17 has the following characteristics:
Width: 120 mm
Section: % 70 wide
Rim diameter: 17 inches
This detailed information prevents errors in purchase and ensures that tires can be installed correctly technically.
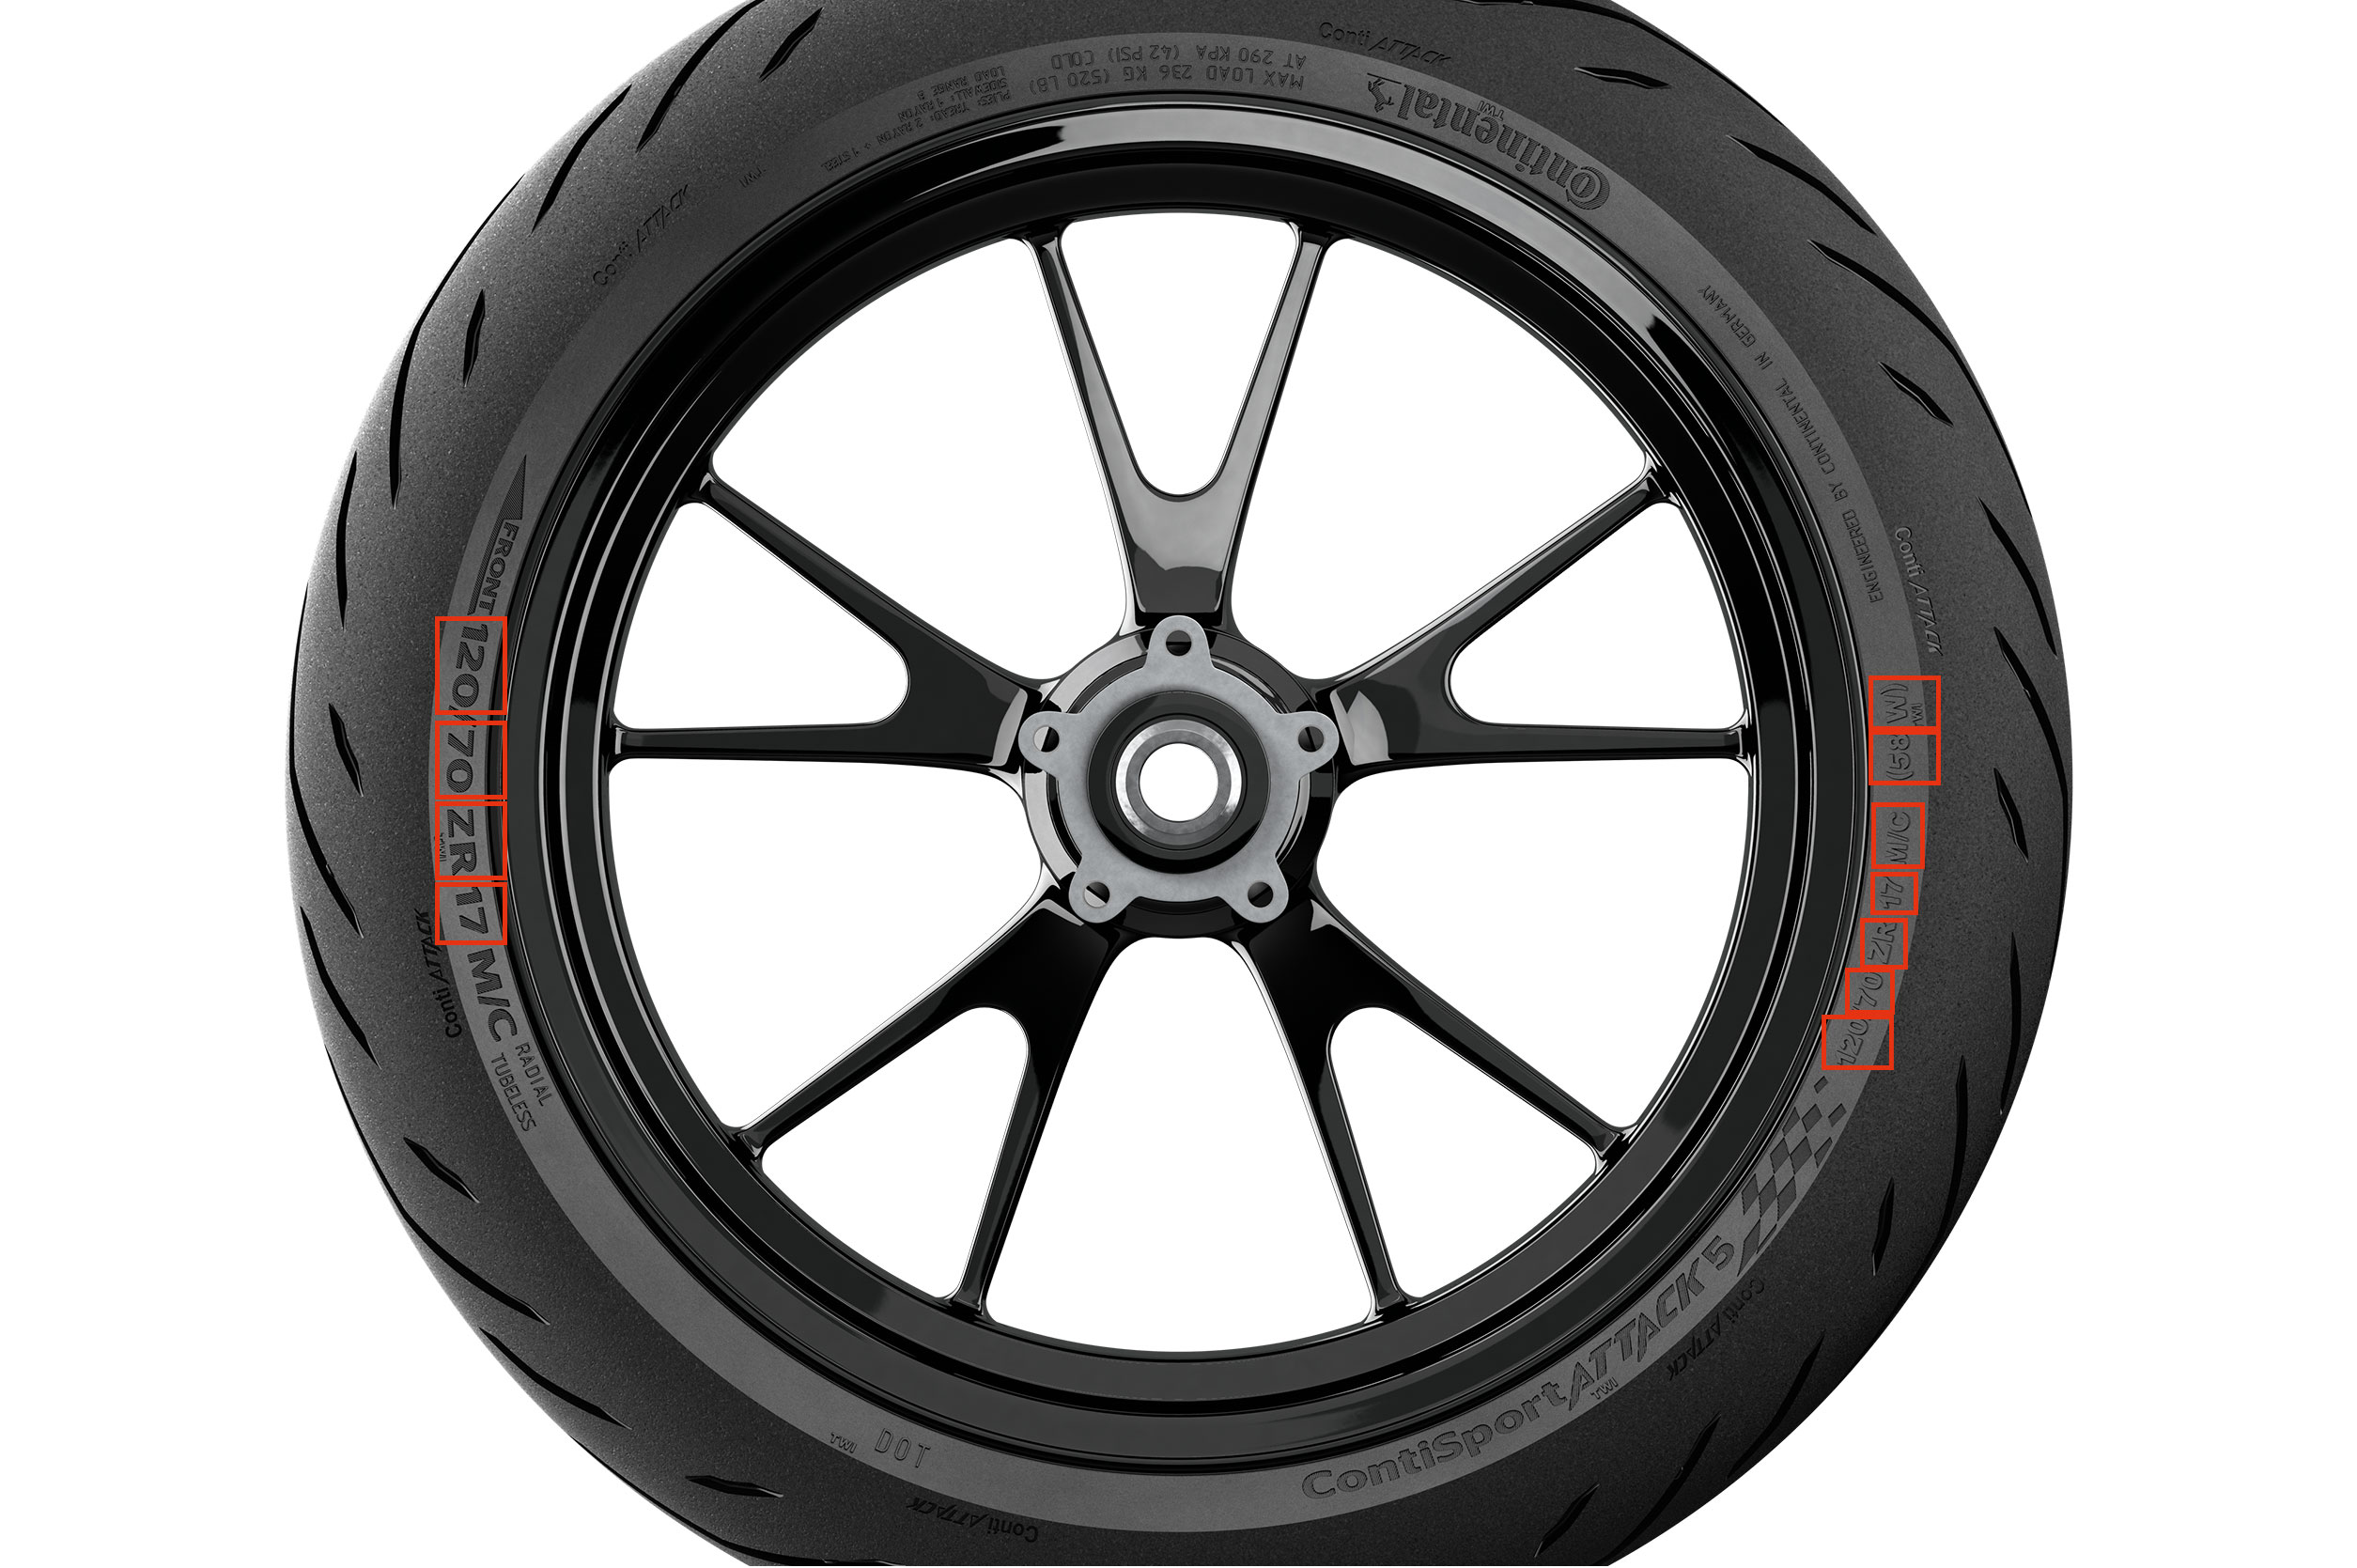
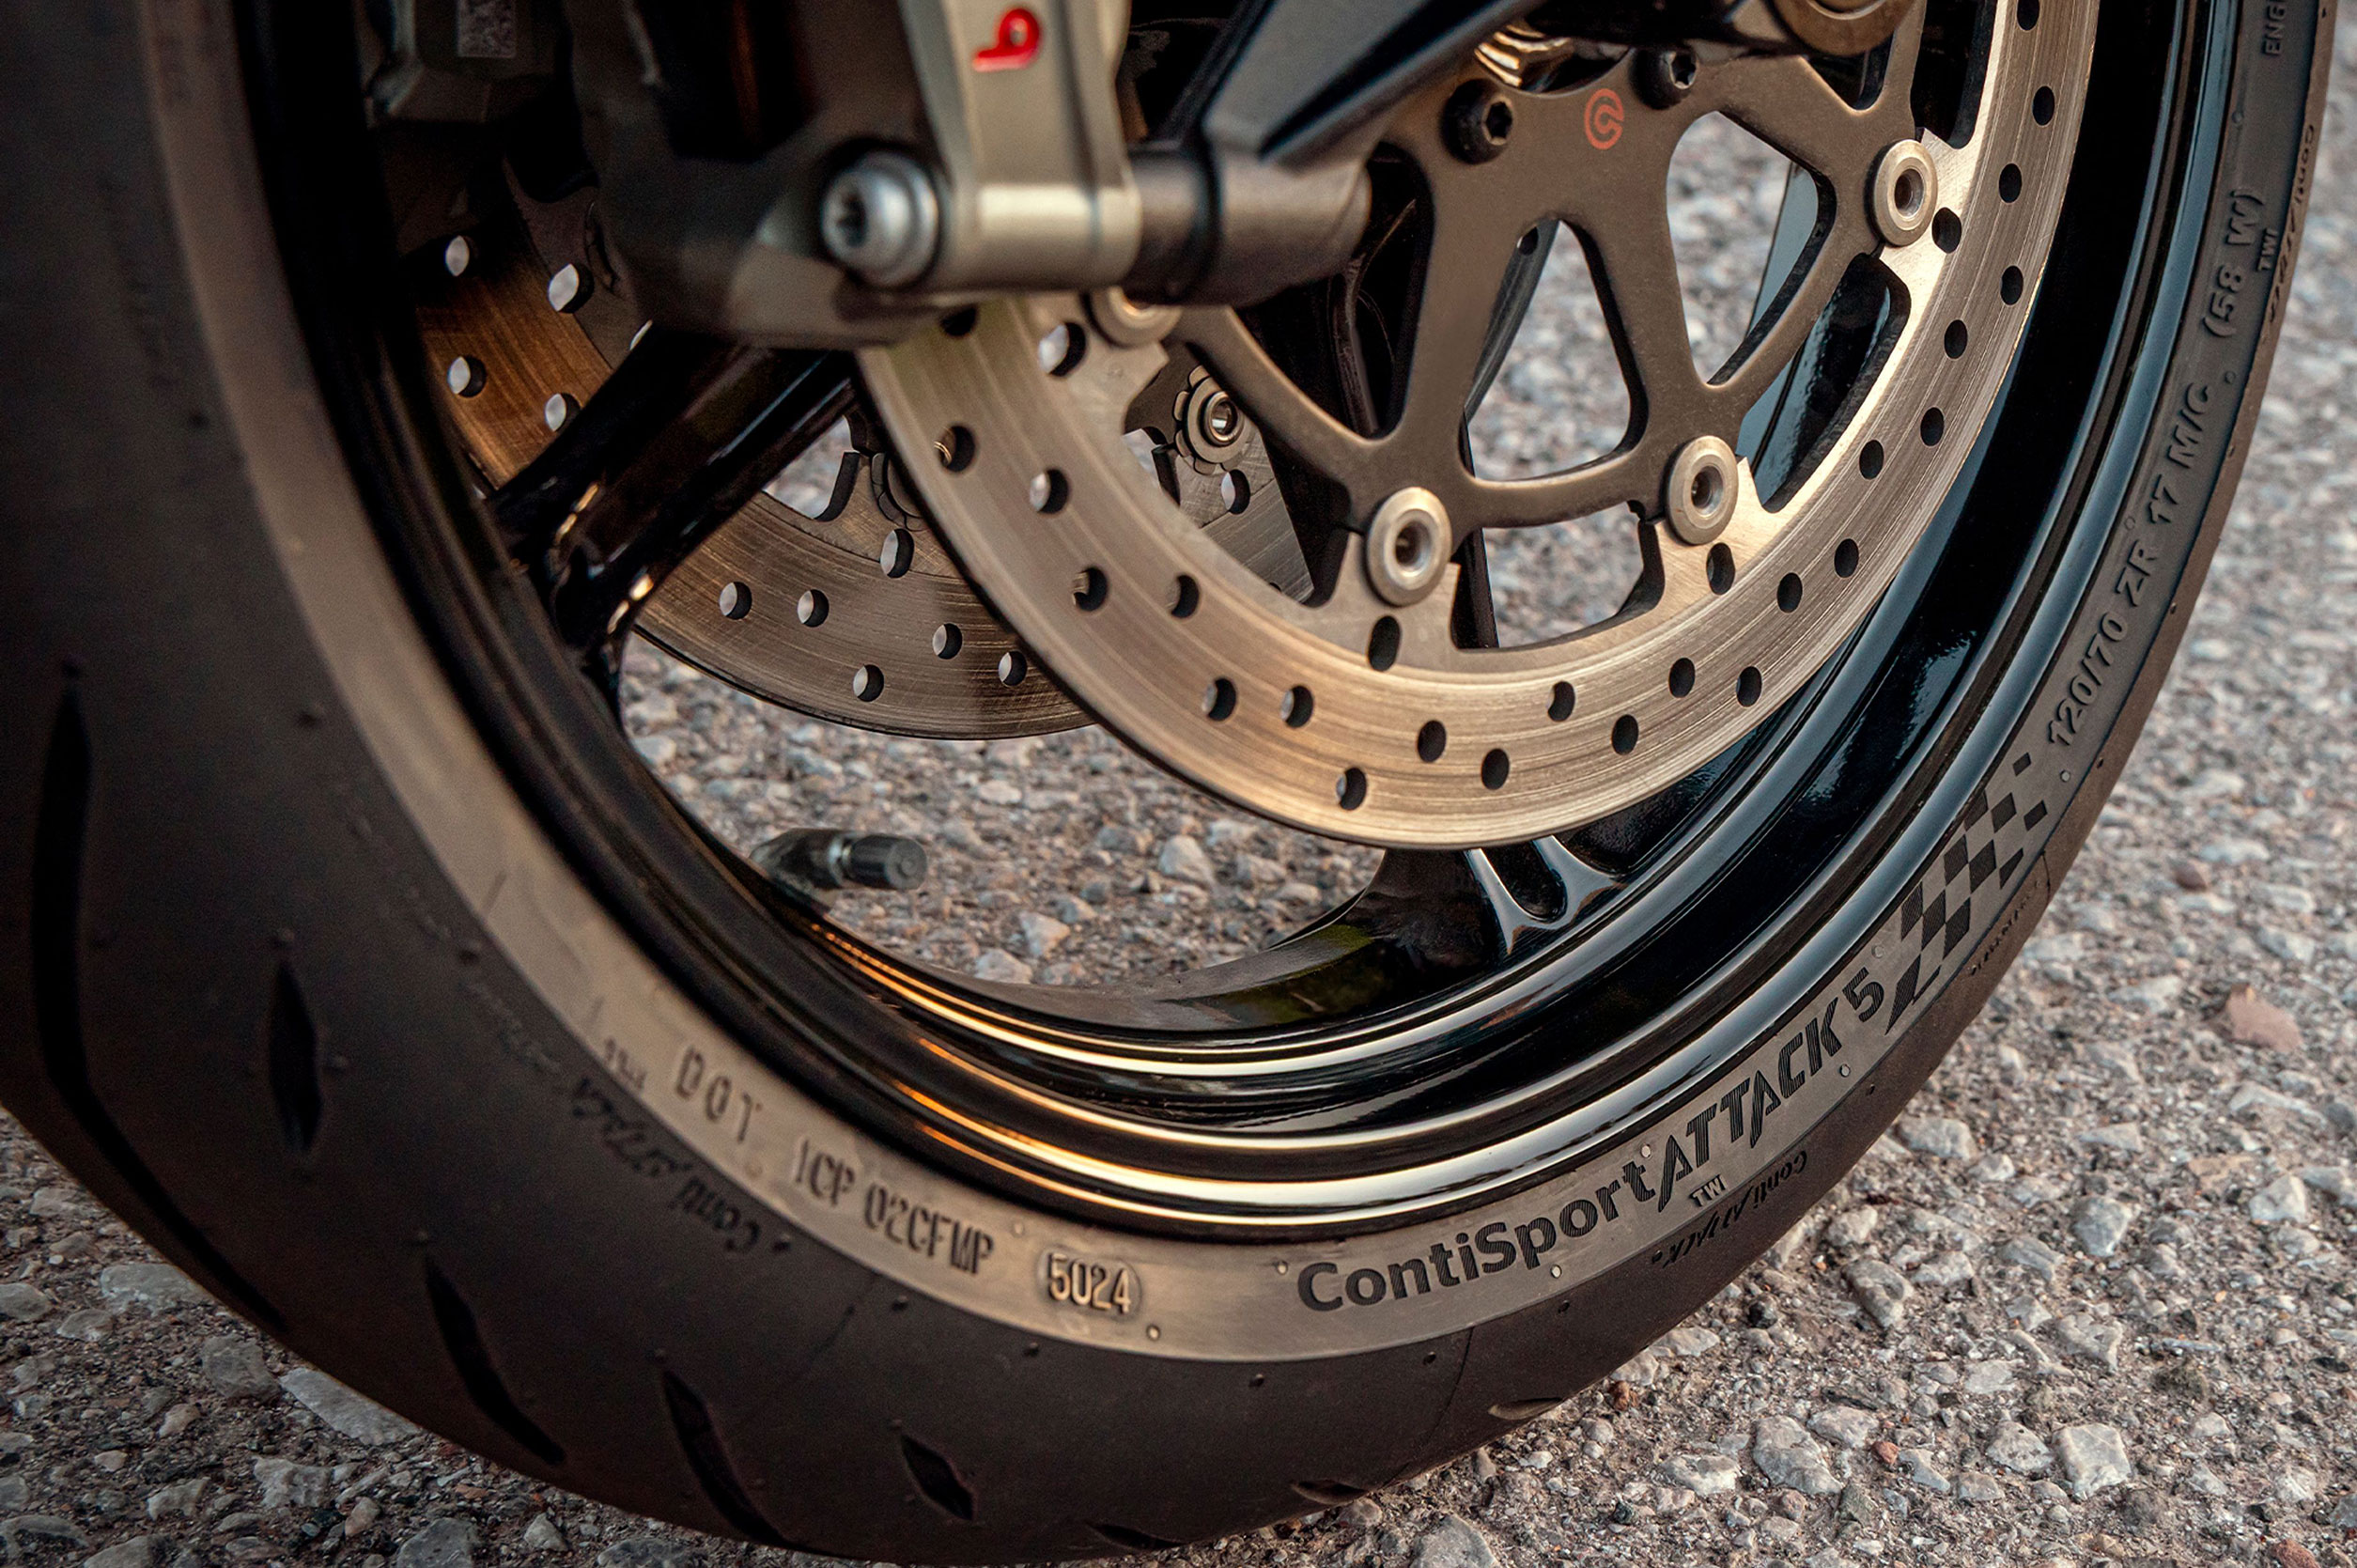
The ETRTO label explains:
120/70 ZR 17 58W
120 – Tire width in millimeters
70 – Cross-sectional ratio in percent
ZR – Radial construction
17 – Rim diameter in inches
58 – Carrying capacity index (58 : 236 kg)
(W) – Speed index >270 km/h
M/C – Motorcycle
These details must necessarily match your vehicle registration and the tire’s certificate of conformity. A wrong combination can affect the vehicle’s handling and, in the worst case, lead to damage or accidents.
It is not a publicly accessible list, but a system of technical data that tire and wheel manufacturers use.
It contains:
Permissible rim widths per tire size
Information about cross sections
Requirements for compatible combinations
You can also find the same values in:
Manufacturer's manuals
Rim and tire evaluations
Technical specifications of motorcycle manufacturers
Compliance with the regulations is particularly important in Switzerland, as deviations often require an individual inspection or an expert report from the Motor Vehicle Inspection (MFK).
Possible problems with non-compliance with the ETRTO standards.
Compliance with the ETRTO standards is essential for road safety. It prevents errors in tire selection and ensures that tires can be mounted correctly technically.
Instability.
Tyres that are too wide on narrow rims lead to imprecise handling.
Overload of the flanks.
Increases the risk of damage and breakdowns.
Impaired braking performance.
The contact surface may be affected.
Risk of accident.
In the worst case, loss of control and injuries can occur.
Other factors when choosing tires.
In addition to the ETRTO specifications, there are additional points to consider when choosing tires:
Information in the vehicle registration certificate
The ETRTO table provides the technical basis, but the final choice should always be made in accordance with the manufacturer's recommendations and the user's own needs.
Conclusion: ETRTO – The key to choosing safe tires.
The ETRTO standard is an essential tool when choosing motorcycle tires. A suitable tire-rim combination improves handling, safety, and driving pleasure.
Anyone who understands the markings and follows the manufacturer's recommendations not only drives more safely but also more efficiently.
In case of any ambiguity, it is always advisable to seek advice from the specialist trade – especially with regard to the Swiss MFK regulations.
Correct tire pressure increases driving pleasure, improves road safety, and protects the tire.
Do you recognize this? After a long period of inactivity, your little one suddenly feels different: The steering of your motorcycle is sluggish, the chassis feels mushy, and the cornering is imprecise. You quickly ask yourself: Is it my fault, is it the motorcycle, or is it just a lack of routine?
Often the cause is much more simple: the tire pressure is not right!
Air is more than just the wind you feel when riding a motorcycle – it is a crucial factor for safety, comfort, and handling. In the tires, it ensures that your motorcycle maintains the correct distance from the road surface. The air pressure directly influences the driving characteristics.
Even a negative pressure of 0.2 bar on the front wheel is noticeable: Steering becomes difficult, the motorcycle becomes unstable and tends to sway in curves.
The importance of the correct tire pressure for motorcycles.
Low pressure:
Heavy steering effort, unstable driving behavior
Increased tire wear, stronger heating
Risk of tire damage, leading to the removal of the tread
Excessive pressure:
Less noise, worse handling
Higher risk of damage from splinters or stones
Tips for the correct tire pressure:
Check every 14 days
Follow manufacturer's instructions (manual)
Check air pressure always in cold condition
Never deflate tires when they are warm
Adjusting pressure for loading and use
Screw the valve caps on correctly
Conclusion:
Regular tire pressure checks ensure greater safety, improved driving comfort, and longer tire life.
The Internet offers various ways to find the correct air pressure for your motorcycle. Often, the manufacturers publish air pressure specifications for their motorcycles on their websites. These vary depending on the intended use (solo, two-person riding, with luggage, long highway trips, etc.).
Fahrräder gibt es in vielen unterschiedlichen Grössen. Dementsprechend besitzen auch Schläuche und Reifen ein individuelles Mass. Wie du dir richtige Grösse für dein Fahrrad mit ETRTO bestimmst, erklären wir dir im folgenden Beitrag.
Was bedeutet die ETRTO-Norm bei Fahrradreifen?
Die ETRTO-Norm (European Tyre and Rim Technical Organisation) sorgt dafür, dass Reifen und Felgen weltweit einheitlich gekennzeichnet sind, Sie macht Schluss mit verwirrenden Zoll- und Zollgrössenangaben wie „28 Zoll“ oder „700C“, die je nach Hersteller variieren können.
Warum ist das wichtig?
Dank der ETRTO-Norm kannst du sicher sein, dass Reifen und Felge perfekt zusammenpassen. Das reduziert das Risiko von Montageproblemen und erhöht die Sicherheit beim Fahren.
Vorteile der ETRTO-Norm.
Einheitliche Grössenangaben weltweit
Einfacher Reifenwechsel ohne Rätselraten
Mehr Sicherheit und Kompatibilität
How do you read the ETRTO indication?
A typical example: 40-622
40 = Tire width in millimeters 622 = Innendurchmesser der Felge in Millimetern
This means: This tire is 40 mm wide and fits on a rim with a diameter of 622 mm (approximately 28 inches).
Fast jede bekannte Grössenbezeichnung solltest du in dieser Liste finden. Wir haben versucht alle Grössenbezeichnungen anzugeben, die im Markt verwendet werden oder früher verwendet wurden.
Warum sind Zollangaben bei Fahrradreifen oft verwirrend?
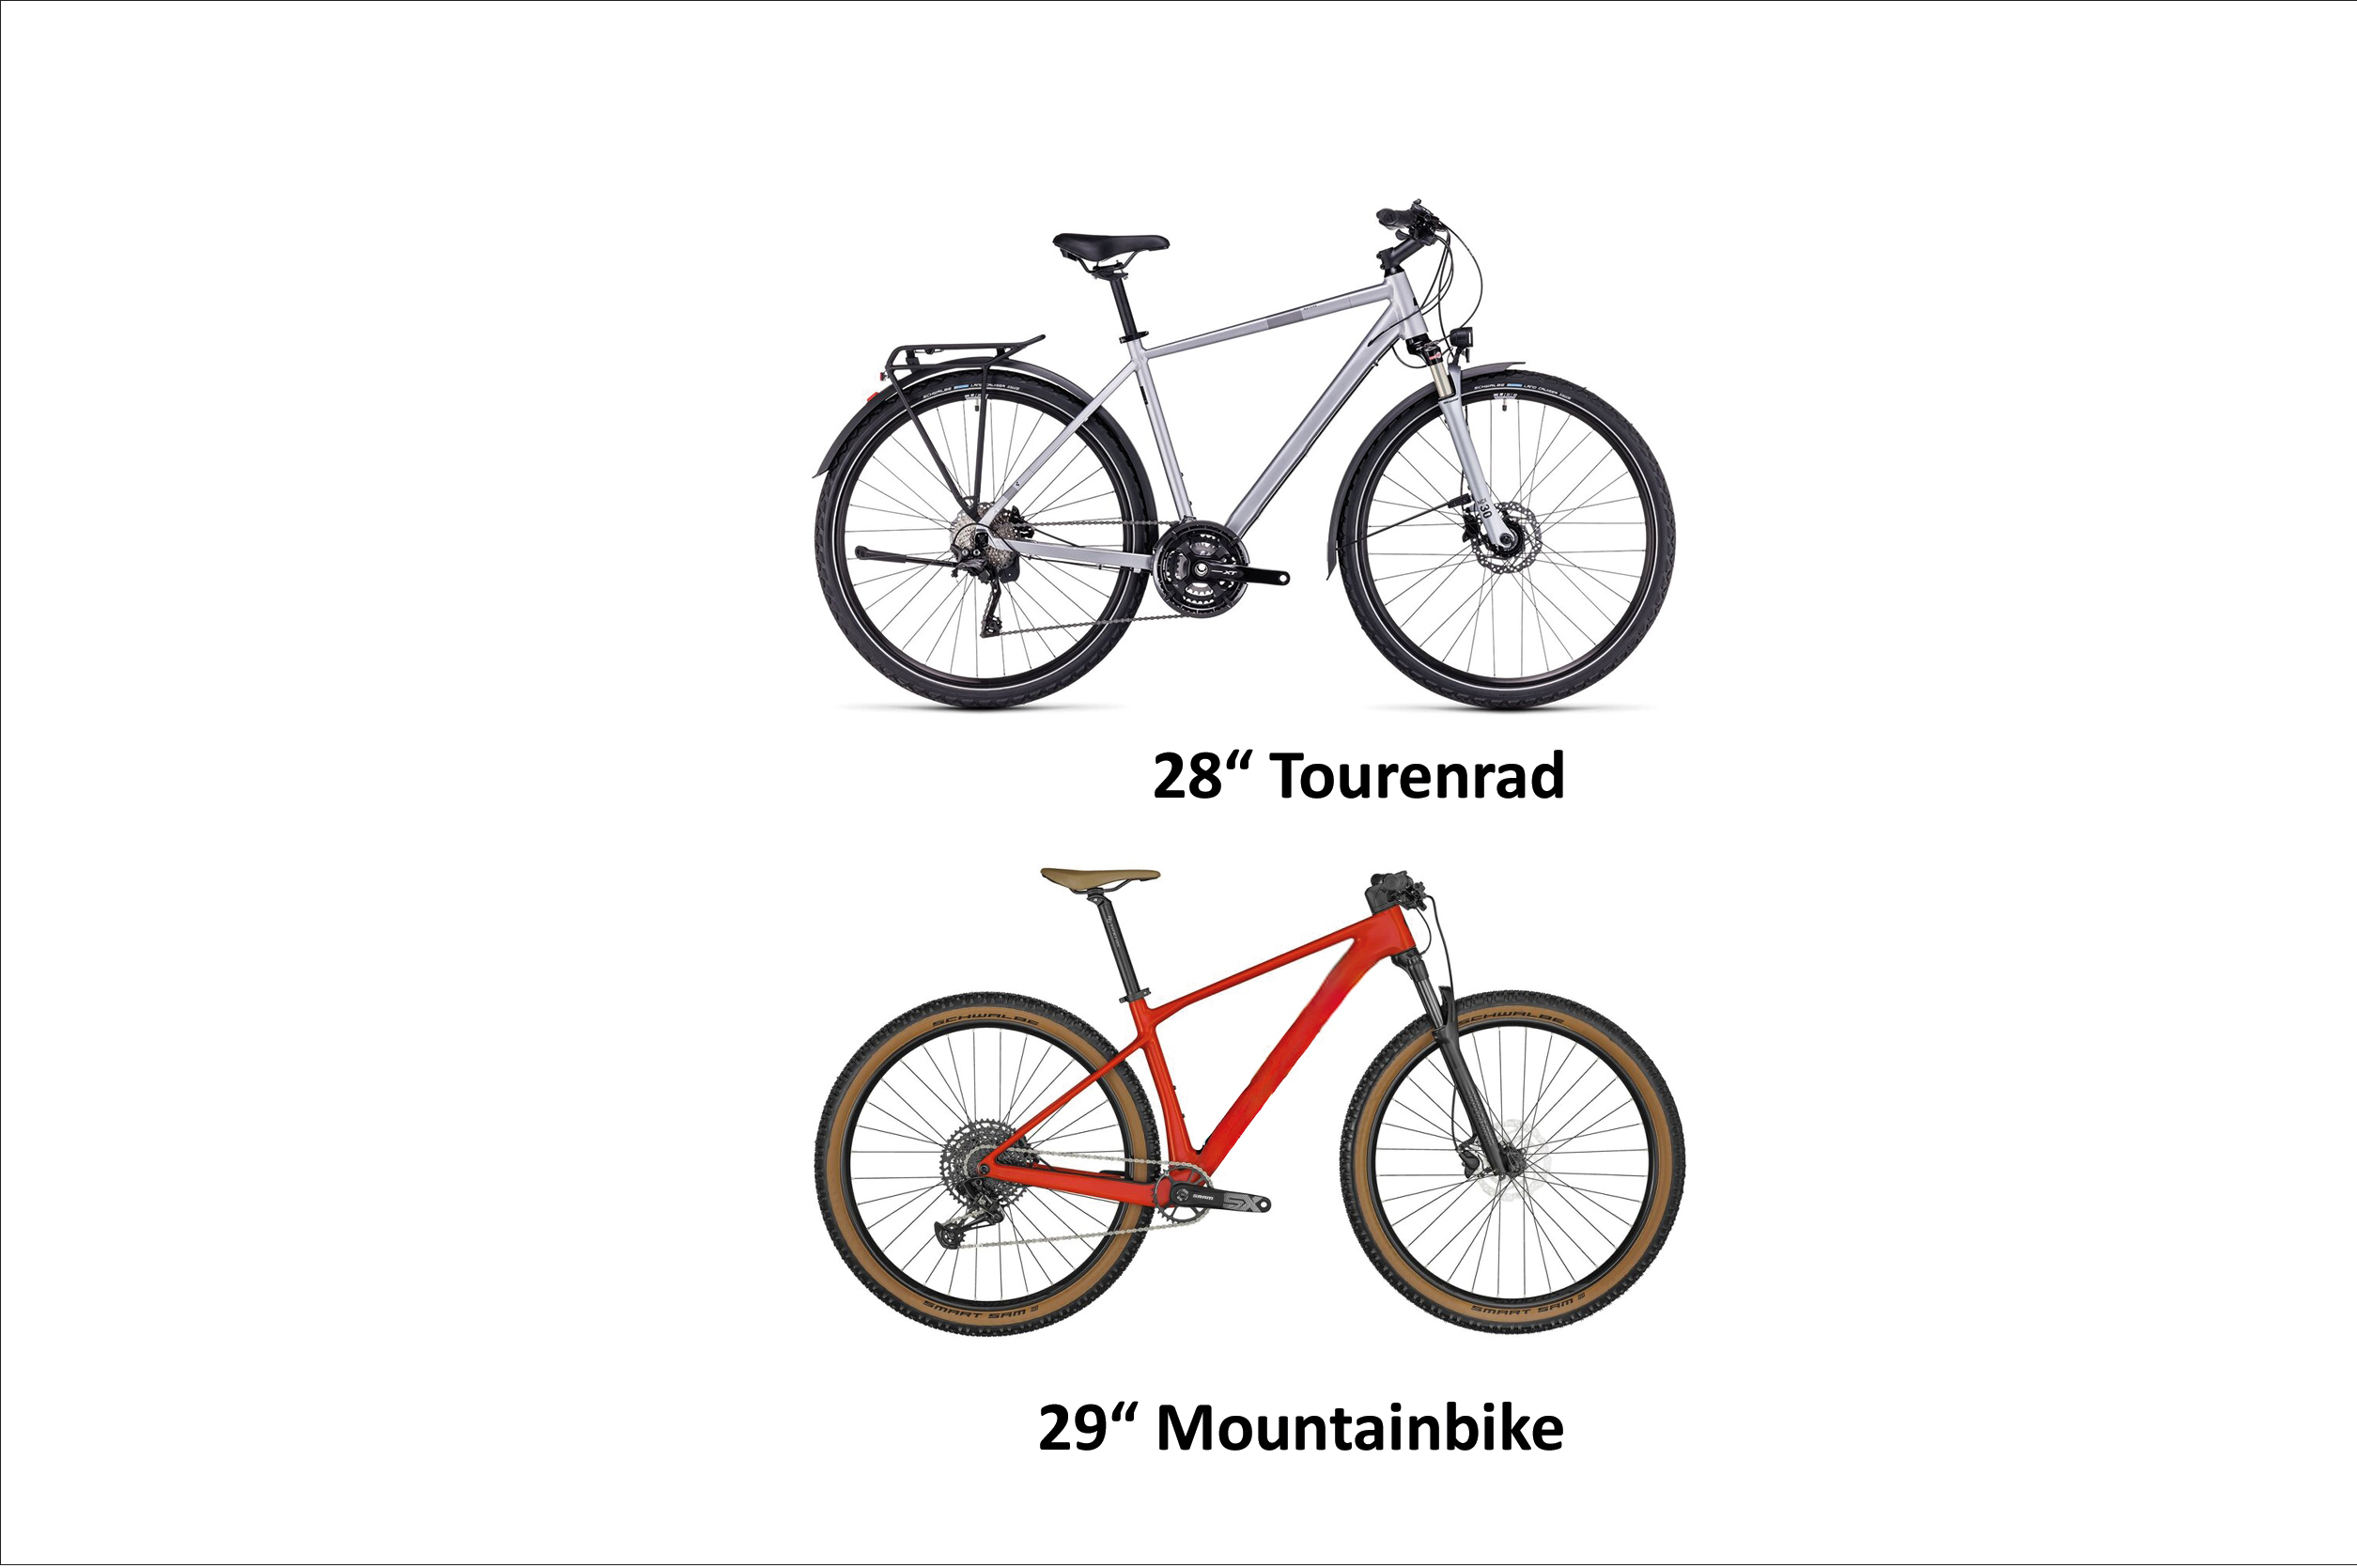
Reifen mit den Bezeichnungen 28 Zoll and 29 Zoll haben beide denselben Felgen-Innendurchmesser von 622mm. Das bedeutet: Sie passen theoretisch auf die gleichen Felgen.
28 Zoll ist in Europa die klassische Grösse für Tourenräder und sehr weit verbreitet.
29 Zoll wurde später in den USA für Mountainbikes eingeführt. Der Name kommt daher, dass die Reifen dort dicker sind und der Aussendruchmesser ungefähr 29 Zoll beträgt.
Warum sind diese Angaben ungenau?
Die Zollgrösse bezieht sich nicht auf den Felgendurchmesser, sondern auf den Aussendurchmesser des kompletten Rads – und der hängt von der Reifenbreite ab.
Ein schmaler Rennradreifen (z.B. 23 mm) hat tatsächlich nur etwa 26 Zoll Aussendurchnmesser
Bei einer Breite von ca. 40 mm kommt man ungefähr auf 28 Zoll
Sehr breite Reifen (60 mm oder mehr) erreichen fast 30 Zoll
Fazit: ETRTO – Der Schlüssel für die richtige Reifenwahl.
Die Zollangabe ist nur ein grober Richtwert. Für eine exakte Passform ist die ETRTO-Angabe (z.B. 37-622) entscheidend, denn sie gibt den Felgendurchmesser und die Reifenbreite in Millimetern an.
A flat tire usually occurs when you least need it. With the following steps, you can ensure that your bike is ready to ride again quickly and cleanly.
Step 1: Prepare tools and materials.
Prepare everything before you start – this will save you time and nerves.
Tools & Material.
3-4 tire levers: With these you lift the tire from the rim – this prevents scratches on the rim
New hose or casing: – Hose with hole or leaking valve – Mantel with cracks, bumps or worn-out profile
Air pump with manometer: For the correct pressure. Pay attention to the appropriate pump head (AV, SV, DV)
Optional: Tweezers, talcum powder (for easier assembly) and a soft cloth
Does the hose or the casing need to be replaced?
Tube.
Visible hole
Valve wobbles
Rubber is brittle
Loss of air
Coat.
Cracks in the side wall
Bump when rolling
The tire no longer has any tread left
The tires can no longer be mounted evenly
Valve and size check.
Auto valve (AV), Schrader valve.
The AV is the most common bicycle valve, similar to the tire valve in a car. It is robust and easy to operate. To inflate: Remove the valve cap, install the pump head and pump until the desired pressure is reached. Release air: Insert the pin into the middle. Assembly: Insert the valve through the rim hole and secure it with a nut if necessary. Ideal for mountain and touring bikes, as it can also be used at gas stations.
French valve (SV), Presta valve or Sclaverand valve.
The SV is slimmer and lighter than the autocycle valve and is used primarily on racing bicycles. It fits on narrow rims and can withstand high pressure. For inflation: Remove the valve cap, unscrew the nut on the valve stem, install the pump head, pump, re-tighten the nut, and install the cap. Assembly: Insert the valve through the rim hole and secure it with the nut. Ideal for road bikes and gravel bikes, thanks to precise pressure control.
Flash valve (DV), Dunlop valve Older city valve (special head required).
The DV is widely used in Europe and easy to maintain. To inflate: remove the valve cap, attach the pump and pump. To deflate: unscrew the nut on the valve insert. Assembly: unscrew the nut, insert the valve through the rim hole, insert the valve core. Robust and ideal for everyday use.
How do you read the ETRTO indication?
A typical example: 40-622
40 = Tire width in millimeters 622 = Rim diameter in millimeters
This means: This tire is 40 mm wide and fits on a rim with a diameter of 622 mm (approximately 28 inches).
Step 2: Check the tire cord.
Check the tire cord before changing the tire. Cracks or misalignments can expose the spoke holes and damage the tire – replace it if necessary.
Step 3: Change the front wheel.
1. Remove the wheel Open the brake, release the quick-release nut, turn the axle counter-clockwise, and remove the front wheel.
2.Air out & remove tires Open the valve, let the air escape completely. Attach the tire lifter opposite the valve and lift the tire from the rim.
3. Remove the hose Carefully pull out the hose and check the rim and the inner side of the casing for foreign objects.
4. Insert the new hose Lightly prime the hose, paying attention to the direction of flow. Insert the valve straight into the rim opening and press the sleeve back on by hand.
5. Inflation and control Inflate tires evenly, check seat (tire line must be uniformly even throughout), align valve perpendicular
6. Install the wheel Tighten the axle, close the brake
Fix the problems.
Problem
Why?
Fixing
The tire is shaking
Mantel sits unevenly
Lower pressure to ~1 bar, tighten the jacket all around, check the control line
Brake is wearing on the tire
The wheel is not positioned correctly / The saddle is minimally crooked
Reinstall and fix the wheel; with a disc: loosen the seat, pull the lever, tighten the seat
Knocking when inflating
The hose is stuck
Lower the pressure, release the sleeve at the point, fit the hose tightly, slowly inflate
Step 4: Change the rear wheel.
The procedure for the rear wheel is almost identical – however, it involves the chain and the shifting mechanism.
Preparation Switch to the smallest gear, set the shift lever to „OFF“, and open the brake
Replacing the hose Unscrew the air hose, remove the cover and replace the tube as with the front wheel.
Installation: Place the chain on the smallest sprocket, pull the shifter slightly backward, tighten the axle, and check the seat of the wheel and the brake
Fix the problems.
Problem
Why?
Fixing
The chain is located next to the pinion
Chain slips during insertion
Remove the wheel, place the chain on the smallest sprocket, and reinstall it.
The tire is shaking
Mantel sits unevenly
Lower pressure to ~1 bar, tighten the jacket all around, check the control line
Brake is wearing on the tire
The wheel is not positioned correctly / The saddle is minimally crooked
Reinstall and fix the wheel; with a disc: loosen the seat, pull the lever, tighten the seat
Knocking when inflating
Tube pinched
Lower pressure, open the sleeve at the point, place the hose clean, slowly inflate
To provide you with the best possible experience, we use technologies such as cookies to store and/or access device information. If you consent to these technologies, we may process data such as your browsing behaviour or unique IDs on this website. If you do not consent or withdraw your consent, this may affect certain features and functions.
Functional
Always active
Technical storage or access is essential for the legitimate purpose of using a specific service requested by the subscriber or user, or for the sole purpose of carrying out the transmission of a communication over an electronic communications network.
Preferences
The technical storage or access is necessary for the legitimate purpose of storing preferences that are not requested by the subscriber or user.
Statistics
Technical storage or access used exclusively for anonymous statistical purposes.The technical storage or access that is used exclusively for anonymous statistical purposes. Without a subpoena, voluntary compliance on the part of your Internet Service Provider, or additional records from a third party, information stored or retrieved for this purpose alone cannot usually be used to identify you.
Marketing
Technical storage or access is necessary to create user profiles for sending advertising, or to track the user across a website or multiple websites for similar marketing purposes.